Which Glow in the Dark filament is the best?
The idea for this video started with my wife buying glow-in-the-dark stars for our daughter's new bed, which turned out to be really crappy. At this point, I remembered that I still had an old roll of glow-in-the-dark filament that I purchased way back when I did a bunch of nozzle wear tests. I made some really nice designs that you can, by the way, find over on CNCKitchen.STORE, but the burning question that I had was: did I use the best glow-in-the-dark filament, and how do different glow-colors perform? That’s why I went out and bought filament worth over $250, from the popular brands found on Amazon to some more special ones. I paid for them all by myself, and only the Nobufil PETG was given to me for free. If you want to check them out, there are links in the description!
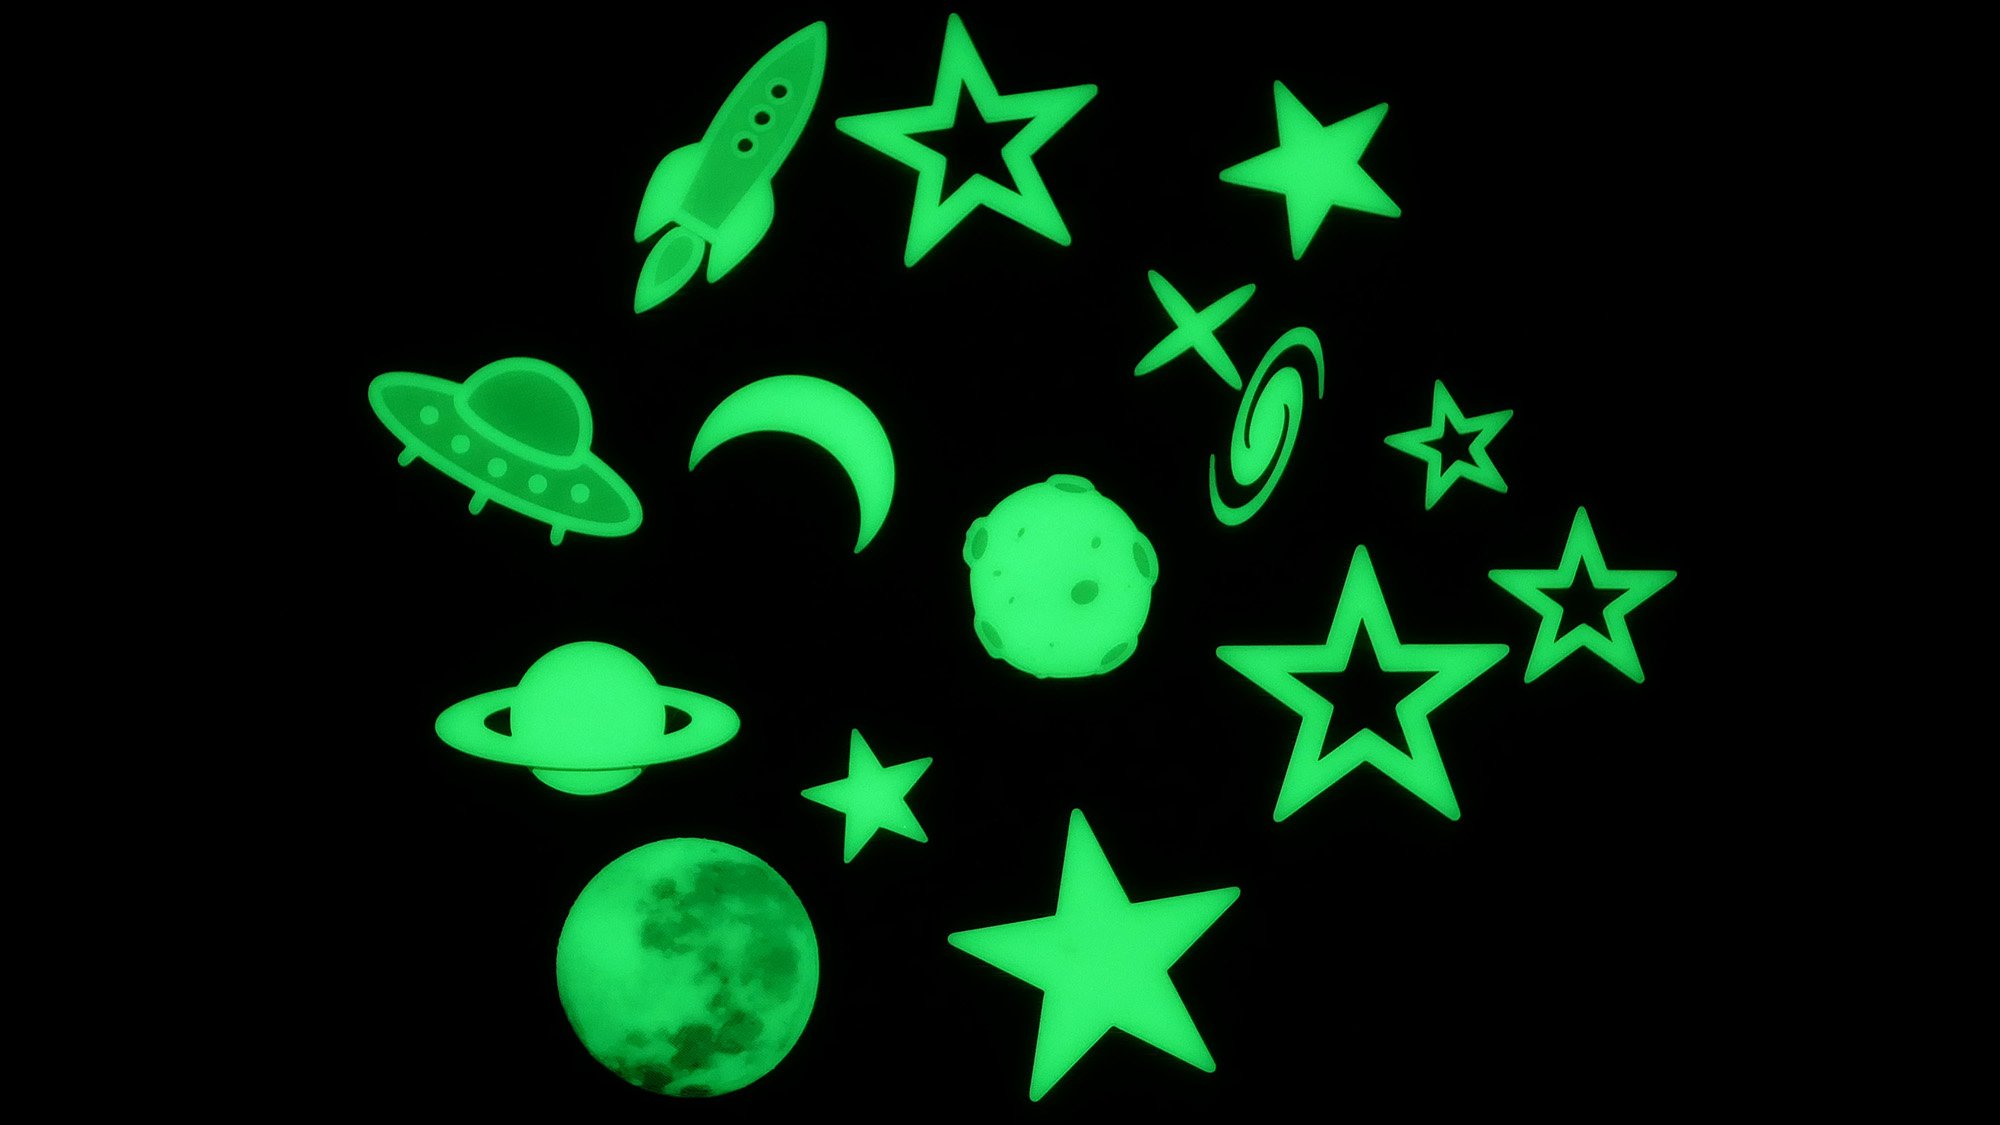
My Glow in the Dark designs
First things first. Glow-in-the-dark filaments are not radioactive. Don’t laugh, I get this asked a lot, and I know plenty of people who still believed that. And it’s not too far fetched there is or rather was, radium-paint used for quite a while for glowing dials until people learned what radioactivity is and that it’s probably not too healthy having such paint on your alarm clock, not even speaking of what happened to the poor folks that painted the dials in the first place. Radium paint is radioluminescent, so glows due to radioactive decay, yet what we are dealing with in glow-in-the-dark filament is phosphorescence. Phosphorescence means that a material can absorb light and later emit that light again over a longer period of time.
Testing Filaments with a Geiger Counter
In the past, zink sulfide was used for that purpose, yet nowadays, most glow-in-the-dark pigments contain strontium aluminate, which glows by an order of magnitude longer and brighter, is non-toxic and can basically be recharged indefinitely. I’m quite sure that most of the filaments I tested used Strontium Aluminate for their glow, yet one roll stood significantly out. This box contains the most nasty and disgusting filament I’ve ever used. This is R3Ds Ultraglow Red, and when I open the case, I almost have to puke because it seriously smells like rotten eggs. And not just a tiny bit. It smells so much, where “only use in a well-ventilated area” will be followed. Yet, I took one for the team and tested it for you. You’re welcome! Besides the glowing red material, I also tested the two more popular colors, green and blue, plus this Rainbow filament from TRONXY. The green glowing materials were from Colorfabb with their Glowfill, Overture, Amolen with a normal green and its shiny green, as well as dasFilament and Nobufil green glowing PETG. The two blue materials were from Amolen and, again, the Austrian Nobufil.
All tested filaments (affiliate)
Overture Green (winner): https://geni.us/3DYcmEI
colorFabb glowFill (nicest): https://geni.us/jPYuZbM
Nobufil Green: https://www.nobufil.com/product-page/glow-in-the-dark-green
Amolen Green: https://geni.us/xPJZat3
DasFilament V2: https://www.dasfilament.de/filament-spulen/pla-1-75-mm/122/pla-filament-1-75-mm-glow-gruen-v2?c=11
Nobufil Blue: https://www.nobufil.com/product-page/glow-in-the-dark-blue-filament
Amolen Blue: https://geni.us/K0NW
Tronxy Rainbow: https://geni.us/j9Ct
Amolen Sparkle Green: https://geni.us/phnkXA
R3D Ultra Red (ultra stinky): https://geni.us/Cckkzs
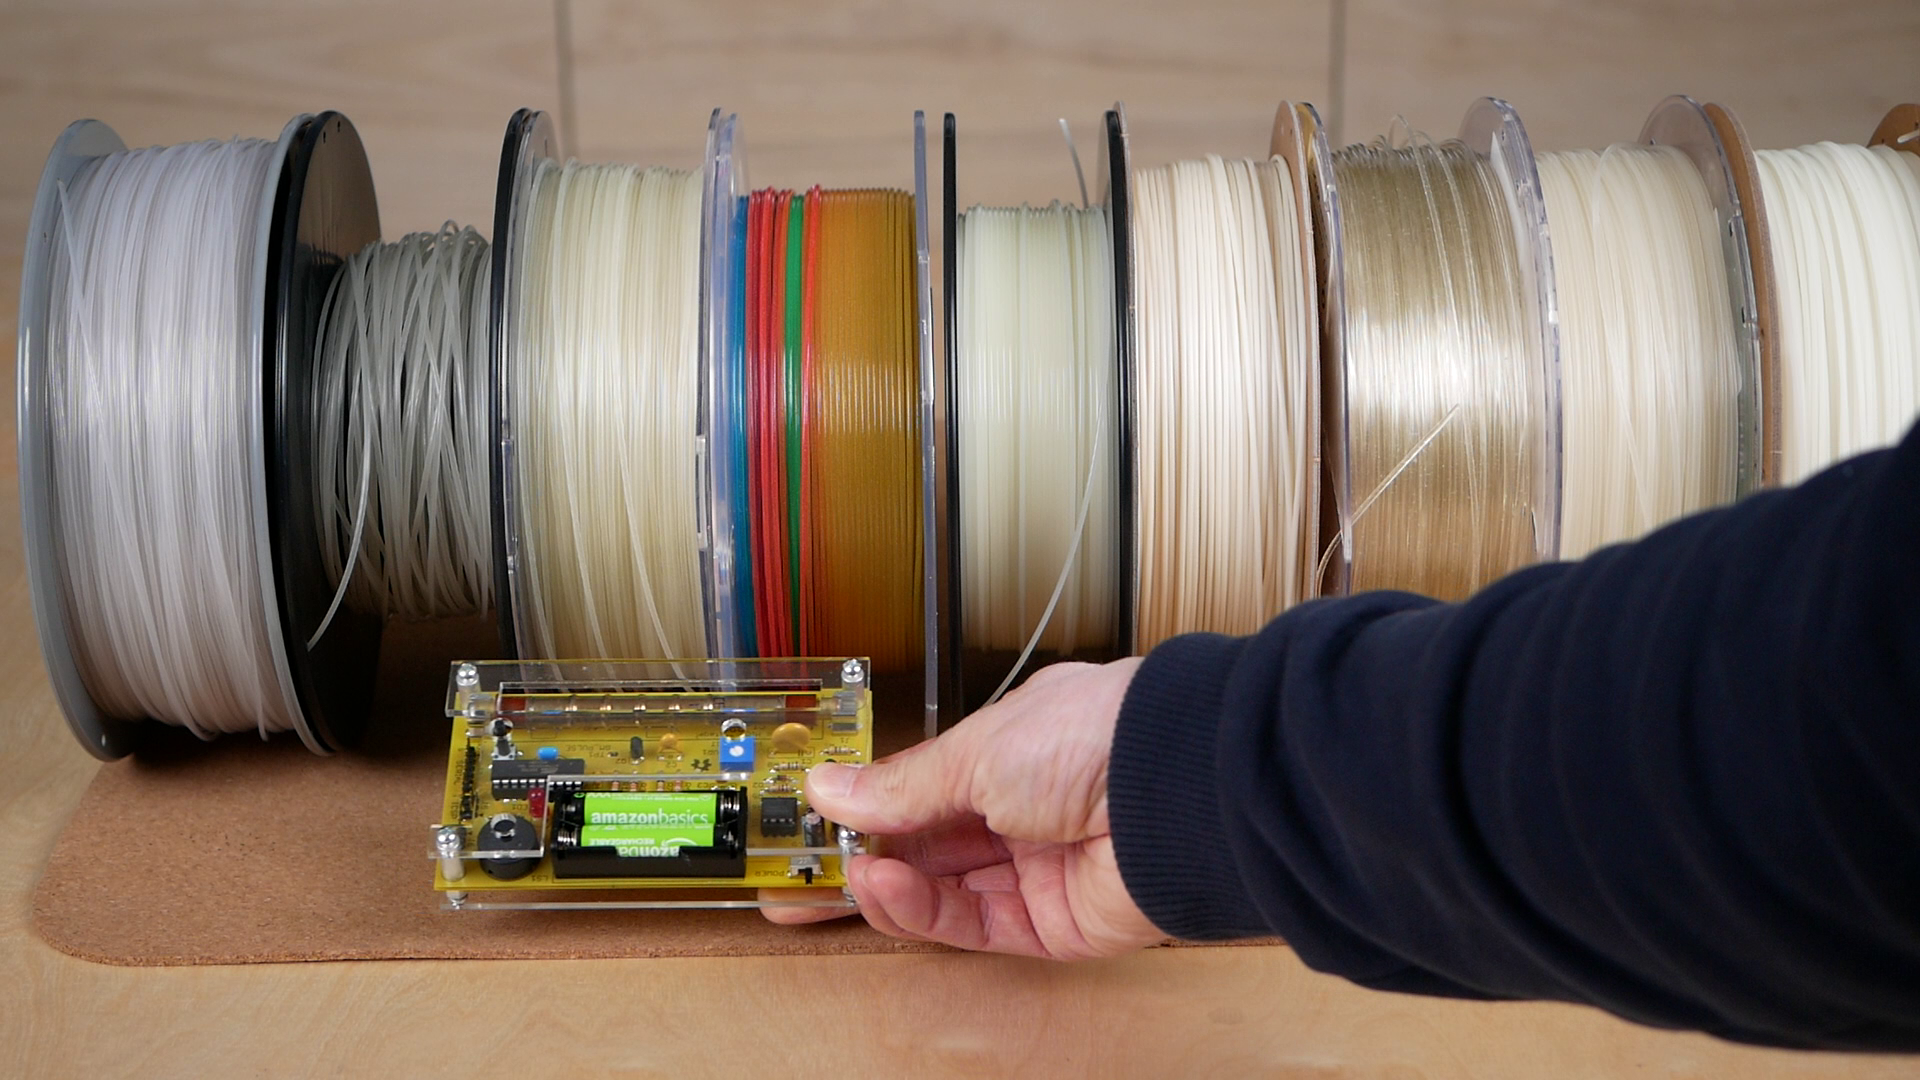
With my selection of glow-in-the-dark filaments, I wanted to test four things: How do the prints look in daylight and at night, which I tested with a 3DBenchy? Then I wanted to find out how thick you have to print to get the full glow potential, for which I printed stepped test samples and, of course, which one glows the brightest and the longest, for which I printed thick samples and then filmed them for a whole night. Finally, I wanted to see how different glow-in-the-dark filaments wear out your nozzle because, if you didn’t know, it’s worse than most fiber-reinforced materials, but there can be significant differences between brands! I even had to place the filament spool on the top of my Voron 2.4 because some materials had such a rough surface that they didn’t properly feed through the bowden tube.

The 3 samples I printed for each material
Most glow-in-the-dark filaments print with a slightly transparent look so that also the glowing particles on the inside can shine to the outside. Colorfabbs GlowFill stands out a little because it’s totally opaque with an ivory-colored matte finish. AMOLENS Sparkly green is on the totally opposite side of the spectrum because here the filament is very transparent with bigger, individual glowing spots that give it that sparkly appearance which is very hard to capture on camera but looks really nice in reality, even though it’s not particularly bright.

Amolen Sparkle Green
Colorfabb GlowFill also shows a similar effect in the dark and has a slightly speckled appearance which looks really beautiful. Tronxys Rainbow Glow and the horribly smelly Ultra Red R3D filament also show these individual points, yet they glow way less bright to start with. How the brightness really compares to the others is something we’ll take a look at in a bit.
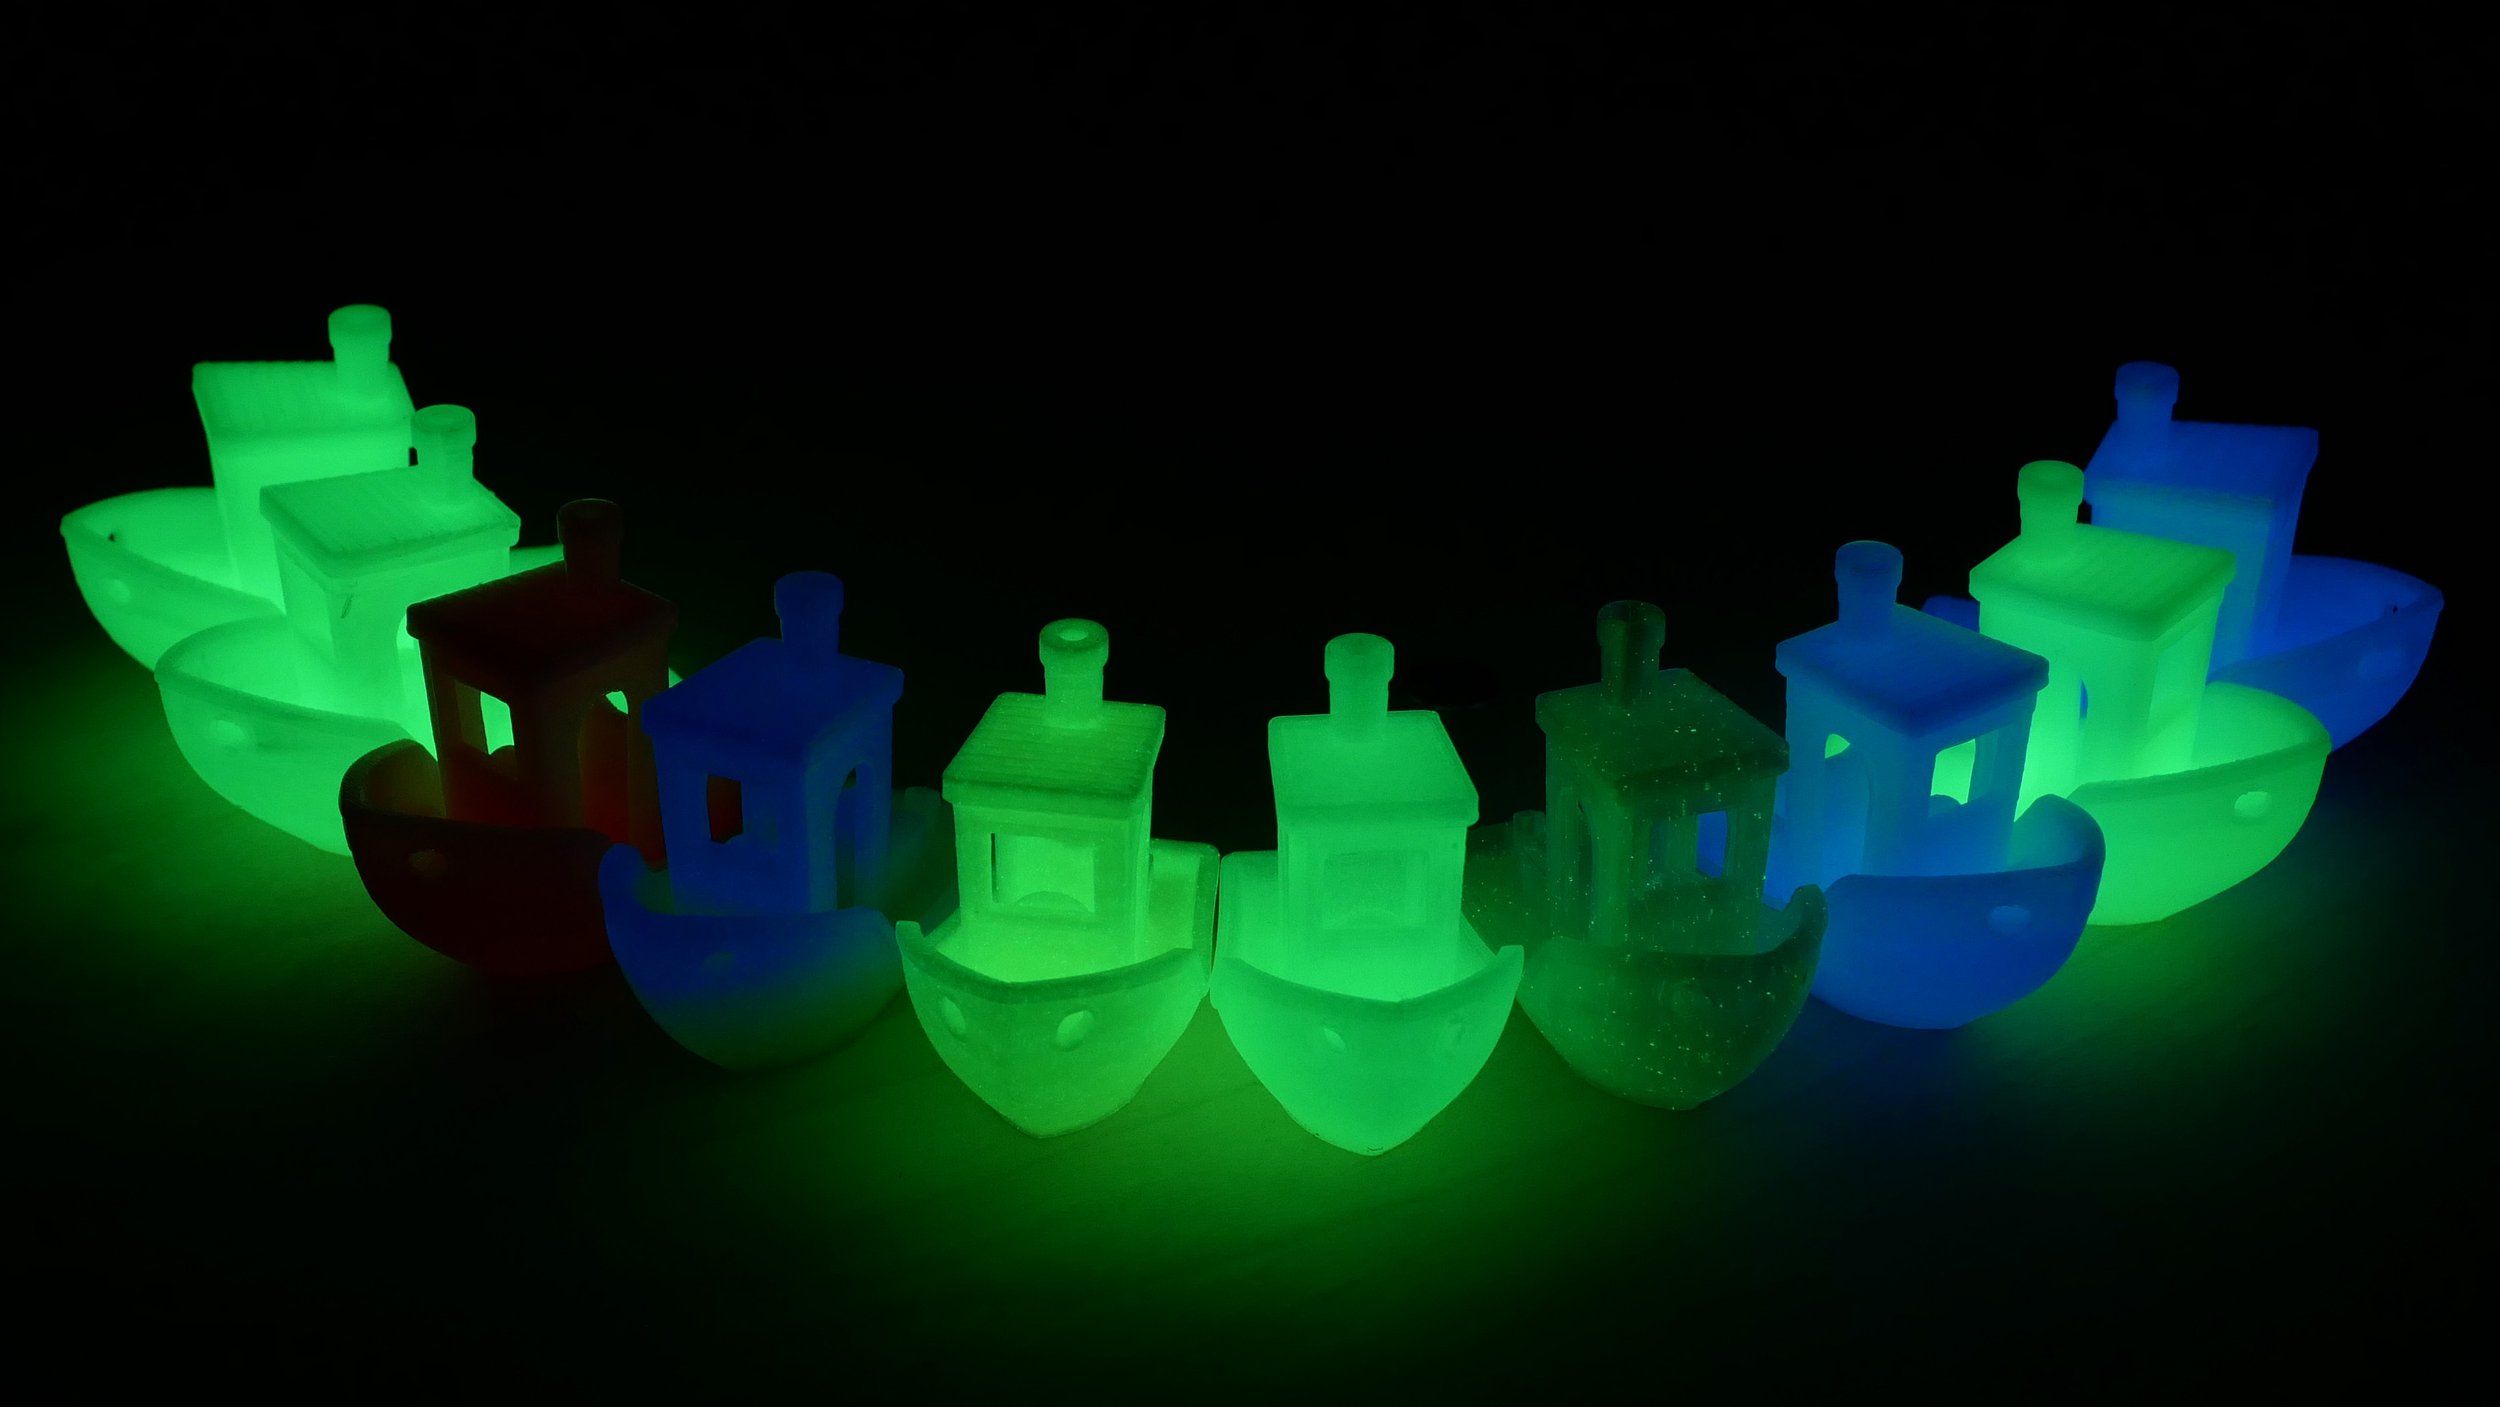
All 3D Benchys
One design that I made for my daughter and where I’m really proud of, is this moon, that’s printed with different thicknesses, so some areas are brighter than others which mimics how the moon really looks. The thicker the material, the brighter glow-in-the-dark prints usually are, basically an inverse of the popular lithophane lampshades. I tested this property with these stepped samples that go from 0.5 mm thickness all the way to 4 mm of thickness. If we take a look at the brightness data, we can see that at the beginning, the increase in brightness is significant, but from 2 mm and higher, you get diminishing returns because the opaqueness of the material simply limits the amount of light that can get from the center outside.
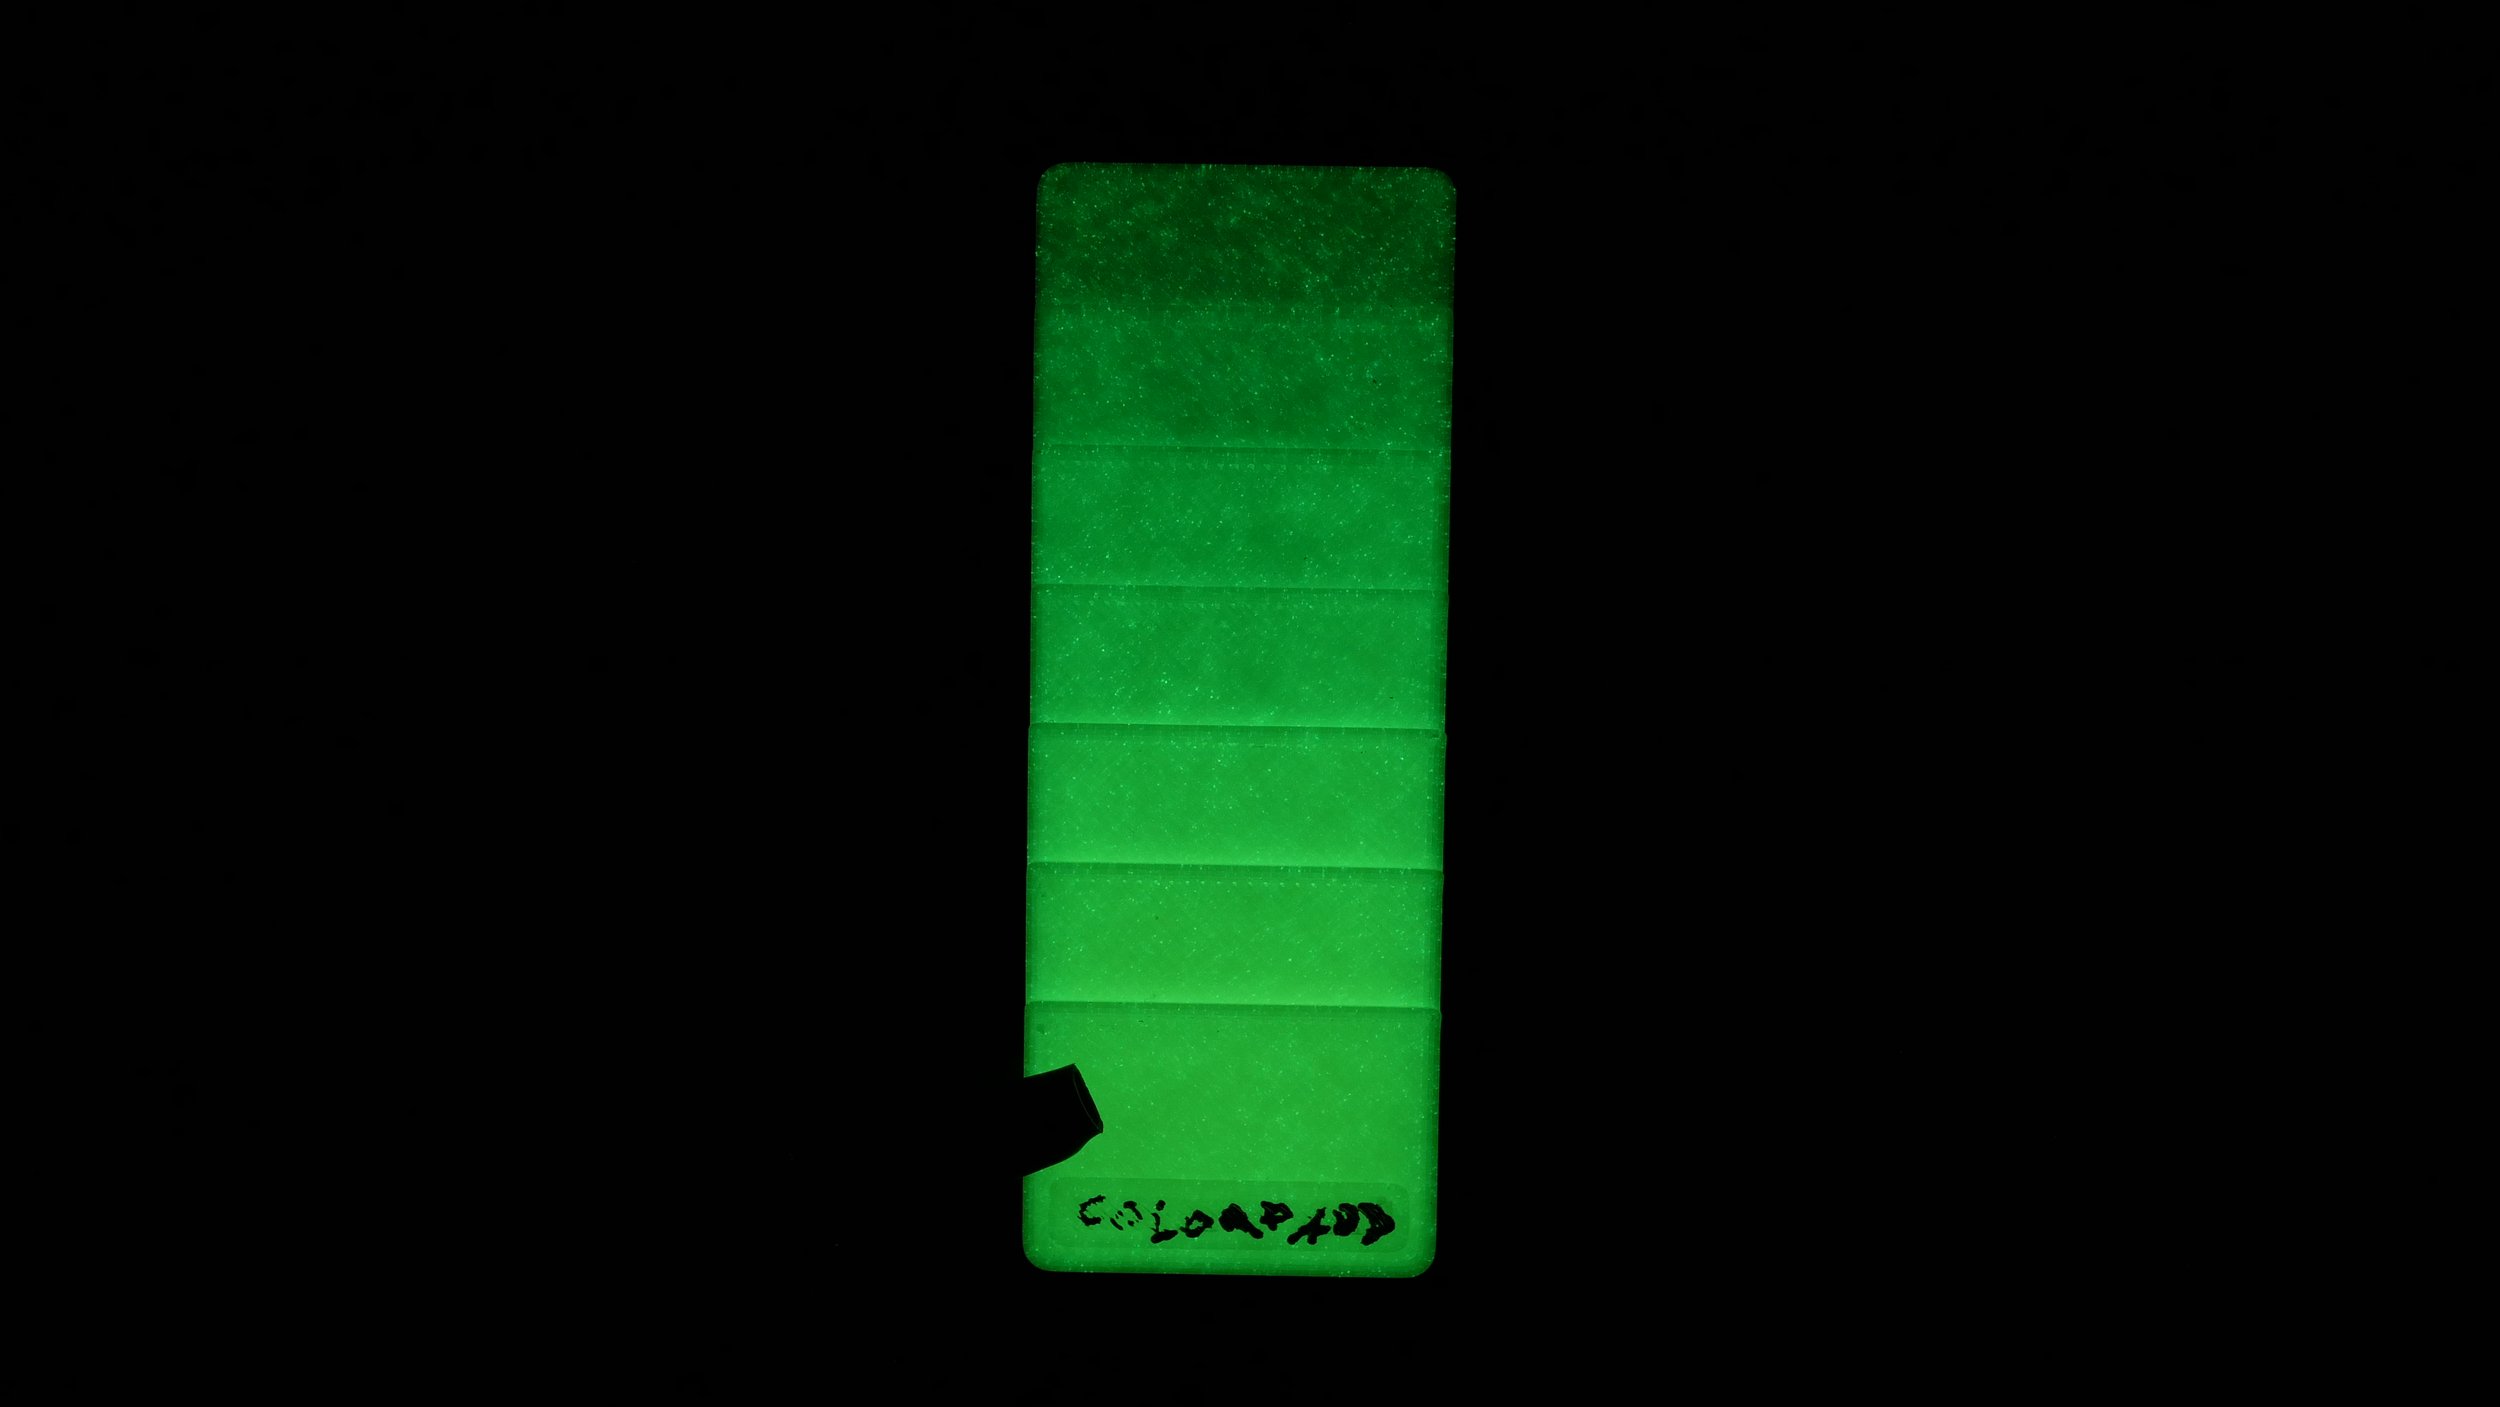
Colorfabb GlowFil sample
But how bright are the different materials I got, and how long does the light last? I tried to approach this at least a bit scientifically, so I printed 3 mm thick test swatches with 100% infill from each filament. Then I charged them up as evenly as possible using an electric turntable while blasting them with my two 200 W 5500 K studio lights. UV light would have even been better for charging up the samples, but in a real-life scenario, you most of the time charge these parts with a regular indoor light.
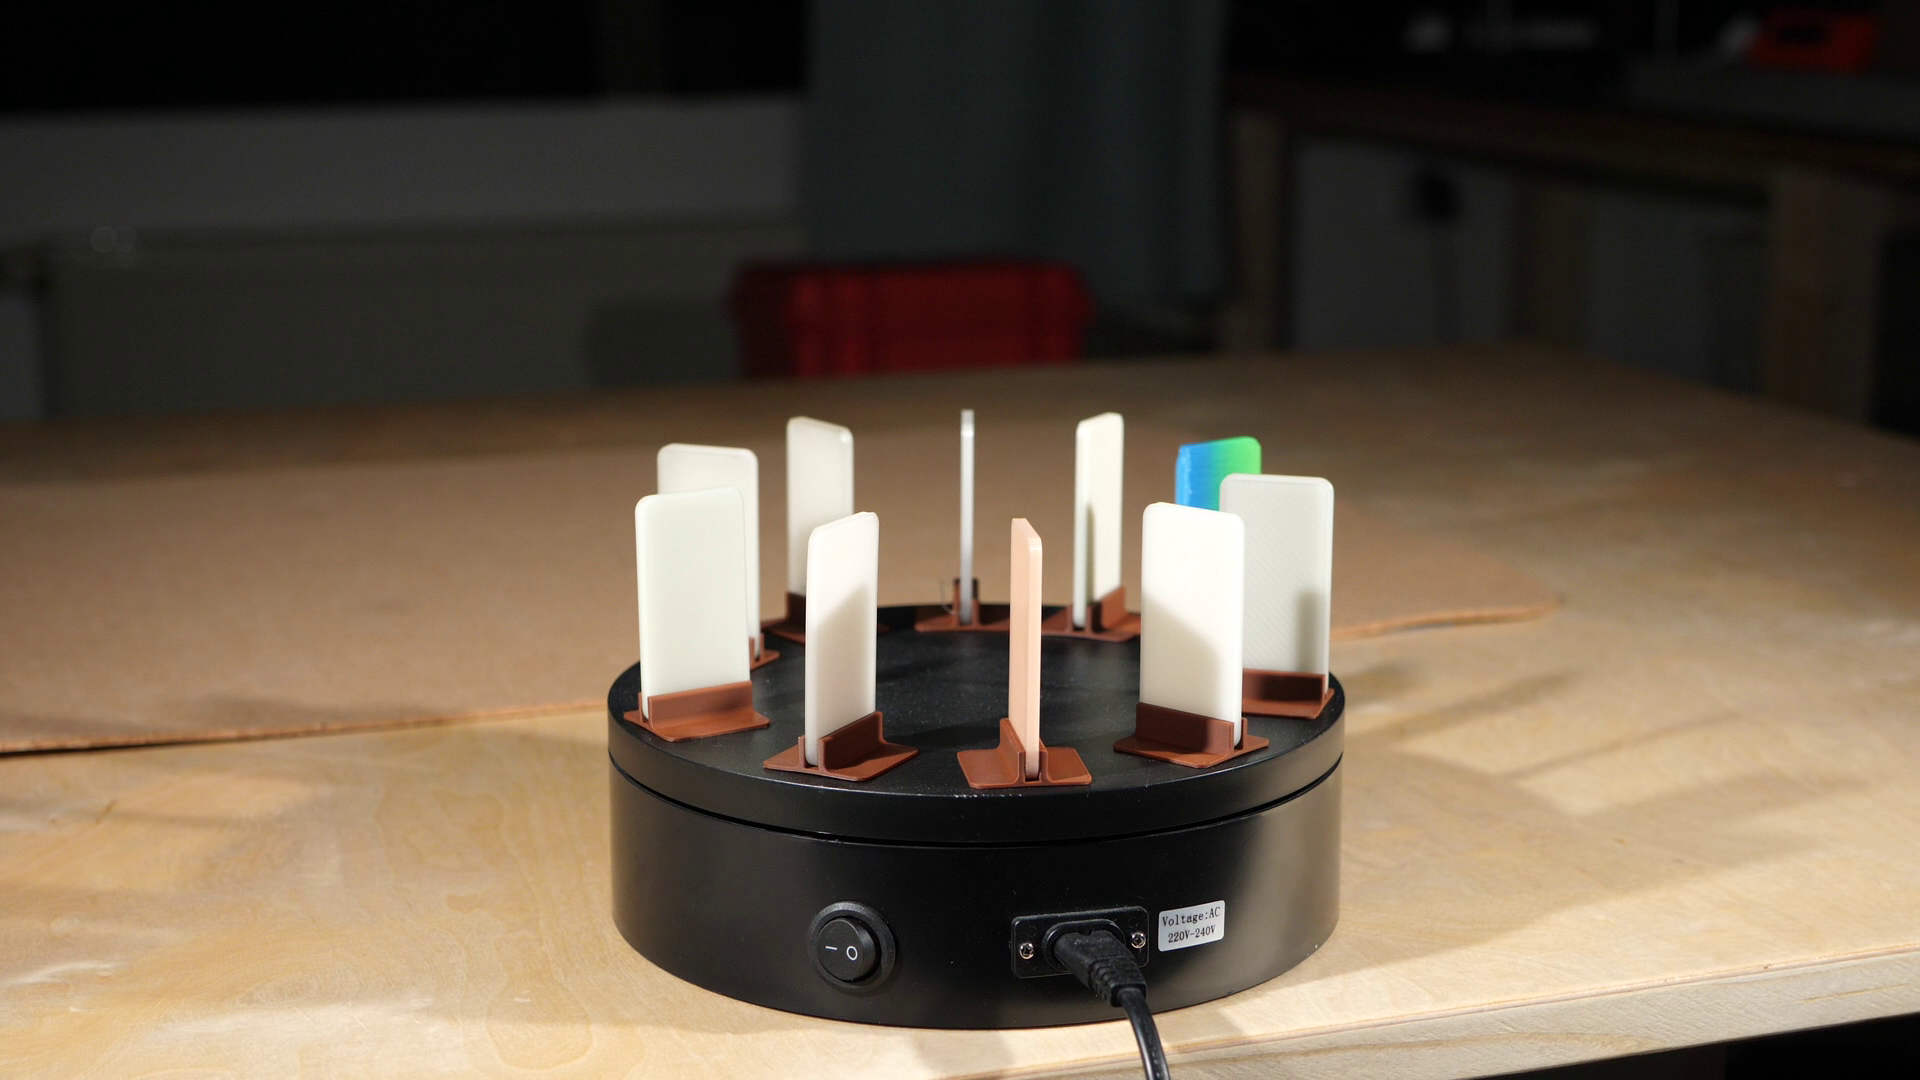
Charging the samples
Then I placed them next to each other, separated by a piece of cardboard, so one doesn’t shine onto the other. Then I took images of the set in 1-minute intervals. I used all manual settings, so the camera should nicely be able to capture the decay of light over time. After 600 images and 10 hours, I used a Python script to analyze the images and extract the brightness of each of the samples, and plotted the results in a graph.
import cv2

drawn = False


for i in range(1470035, 1470615):
    img = cv2.imread('03/P' + str(i) + '.jpg')

    # Define the crop region
    xPos = [563,902,1260,1601,1937,2277,2631,2979,3312,3689]
    y, w, h = 1070, 211, 461  # x, y are the top-left corner of the ROI and w, h are its width and height

    for x in xPos:
        # Crop the image
        cropped_img = img[y:y+h, x:x+w]

        #to grayscale
        gray_img = cv2.cvtColor(cropped_img, cv2.COLOR_BGR2GRAY)
        average_brightness = cv2.mean(gray_img)[0]
        print(average_brightness, ', ', end = '')
        if not drawn:
            cv2.rectangle(img, (x, y), (x+w, y+h), (0, 0, 255), 2)

    print()

    if not drawn:
        cv2.imshow('Regions', img)
        cv2.waitKey(0)
        cv2.destroyAllWindows()
    drawn = True
For this I converted the images into grayscale and then calculated the average gray value over this marked area. This might not be the perfect way, but at least now you know how I got my data. The first thing we can see in the plot is that the glow rapidly decreases right at the start, and after two hours, even the brightest ones only glow with 10% of their initial brightness.

Samples after 10 minutes
This sounds horrible, but since our eyes adjust to the darkness, the samples still appear very bright after several hours in a bedroom, for example. What we can also see is that we have three brightness groups. The brightest are the green glow-in-the-dark filaments, the next ones are the blue-glowing ones plus the sparkly green and rainbow filament. The red filament was the darkest because it probably still uses one of the older-generation Calcium Sulfide phosphors. But which of the 10 filaments did perform the best, now? Let’s go through the decay curves. R3D Red was the worst and didn’t shine any longer than 30 minutes. Next came the sparkly green PLA from Amolen that didn’t really shine noticeably anymore after 2.5h, yet you will still be able to see very dim speckles in the material from up close. Then came Tronxy’s Rainbow Filament, which also didn’t shine detectably anymore after 4 hours. From the two blue glow-in-the-dark filaments, the Nobufil was the winner. Both it and the one from Amolen glowed over 8 hours, but the one from Nobufil was just a bit brighter. 4 of the 5 green filaments were very close, with dasFilament in position 5, Amolen in 4, Nobufil in 3, and Colorfab GlowFill came in second best. The glow-in-the-dark filament that won, was Overtures Green Glowing PLA, which was the brightest and, even after 10 hours, was still noticeably glowing.
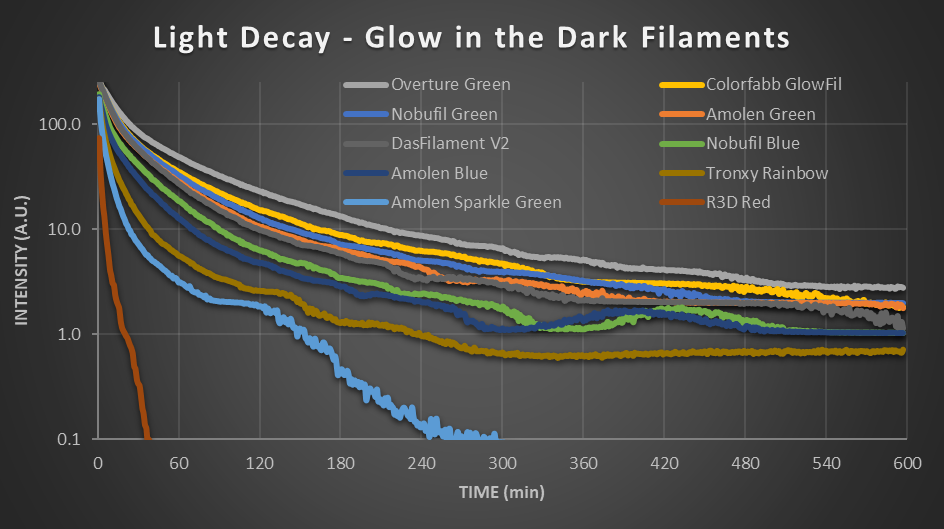
Light decay curves
The glowing capabilities are dependent on the phosphor itself but also on particle size and the amount that was added to the filament, and there are significant differences. I made some microscope shots of the filaments, which already show how some materials basically contain splintered rocks, while others use very finely distributed glow pigments.

R3D Red filament with visible glow particles (1.75 mm filament diameter)
That difference can already be felt when just touching the material. Strontium Aluminate is known to be very hard, and there are numerous examples of people killing their 3D printer nozzle because they printed something glowing. So I didn’t only buy all of these filaments but also a set of brass nozzles that I used to test how much the tips wear down after only a 100 g print. I extruded these blocks with 90% triangular infill where the nozzle regularly moves over the already printed infill, slowly shaving down the tip, which you can even hear. This is a worst-case scenario but allows me to get results quickly.
100 g sample
I made a macro image of each nozzle before and after the test and also measured the length. I selected the materials by feel and started with the Tronxys rainbow glowing filament. I was able to spot a ton of wear already on plain sight, and measuring the tip, showed that 0.18 mm were missing. Then I tested ColorFabbs GlowFill. The results were even worse, and 100 g of this filament removed almost half a millimeter from the nozzle tip, yet you have to dig all the way down to the technical data sheet to find a comment that this material could wear a brass nozzle.

Worn down nozzle after 100g Colorfabb GlowFill
I really don’t want to know how many nozzles look like this, and the users are not even aware of it. Next, I also tested the dasFilament glow-in-the-dark, which has the smoothest surface. After the test, I could barely measure any wear, so you can also get lucky! Amolens Sparkle Green also has these big particles in it, yet not a lot of them. It still stripped 1/10 mm from the nozzle tip after printing 100 g. In conclusion, I can only say that if you consider printing glow-in-the-dark filament, use a hardened steel nozzle. Not a stainless steel nozzle, a hardened steel one, and on a really bad day, even these can wear after a while! If you had similar experiences, let me know in the comments!

New nozzle (left) and worn down nozzle after 100g glow in the dark filament (right)
So with all these investigations, what can I say about the materials I tested? Green glows the brightest, blue is a little worse, and red is only for people that like to smell their farts. If glow intensity is what you’re looking for, get the one from Overture. Colorfabbs GlowFill looks, in my opinion, the best with its opaque finish and the slight speckles when it glows while still lasting very long. Just consider that it will kill your nozzles! Amolens sparkly green filament wasn’t bright but looks really nice in person. If you only want to print a little glow-in-the-dark and don’t want to change nozzles, the dasFilament PLA is a great choice. And if you look for a glow-in-the-dark PETG, Nobufils materials are also a solid option!
All tested filaments (affiliate)
Overture Green (winner): https://geni.us/3DYcmEI
colorFabb glowFill (nicest): https://geni.us/jPYuZbM
Nobufil Green: https://www.nobufil.com/product-page/glow-in-the-dark-green
Amolen Green: https://geni.us/xPJZat3
DasFilament V2: https://www.dasfilament.de/filament-spulen/pla-1-75-mm/122/pla-filament-1-75-mm-glow-gruen-v2?c=11
Nobufil Blue: https://www.nobufil.com/product-page/glow-in-the-dark-blue-filament
Amolen Blue: https://geni.us/K0NW
Tronxy Rainbow: https://geni.us/j9Ct
Amolen Sparkle Green: https://geni.us/phnkXA
R3D Ultra Red (ultra stinky): https://geni.us/Cckkzs