Brick Layers - Make 3D prints stronger!
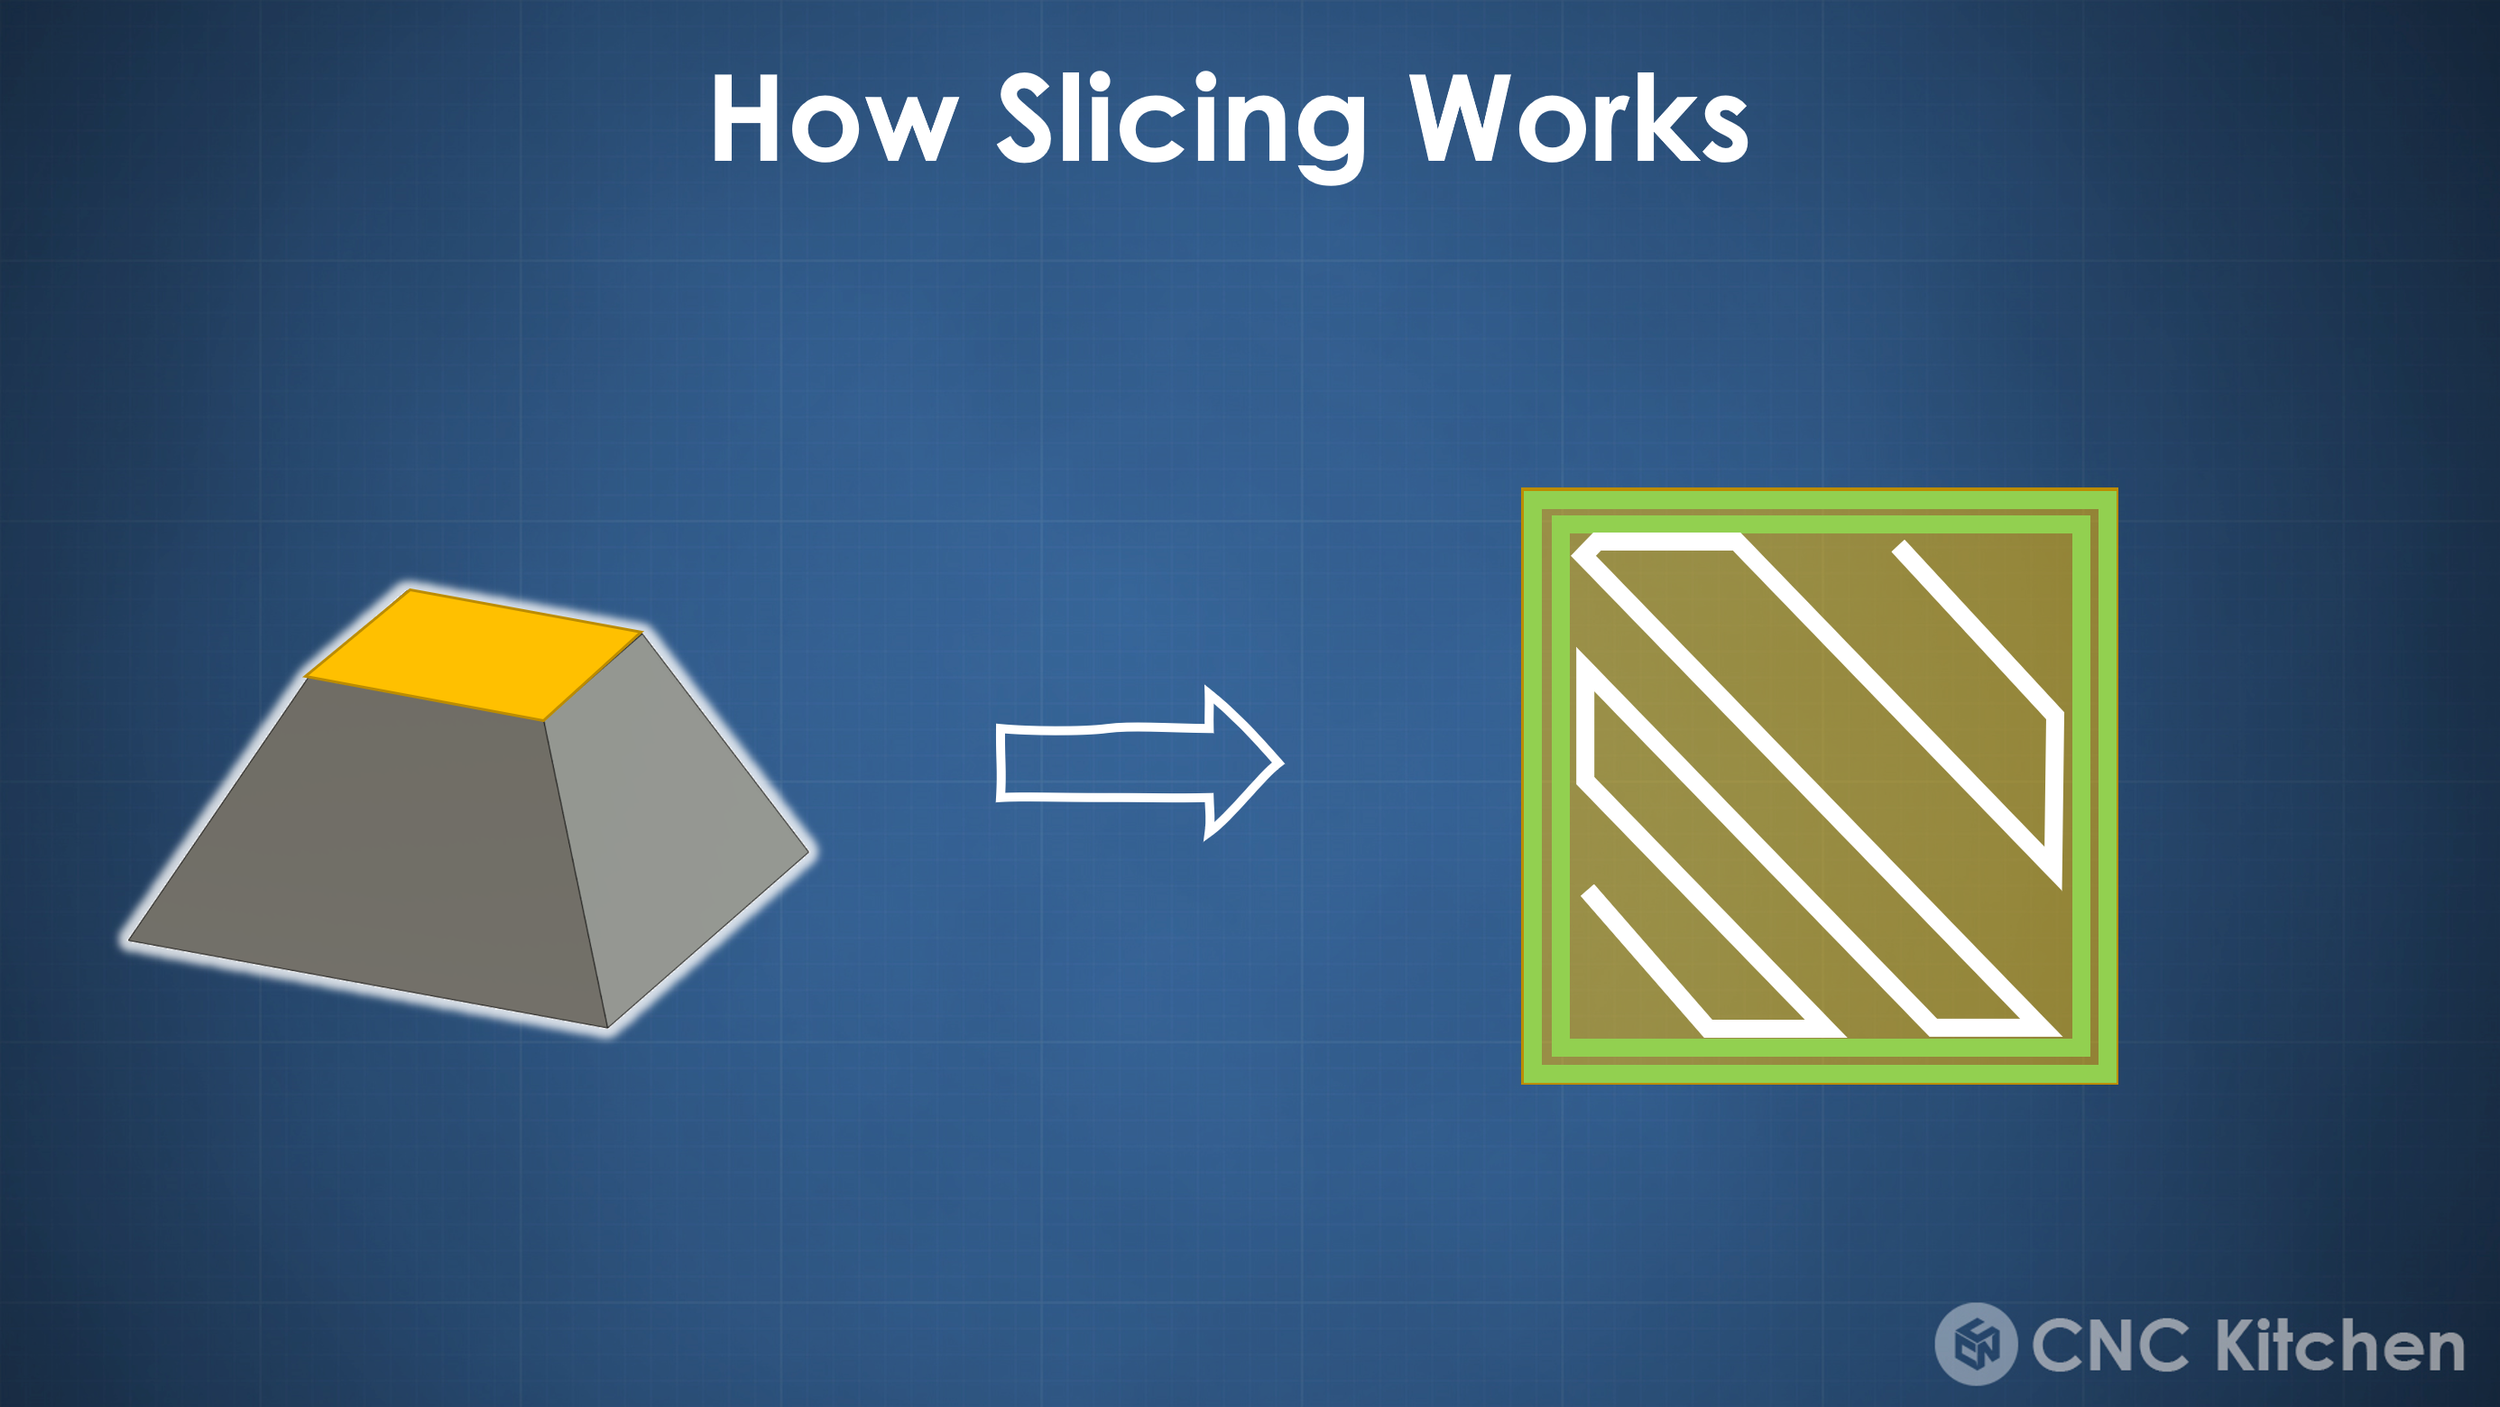
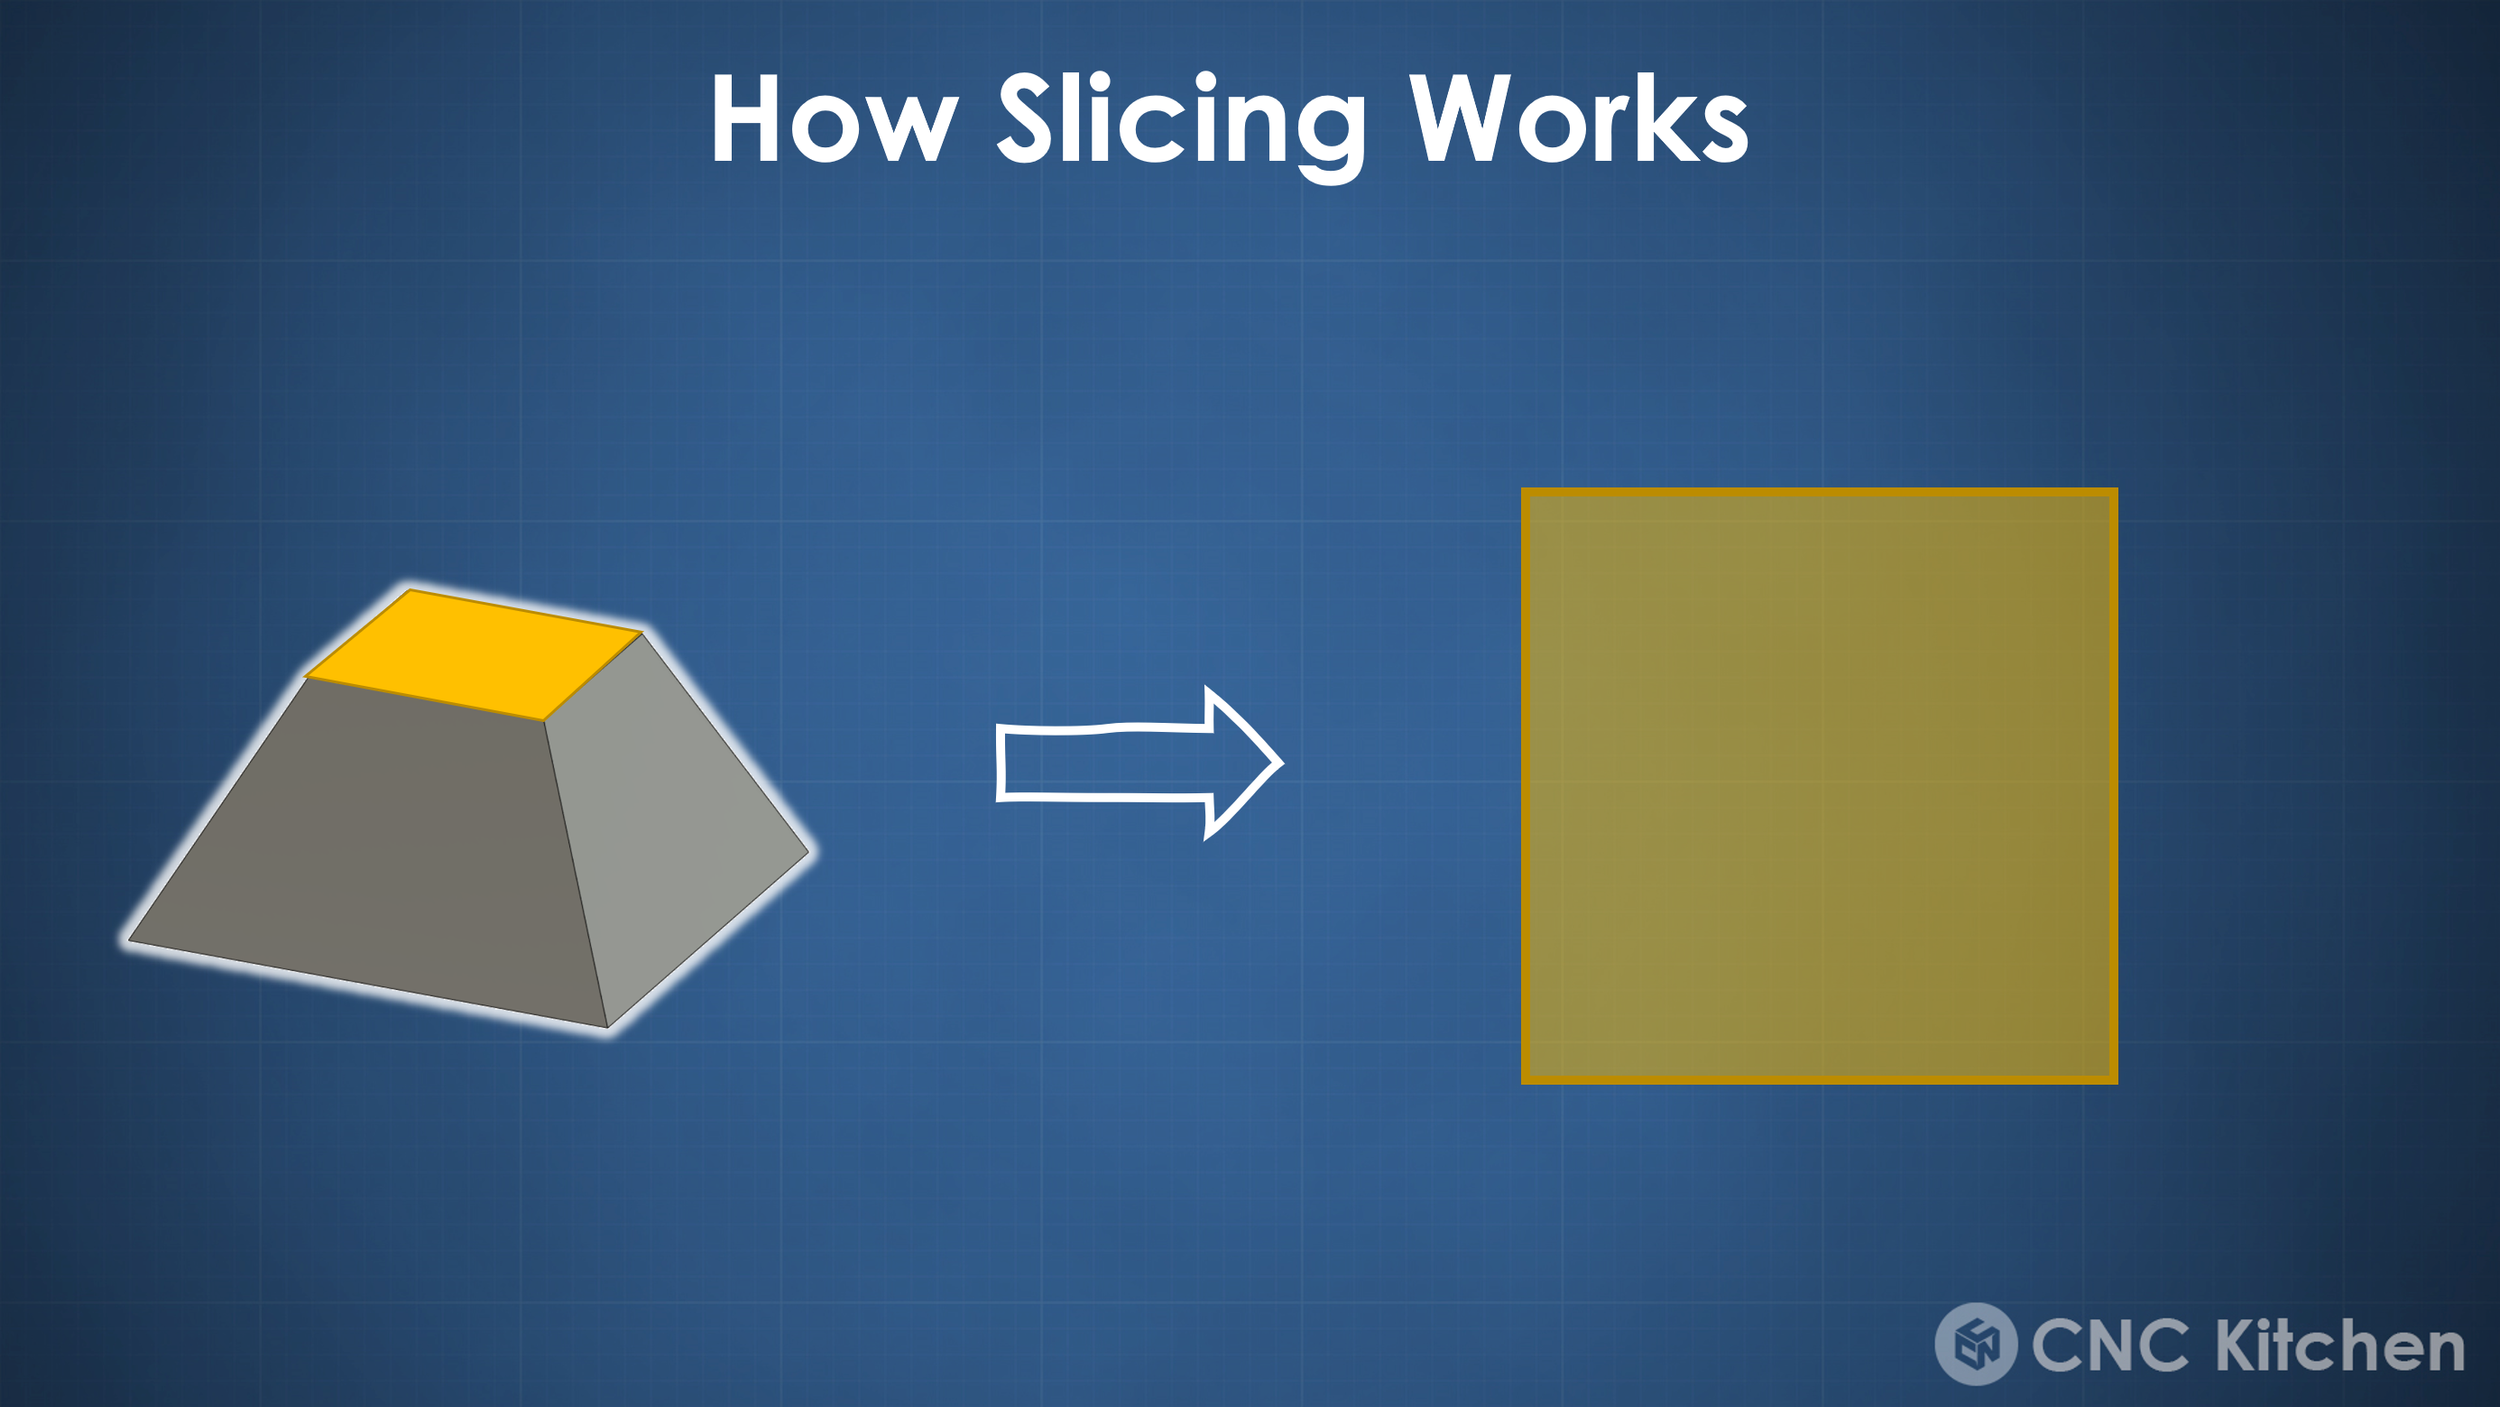
Even though 3D printing slicers have come a long way over the years with crazy fast slicing times and features like organic supports, dynamic extrusion width, and hundreds of different parameters we can play around with, they still work with the same principle, and this is, cutting a part into 2D layers and filling these layers with print moves. And these two-dimensional layers are then simply stacked on top of each other, creating a three dimensional part.
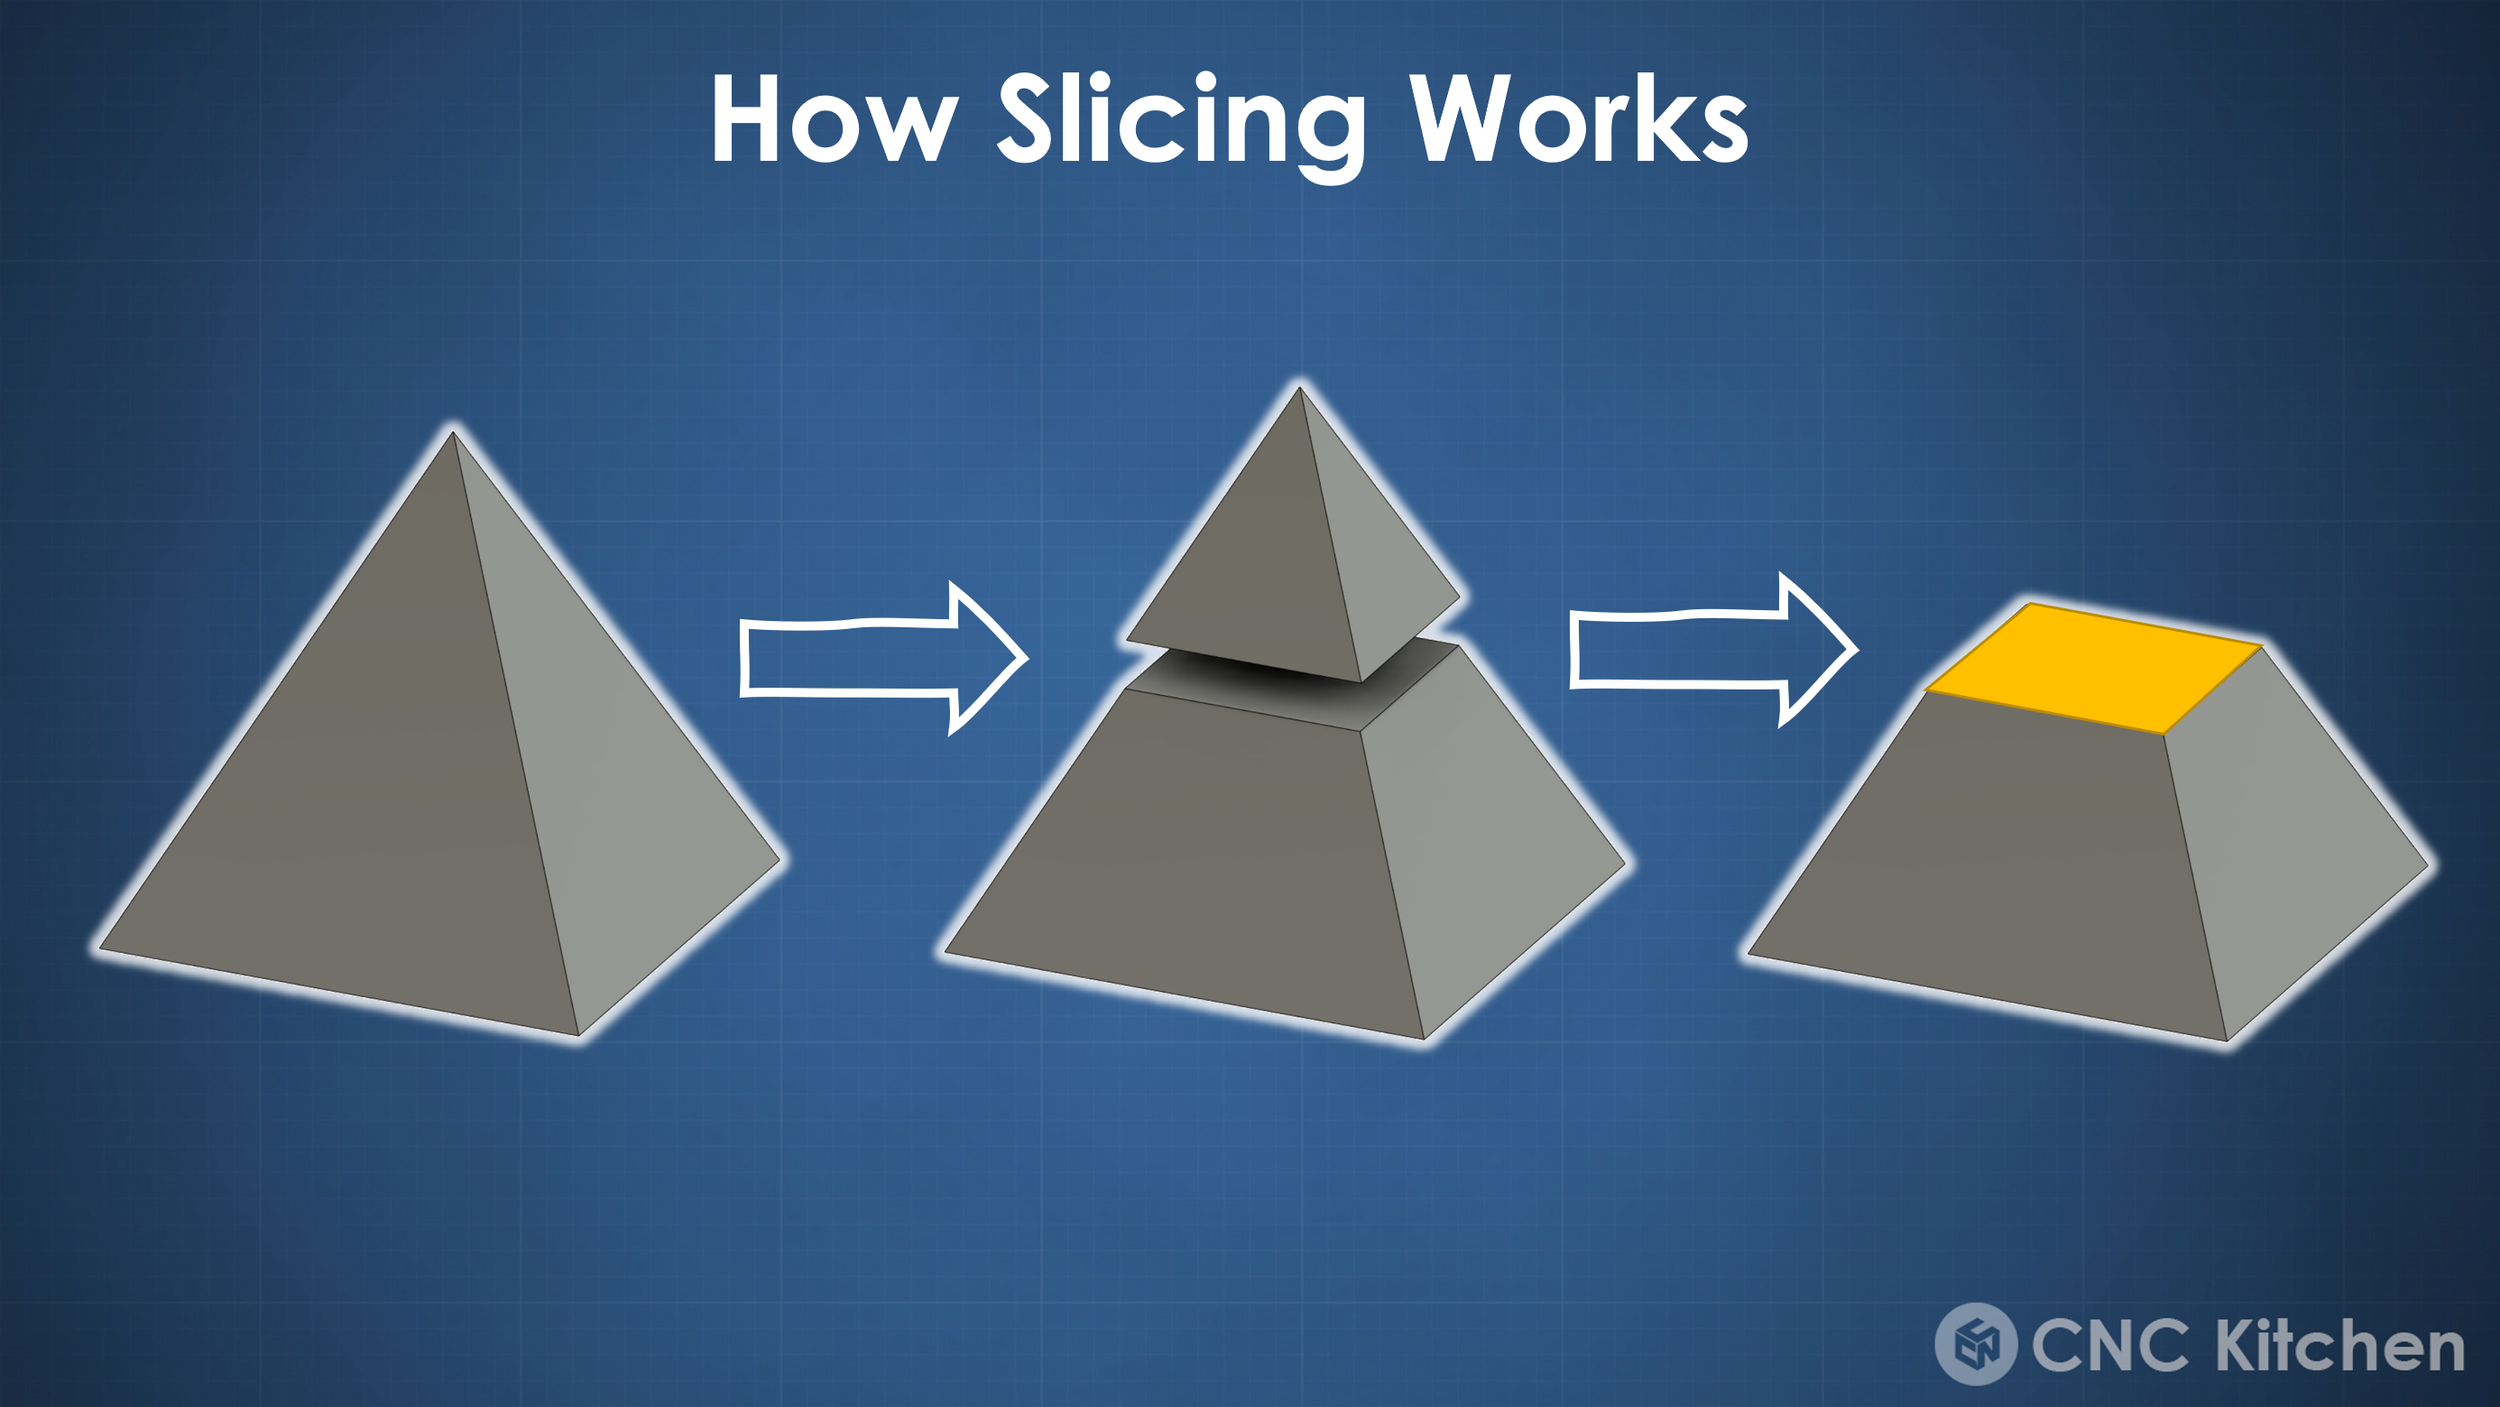
This results is one of the biggest problems of extrusion-based 3D printing, which is the significantly lower strength perpendicular to layers compared to in the printing plane. Layers that are stacked on top of each other only partly melt together, creating a weak point, and if these weak points are all in one plane, this is where a part will fail.

FDM 3D Printing Strength Problem
There have been attempts at real 3-dimensional slicing, but basically, none of them made it into any mainstream slicer, simply because the approach we use nowadays works remarkably well and is reasonably simple.
Conical Slicing
Even my three-year-old daughter knows that building a wall without overlapping bricks is a bad idea, and nobody in their right mind would build a brick wall with all of the stones aligned. Yet, all of our 3D printers still produce parts in this sub-optimal pattern.

Stacked and aligned layers
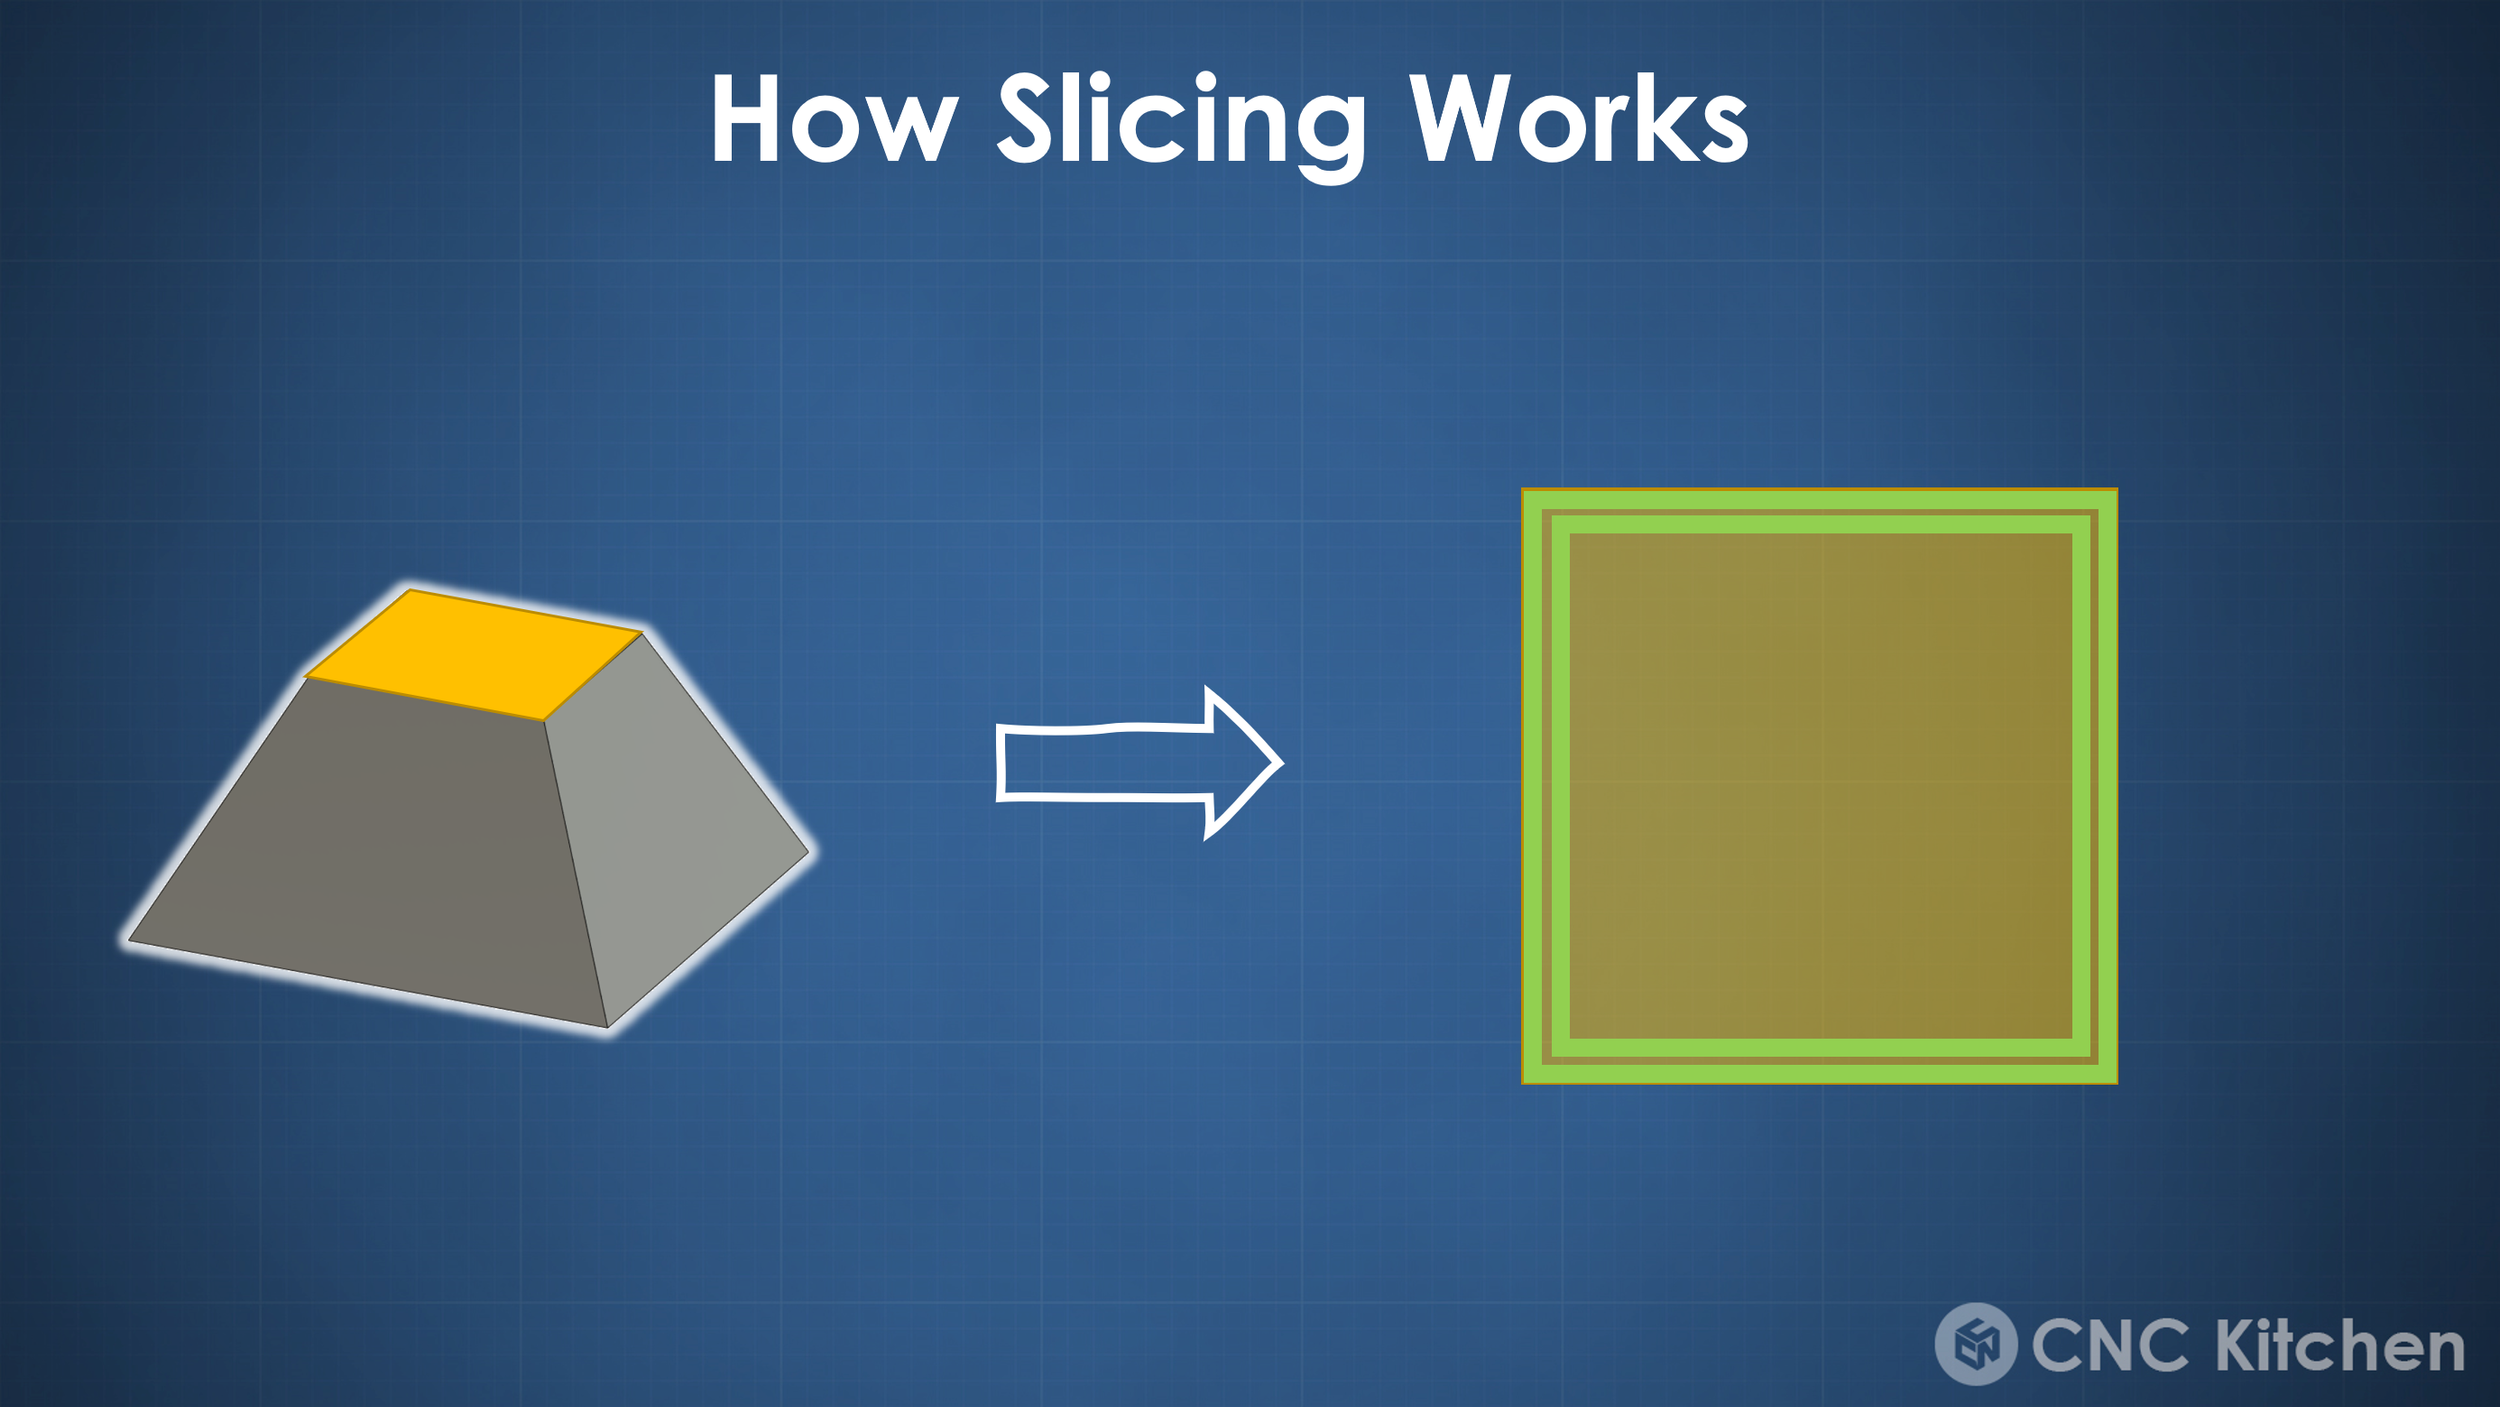
So I set myself the goal to change that and try how we could print in an interlocking, brick wall pattern and how that affects print quality and especially strength! Implementing that into the slicing process is, in my opinion, fairly simple, yet we can not find it in any slicer at the moment. However, what we need to do is change the printing order. Usually, the perimeters are printed at first, from the inside to the outside, and then the rest of the layer is filled with the infill pattern. Since we want to print every other print line shifted by half a layer height, we need to avoid collision of the nozzle, with the already printed part. We first want to print every other lower perimeter and then move half the layer height up and complete the rest. If we print the whole part like this, we don’t have planar layer boundaries anymore but especially the perimeters interlock in this zig-zag-pattern. This not only gets rid of the layer plane but also increases the surface area where two layers can bond together, potentially increasing the layer adhesion. I did a bit of research yet couldn’t find any patent on this method, yet if there are any, please let me know. I’m by the way not the one inviting this because a hand full of viewers have been writing me concerning that method in the past and there are even PrusaSlicer feature requests.

Brick Layer Idea
Yet, to my knowledge, I was the first one implementing an testing this. And to do that, I brainstormed different ideas. I first thought about using a Python post-processing script that does the re-ordering until I realized there is one slicer that I regularly used years ago for crazy ideas like this. Welcome back Simplify3D! Simplify3D was the go-to slicer when I started 3D printing in 2014 because it had custom supports that worked way better than what any other slicer could do. Today, at least if you do hobby-level 3D printing, there is barely a reason to spend $200 on a slicer that might be stable and reliable but doesn’t deliver any features that you don’t find in CURA or PrusaSlicer, which are free. Well, besides their process approach. Whereas in PrusaSlicer, you can only do part-specific properties and slightly alter them with modifier geometry, in Simplify3D you can vary and combine everything on a part, from layer height to nozzle temperatures. So, in order to implement the Brick Layer Slicing approach, I created four individual processes, one for each perimeter and one for the infill. The first two processes are for the internal and external perimeter and print normally with the standard layer height and, most importantly, an initial layer height of 100%. The super simple, yet in my opinion, the smart trick to achieve the brick layers is setting the initial layer height for the two remaining processes to 150%. This way, these layers are offset half a layer height in the first layer and, therefore, are automatically shifted in all subsequent layers.

Brick Layer impementation
This approach works very well and not only on generic cubes. Also, more complex parts like a 3DBenchy look well in the slicer and print similarly well on a real machine. Outer surfaces look way better than I expected, and only sloped top surfaces seem a bit under-extruded. The reason for this is that the slicer misses some of the intermediate top layers due to the shift in slicing height. Yet this might be fixed by printing layers at half the height, once the top of a part is reached. This is nothing I can probably implement in my proof-of-concept and would be something that needs to be looked at in a proper slicer implementation.

3DBenchy sliced with brick layers
I broke some of the parts to get an idea of how much the slicer preview correlates with a real part. Looking at them under a microscope showed how the perimeters aligned when using conventional slicing. The bricklayers, on the other hand, end up with this really nice interlocking pattern, where the individual extrusions not only touch on the bottom but also diagonally to the next layer.

(left) regularly sliced part, (right) brick layers
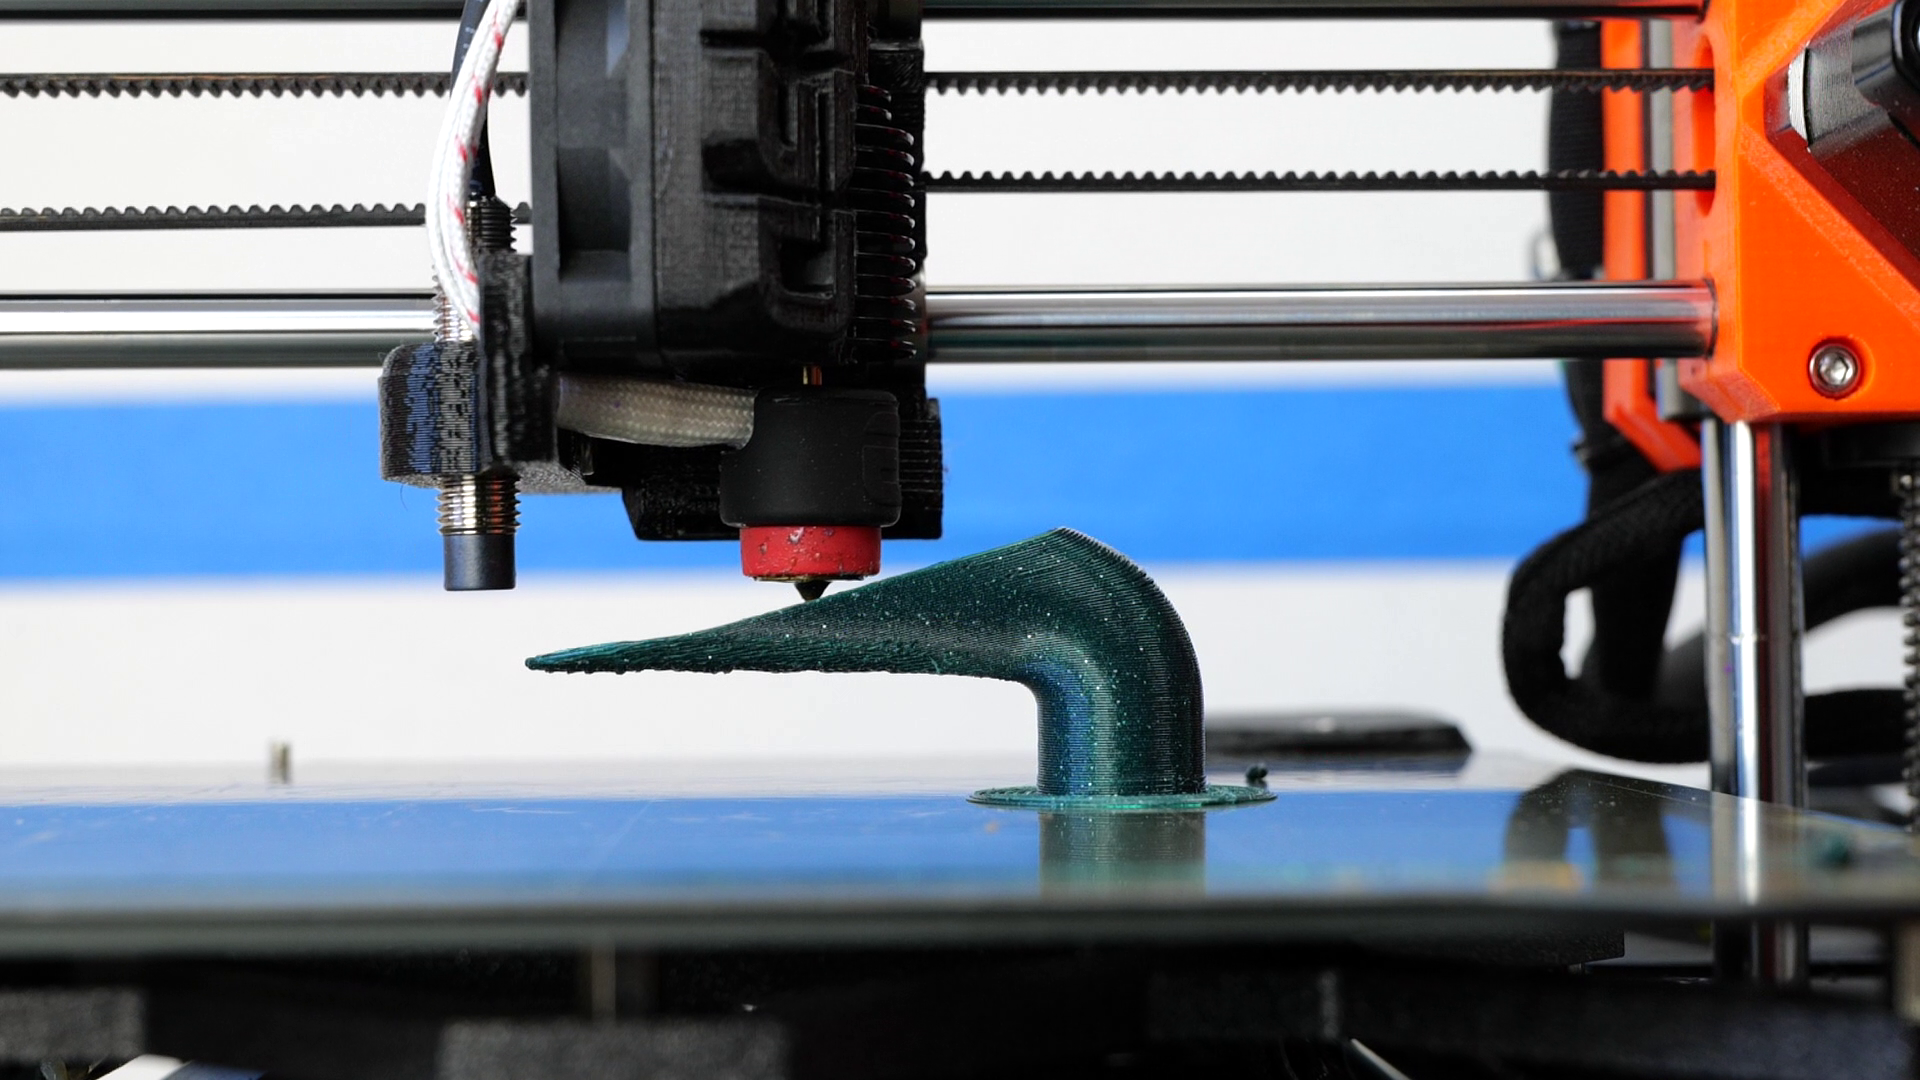
So far, we’ve only seen that brick layers seem to print well and also look like we imagined them under the microscope, but we didn’t take a look at the most important question: can we increase the layer adhesion by using this process? So, I went ahead and printed layer adhesion samples for that. I tried to design some that had a high enough cross-section to fit a bunch of perimeters in order to properly see the effect of the brick layers. Unfortunately, the design wasn’t entirely straightforward, and the first designs often broke at the lug and not at the actual test section. After a couple of design iterations also employing finite element analysis, I landed with this final design. I printed four of these samples, each using the regular slicing method and the brick layers. To see if there is any difference in materials I printed them from PLA, and from PETG. I used a layer height of 0.25 mm with 4 perimeters and no infill to specifically focus on the layer adhesion of the perimeters.

Design iteraterations from left to right
Once they were printed, I compared the weights, just to make sure that the only difference is the slicing method, and then I mounted them one after the other into my DIY Universal Test Machine and loaded them at a constant speed until they failed. The PLA samples that were conventionally sliced failed at 944 N on average. The PETG samples were just as strong, with an average failure load of 950 N. The fracture surfaces were mainly completely flat, showing the weak point of regular 3D-printed parts. Then, I tested the samples with the bricklayers. The PLA samples failed on average at 1072 N, which is 14% stronger than the reference, showing that this novel slicing method really improves layer adhesion. The PETG samples were very interesting. They also increased their strength by 10%.

Strength Test Results
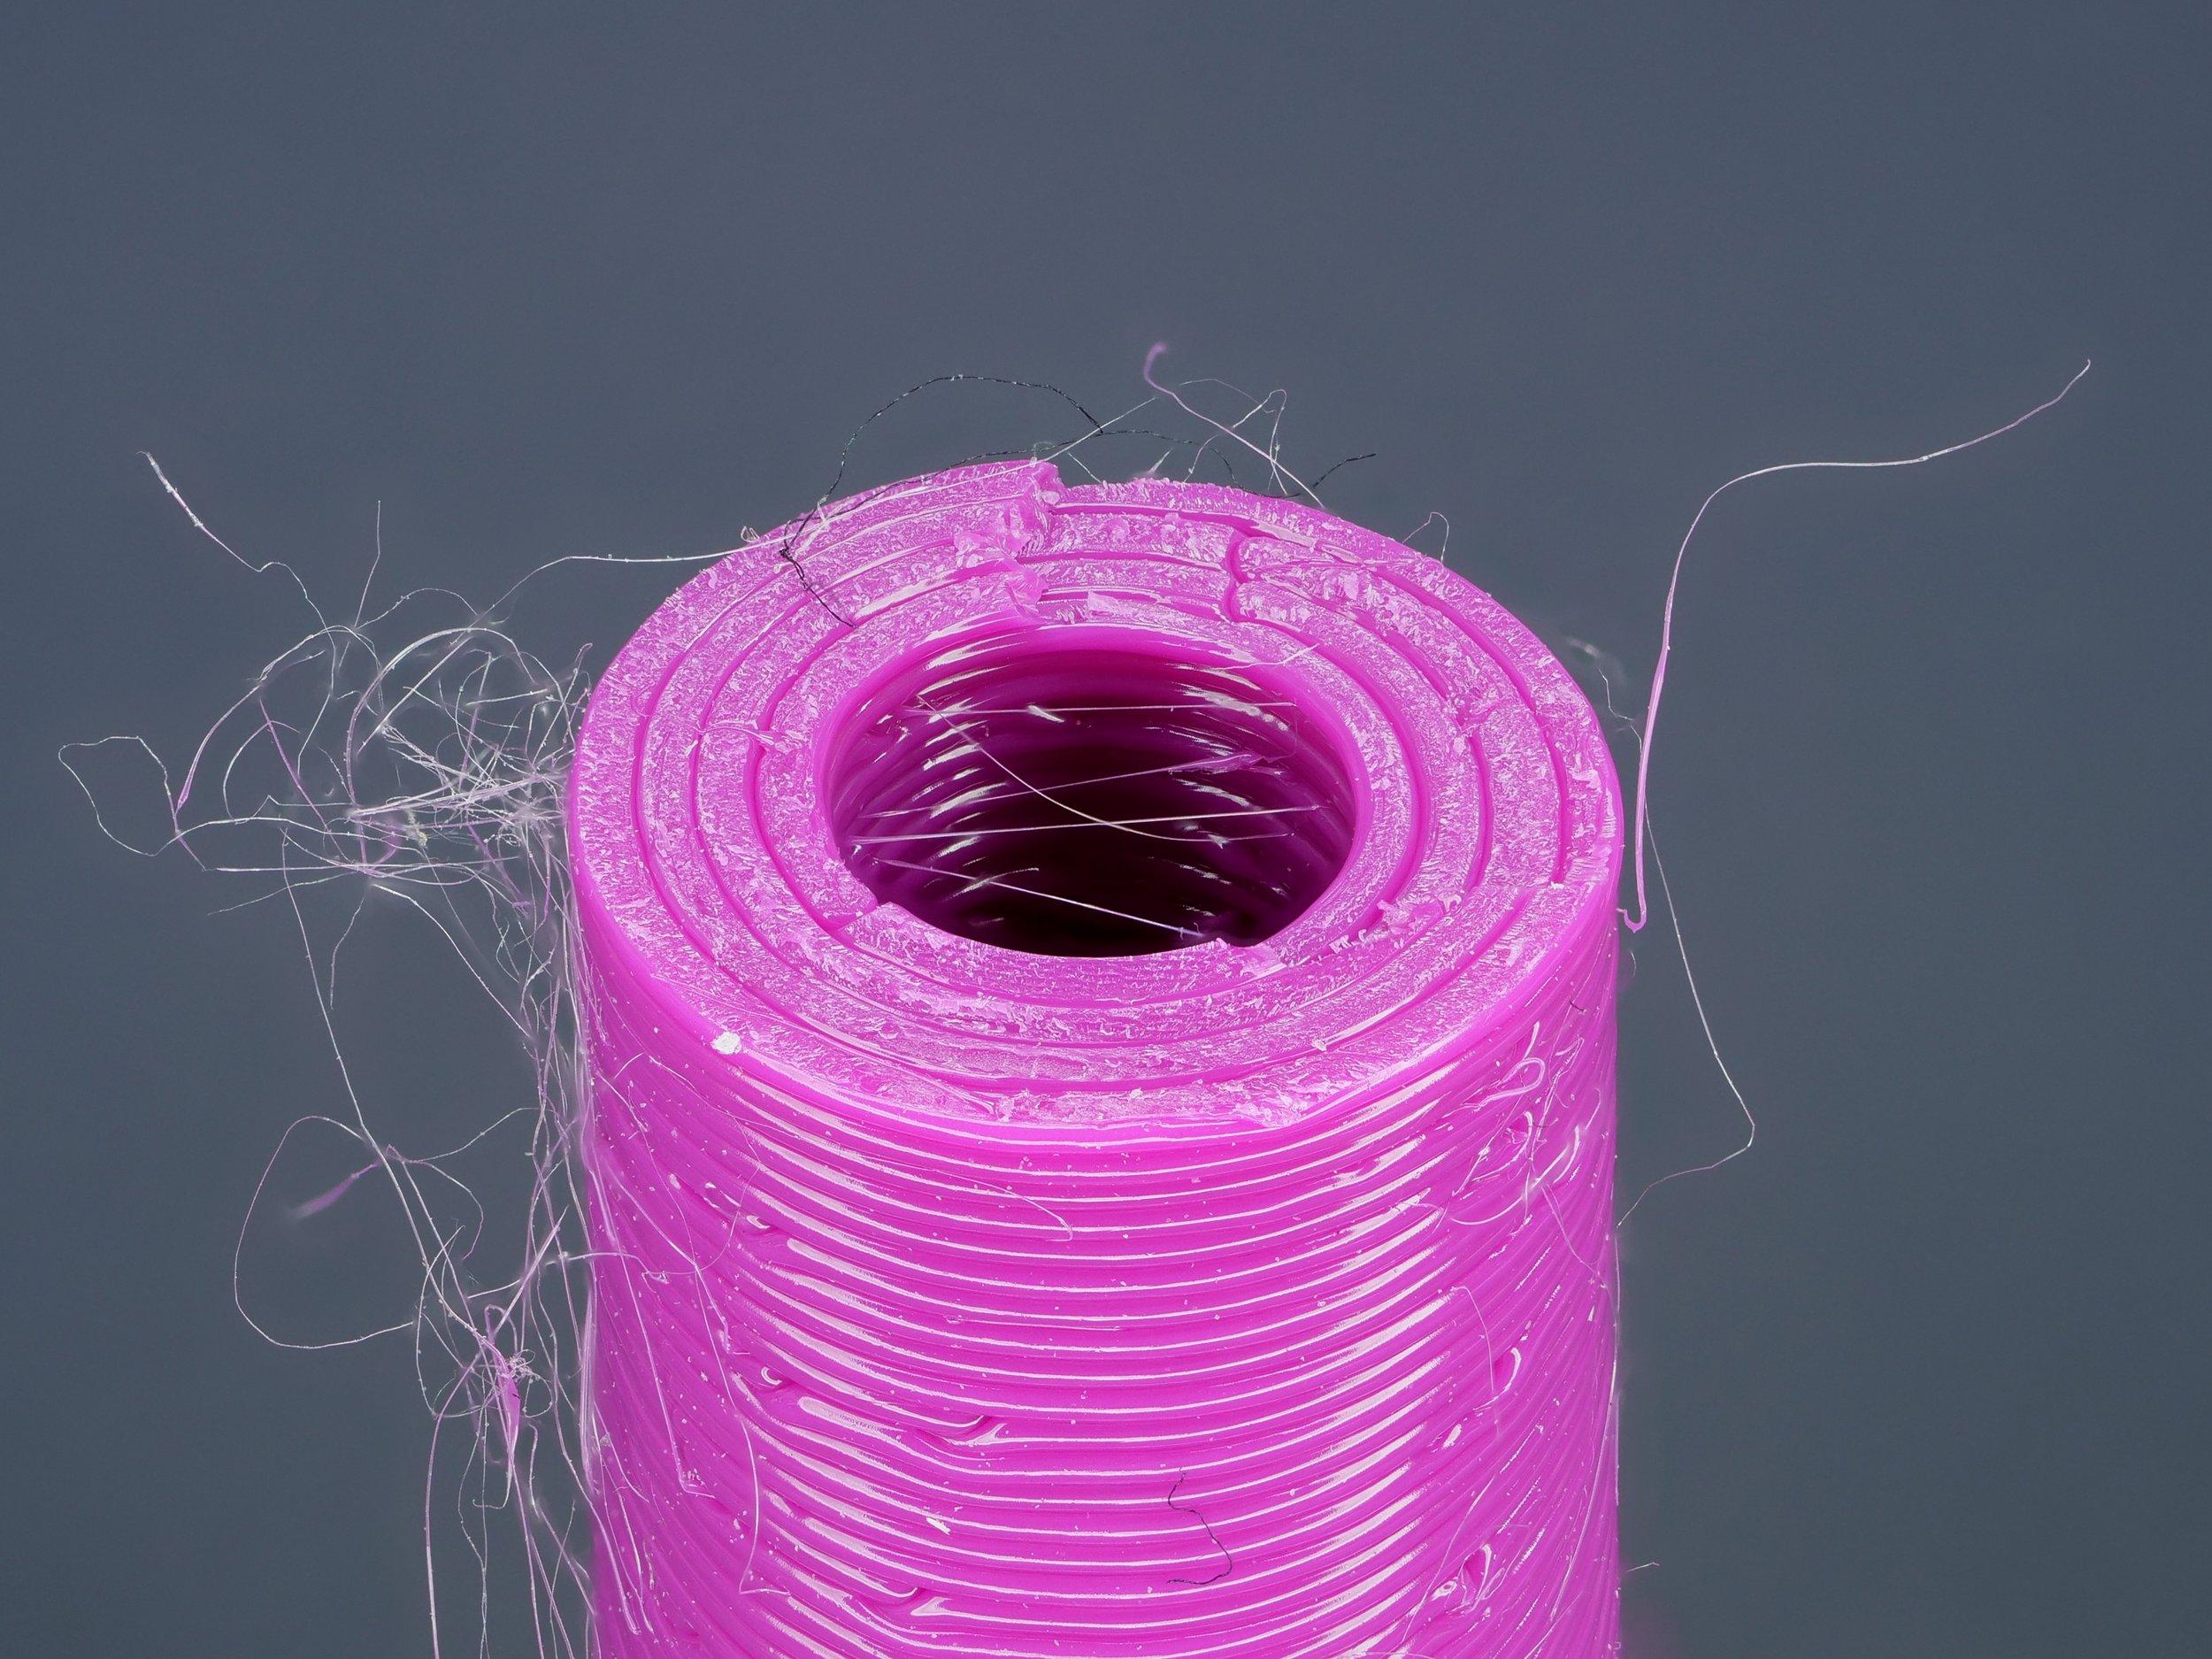
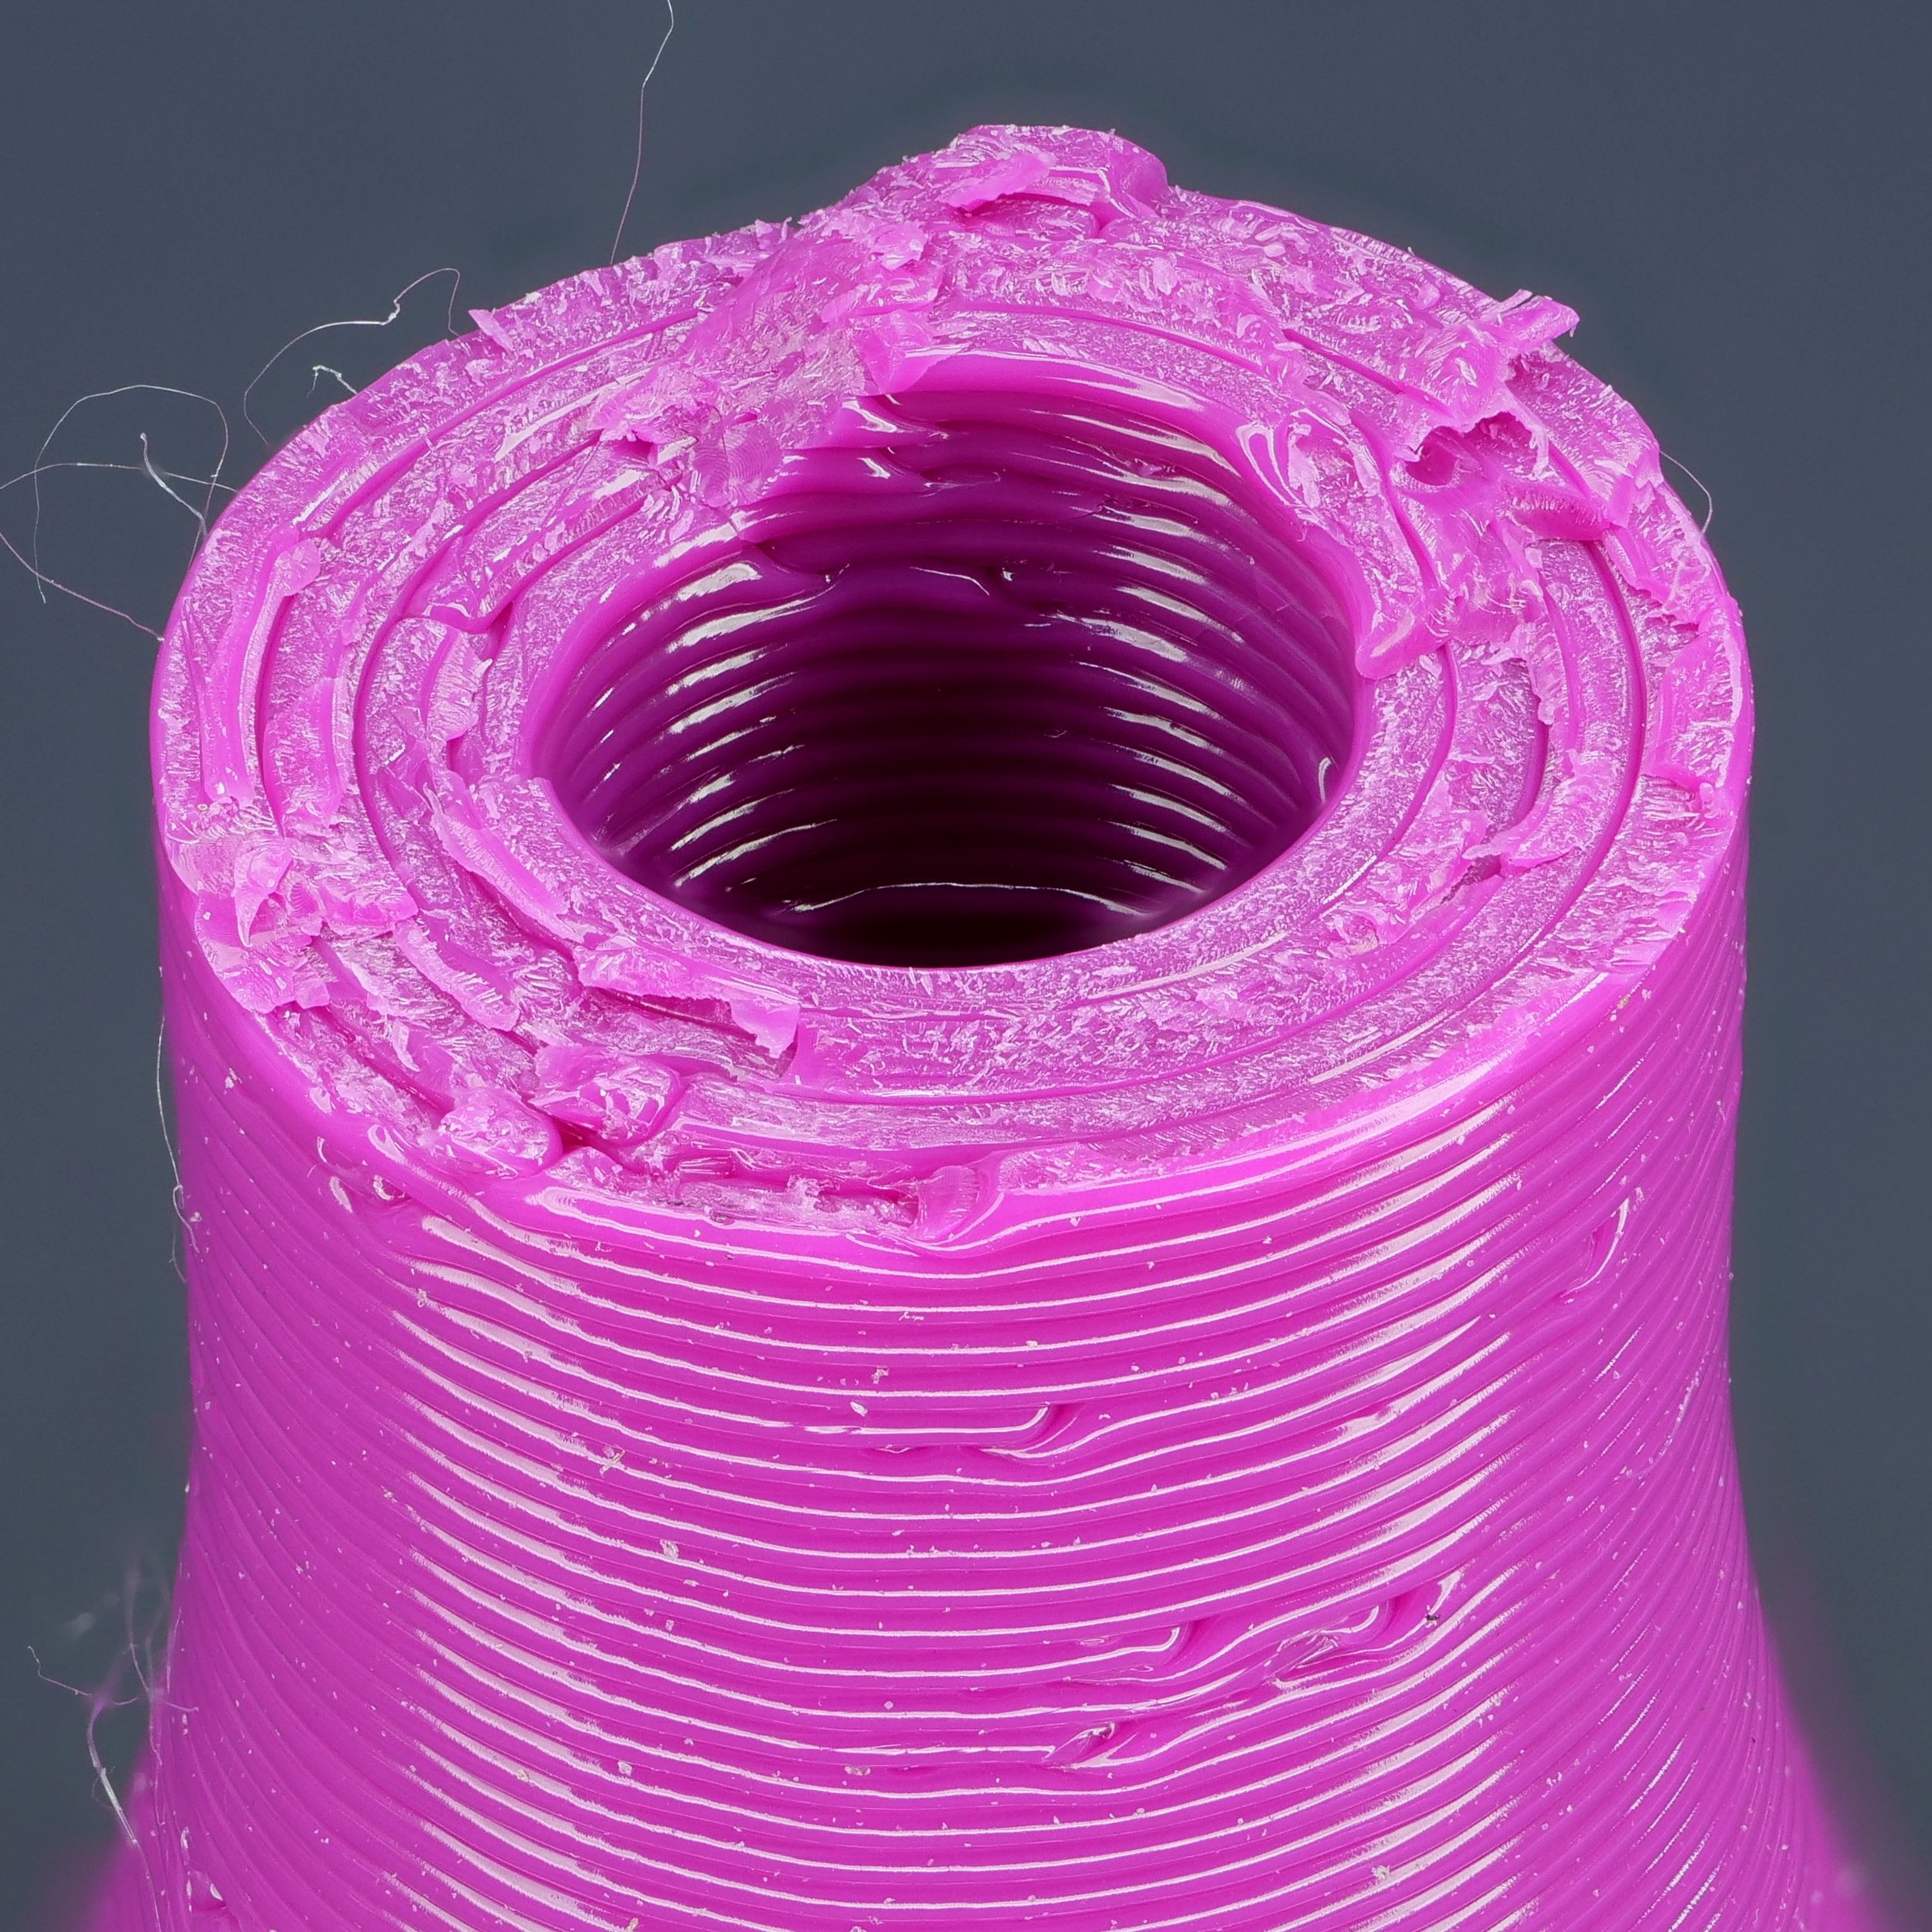
The interesting observation here was that whereas the conventionally sliced PETG samples simply failed in one plane, many of the bricklayer samples showed secondary cracks through the parts, some almost exploding on the test rig. I’m still not sure if that means that this is a positive result and that we got almost homogenous part properties or if we introduced an additional weakness into the part. If you have an opinion, please let me know!
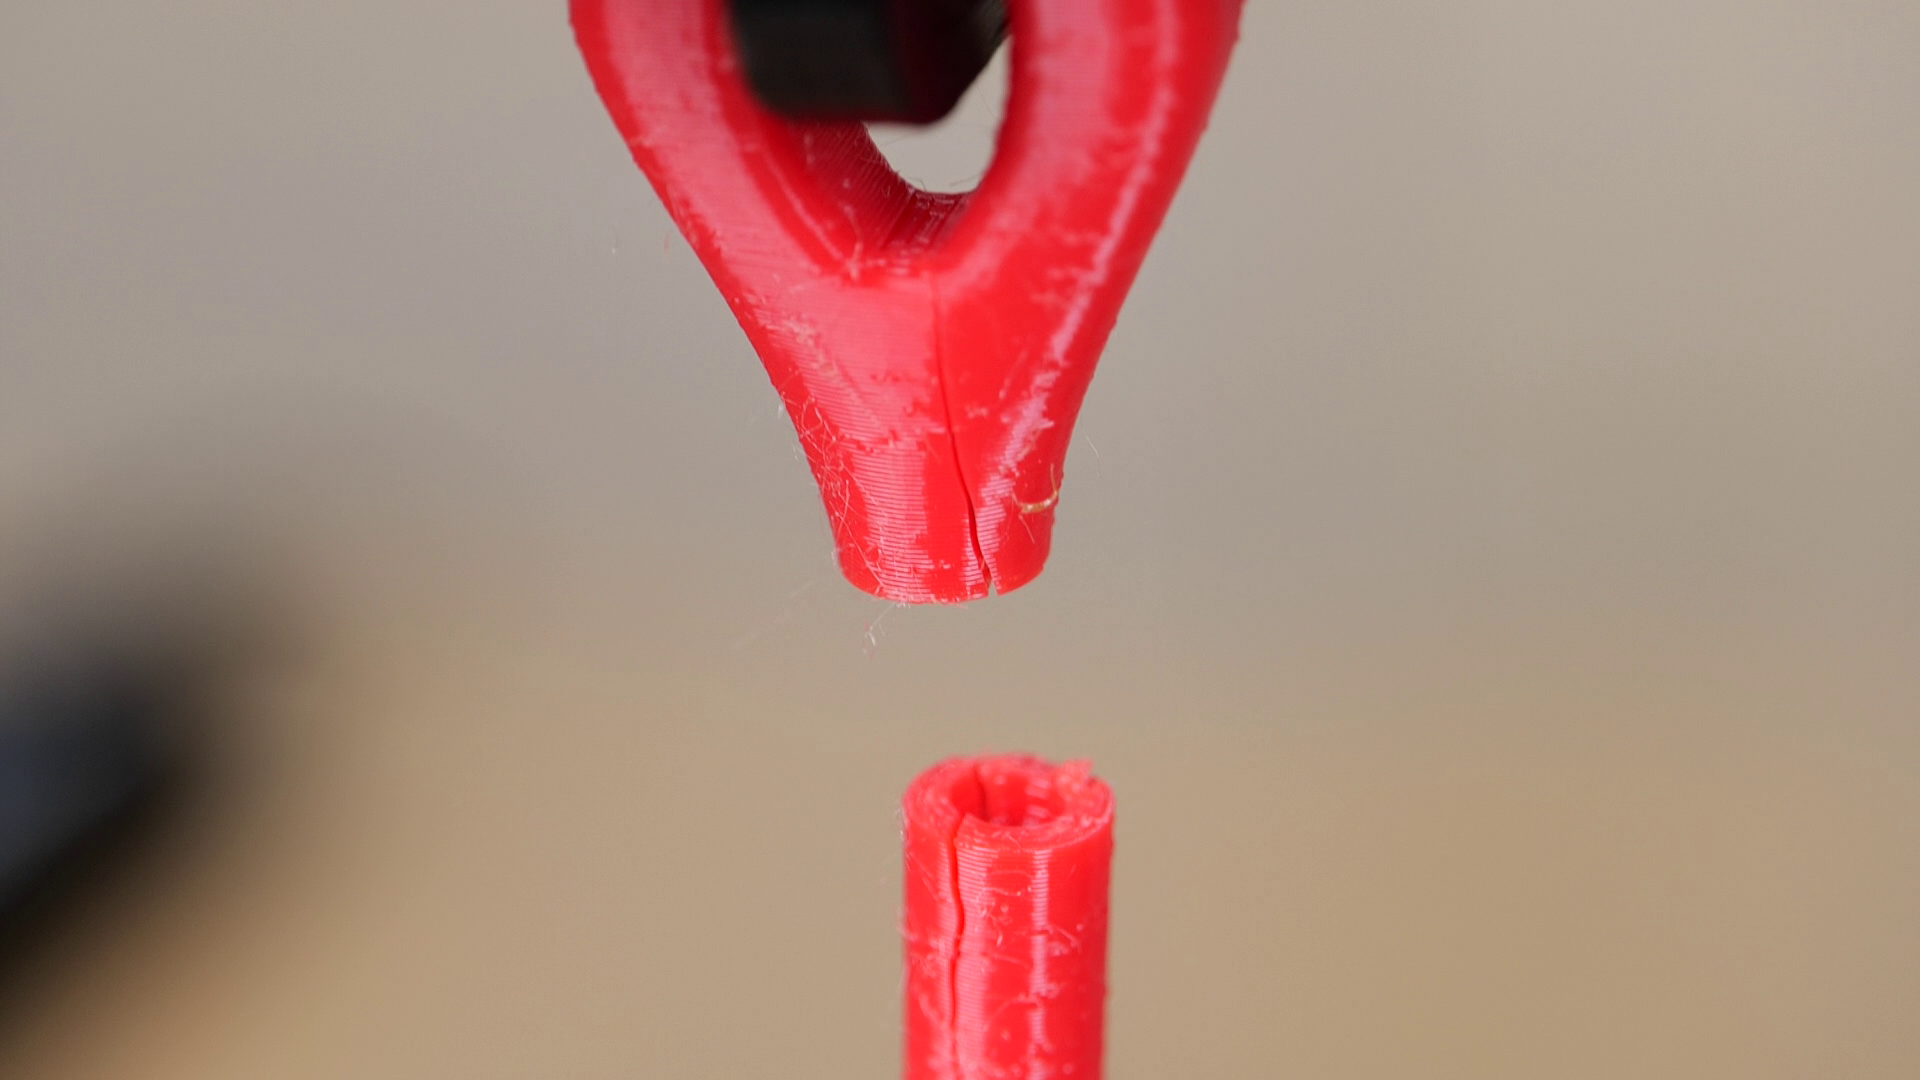
PETG part with secondary cracks
Comparing the crack surfaces showed that we went from a primarily planar failure to a zig-zag or even conical failure, which explains the better results because this increases the surface area where the extrusions can bond together.
One thing I realized during the implementation of this method was that it probably works best if the layers are rather tall. The thinner the layers get, the less of an interleaving effect we get. I had planned to investigate that further, but the samples that I printed at 0.2 and 0.3 mm layer height were very inconsistent, probably because I used old, wet, and unreliable filament. The results still showed a slight increase in layer adhesion with our novel slicing approach, but if we look at the standard deviation, this is probably not statistically significant.

All tests results
I think I was able to show that this novel slicing approach might have significant potential for making functional FDM 3D prints stronger. We probably won’t see a doubling of the layer strength, but an increase of 10% or more is a lot, considering how good our materials and processes have become in the last few years. I’ve put my Simplify3D factory files down in the description, and I think there might be ways to do the same in PrusaSlicer. If you have thoughts on this approach, please leave them in the comments, and if you have the skills, I highly encourage anyone to replicate and especially improve this. There are still so many things that can be improved in additive manufacturing with slicing optimization, and we need ideas like this to bring the technology forward!