Does a HEATED CHAMBER make your 3D prints STRONGER?
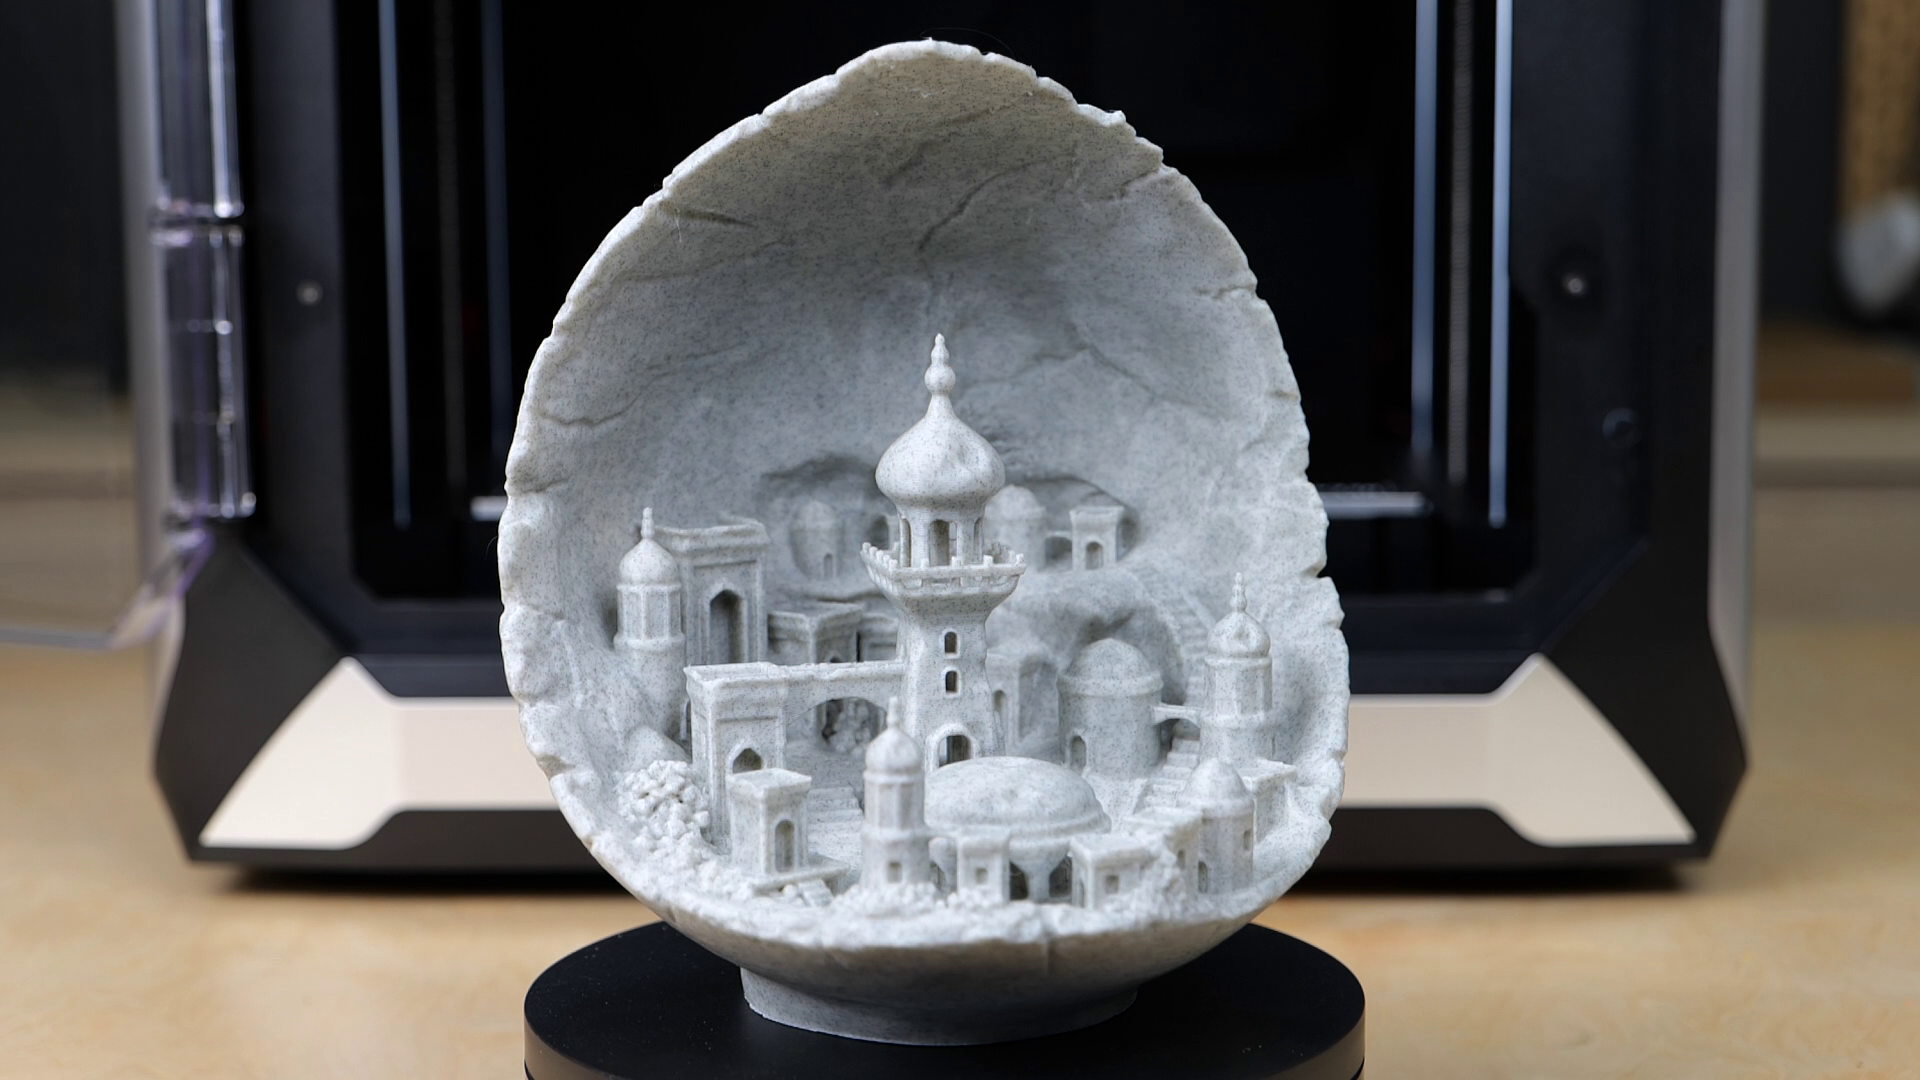
Thanks to QIDI for sponsoring this investigation! The QIDI X-Max 3 is probably what many would have wanted to see from BambuLab. The X-Max 3 is a fully assembled CoreXY with an impressive 325x325x310mm build volume with a direct extruder and a filament dry box in the back. It runs Klipper with the Fluidd web interface, does auto input shaping calibration for super-fast printing, has quick wifi but also wired LAN, and uses a slightly customized version of PrusaSlicer. Yet what intrigued me the most is its high-temperature capabilities with a 120°C bed, a 350°C hotend, and an actively heated chamber that you can set up to 65°C, making it perfect for even demanding filaments. And this beast, depending on where you buy it, currently sells for only right around $1000. Check out the QIDI X-Max 3 here https://geni.us/QIDI3D and get a special discount with code CNCKITCHEN30

QIDI X-Max 3
But this shouldn’t be a printer review, I wanted to use the QIDI X-Max 3 for a project that has been on my bucket list for a while. How does the layer adhesion of some more demanding materials behave if you print them without an enclosure, if the enclosure is only passively heated by the bed, or if you have an active heater keeping it at a set temperature? So, I chose two different materials for the test. At first, plain and simple ABS from ESUN. This is not their ABS+, which is optimized to be printed on an open printer, but probably just injection molding pellets made into filament. The other material I selected is Prusament PCBlend.

eSUN ABS (blue) and Prusament PCBlend (orange)
This is a high-performance material optimized to be printed without an enclosure but I wanted to find out if we can even get more out of it if we print it enclosed. I used this material quite a ton for outside projects because it’s relatively easy to print but has really good strength and temperature resistance. You can watch the full test here.
To test layer adhesion, I printed my round tensile samples, which we’ll later rip apart on my universal tensile testing machine. I printed them with the standard 0.4mm nozzle set to 250°C for ABS and 275°C for the PCBlend. Layer height was 0.2 mm and I used 2 perimeters at 100% infill. I intensionally printed 12 samples at a time so that, especially at higher chamber temperatures, the printed material has some time to cool down and doesn’t get all squishy.

Printed Samples on the QIDI X-Max 3
Since we want to compare the results objectively, I printed all the samples on the QIDI X-Max 3. To simulate an open-style 3D printer, I left the front door open during the whole printing process and also removed the top lid. With a room temperature of 20°C the chamber temperature sensor never got hotter than 26°C. The second scenario is the passively heated chamber, which is the primary way most other enclosed printers get warm on the inside. The heat source here is the heated bed, which warms up the air. Yet the hotter the inside gets, the more the machine also dissipates heat on the outside. At some point, we’ll reach an equilibrium temperature where the heat generated by the bed is just as big as the heat dissipation to the room. This equilibrium temperature varies depending on the size of your bed, the set bed temperature, and also the amount of insulation. When I printed the second set of samples on the QIDI X-Max 3, I ended up at slightly below 50°C due to the big 325x325 mm bed. The last set of samples was printed with the chamber heater turned on. I’m usually not a big fan when printer manufacturers just reskin existing slicers, but QIDI added precisely the feature many have been asking for years in PrusaSlicer. They allow setting the chamber temperature beside the bed and nozzle temperature. If you input a chamber temperature, the X-Max 3 will use its internal 300W heating element to reach and keep that temperature.

Active chamber heater in the X-Max 3
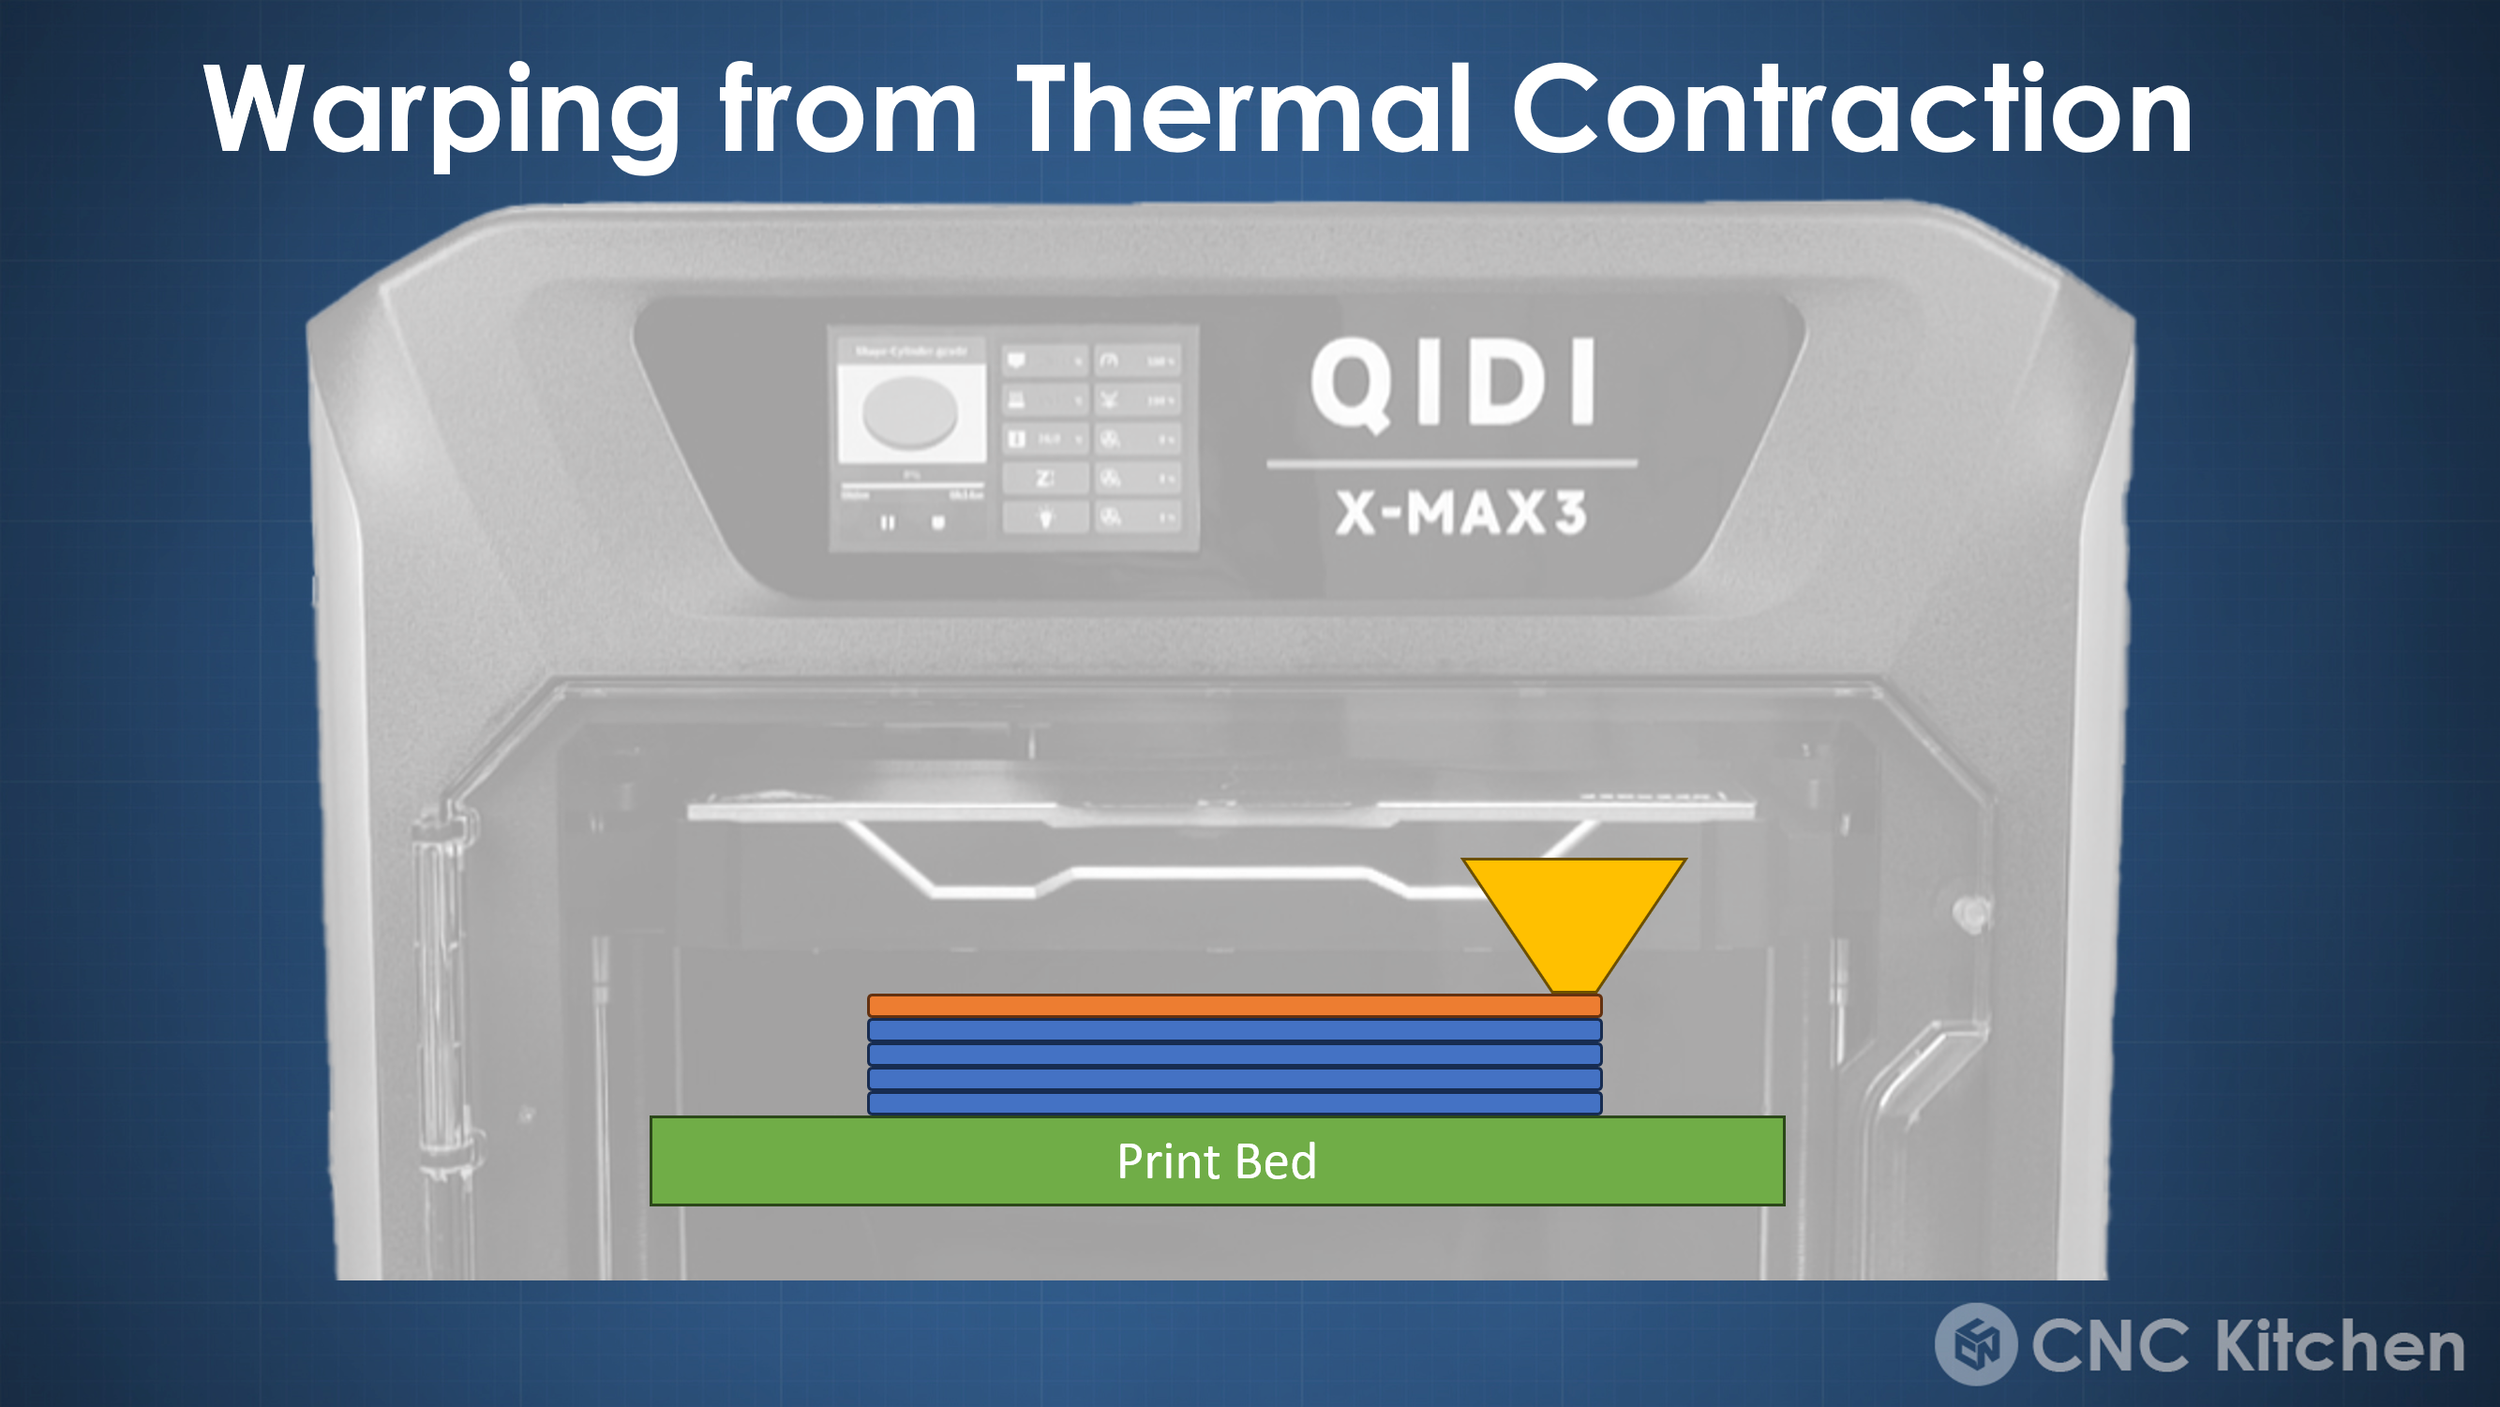
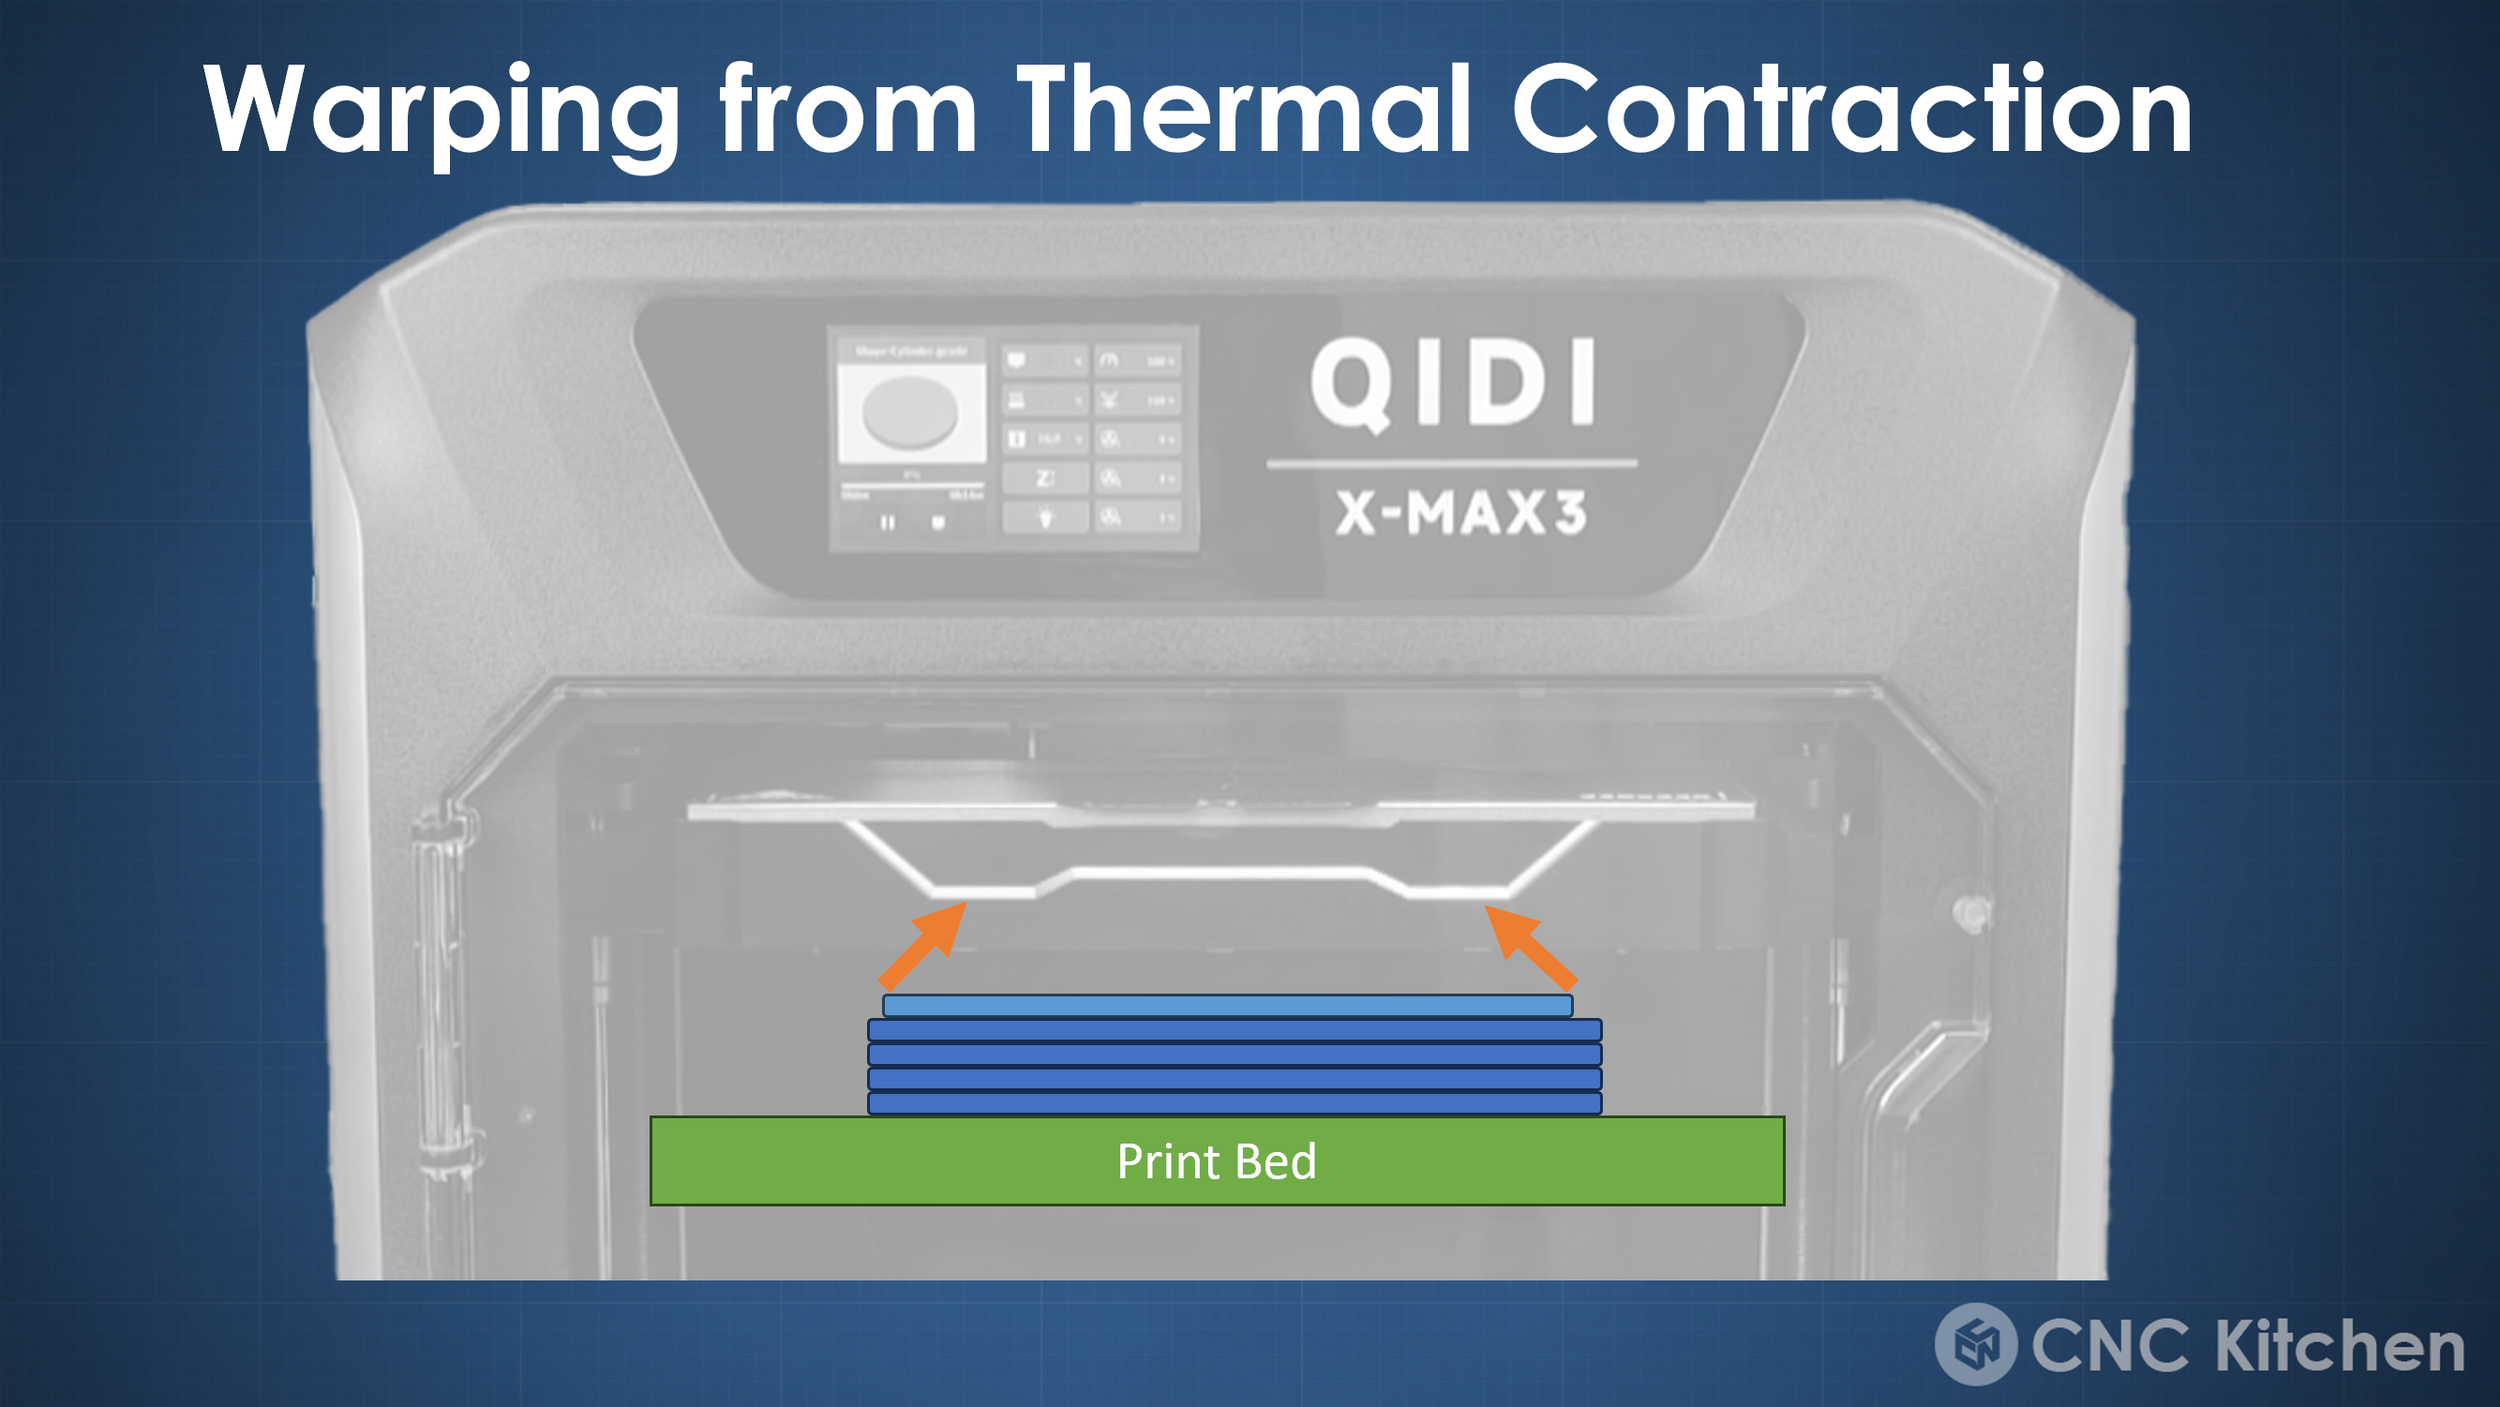
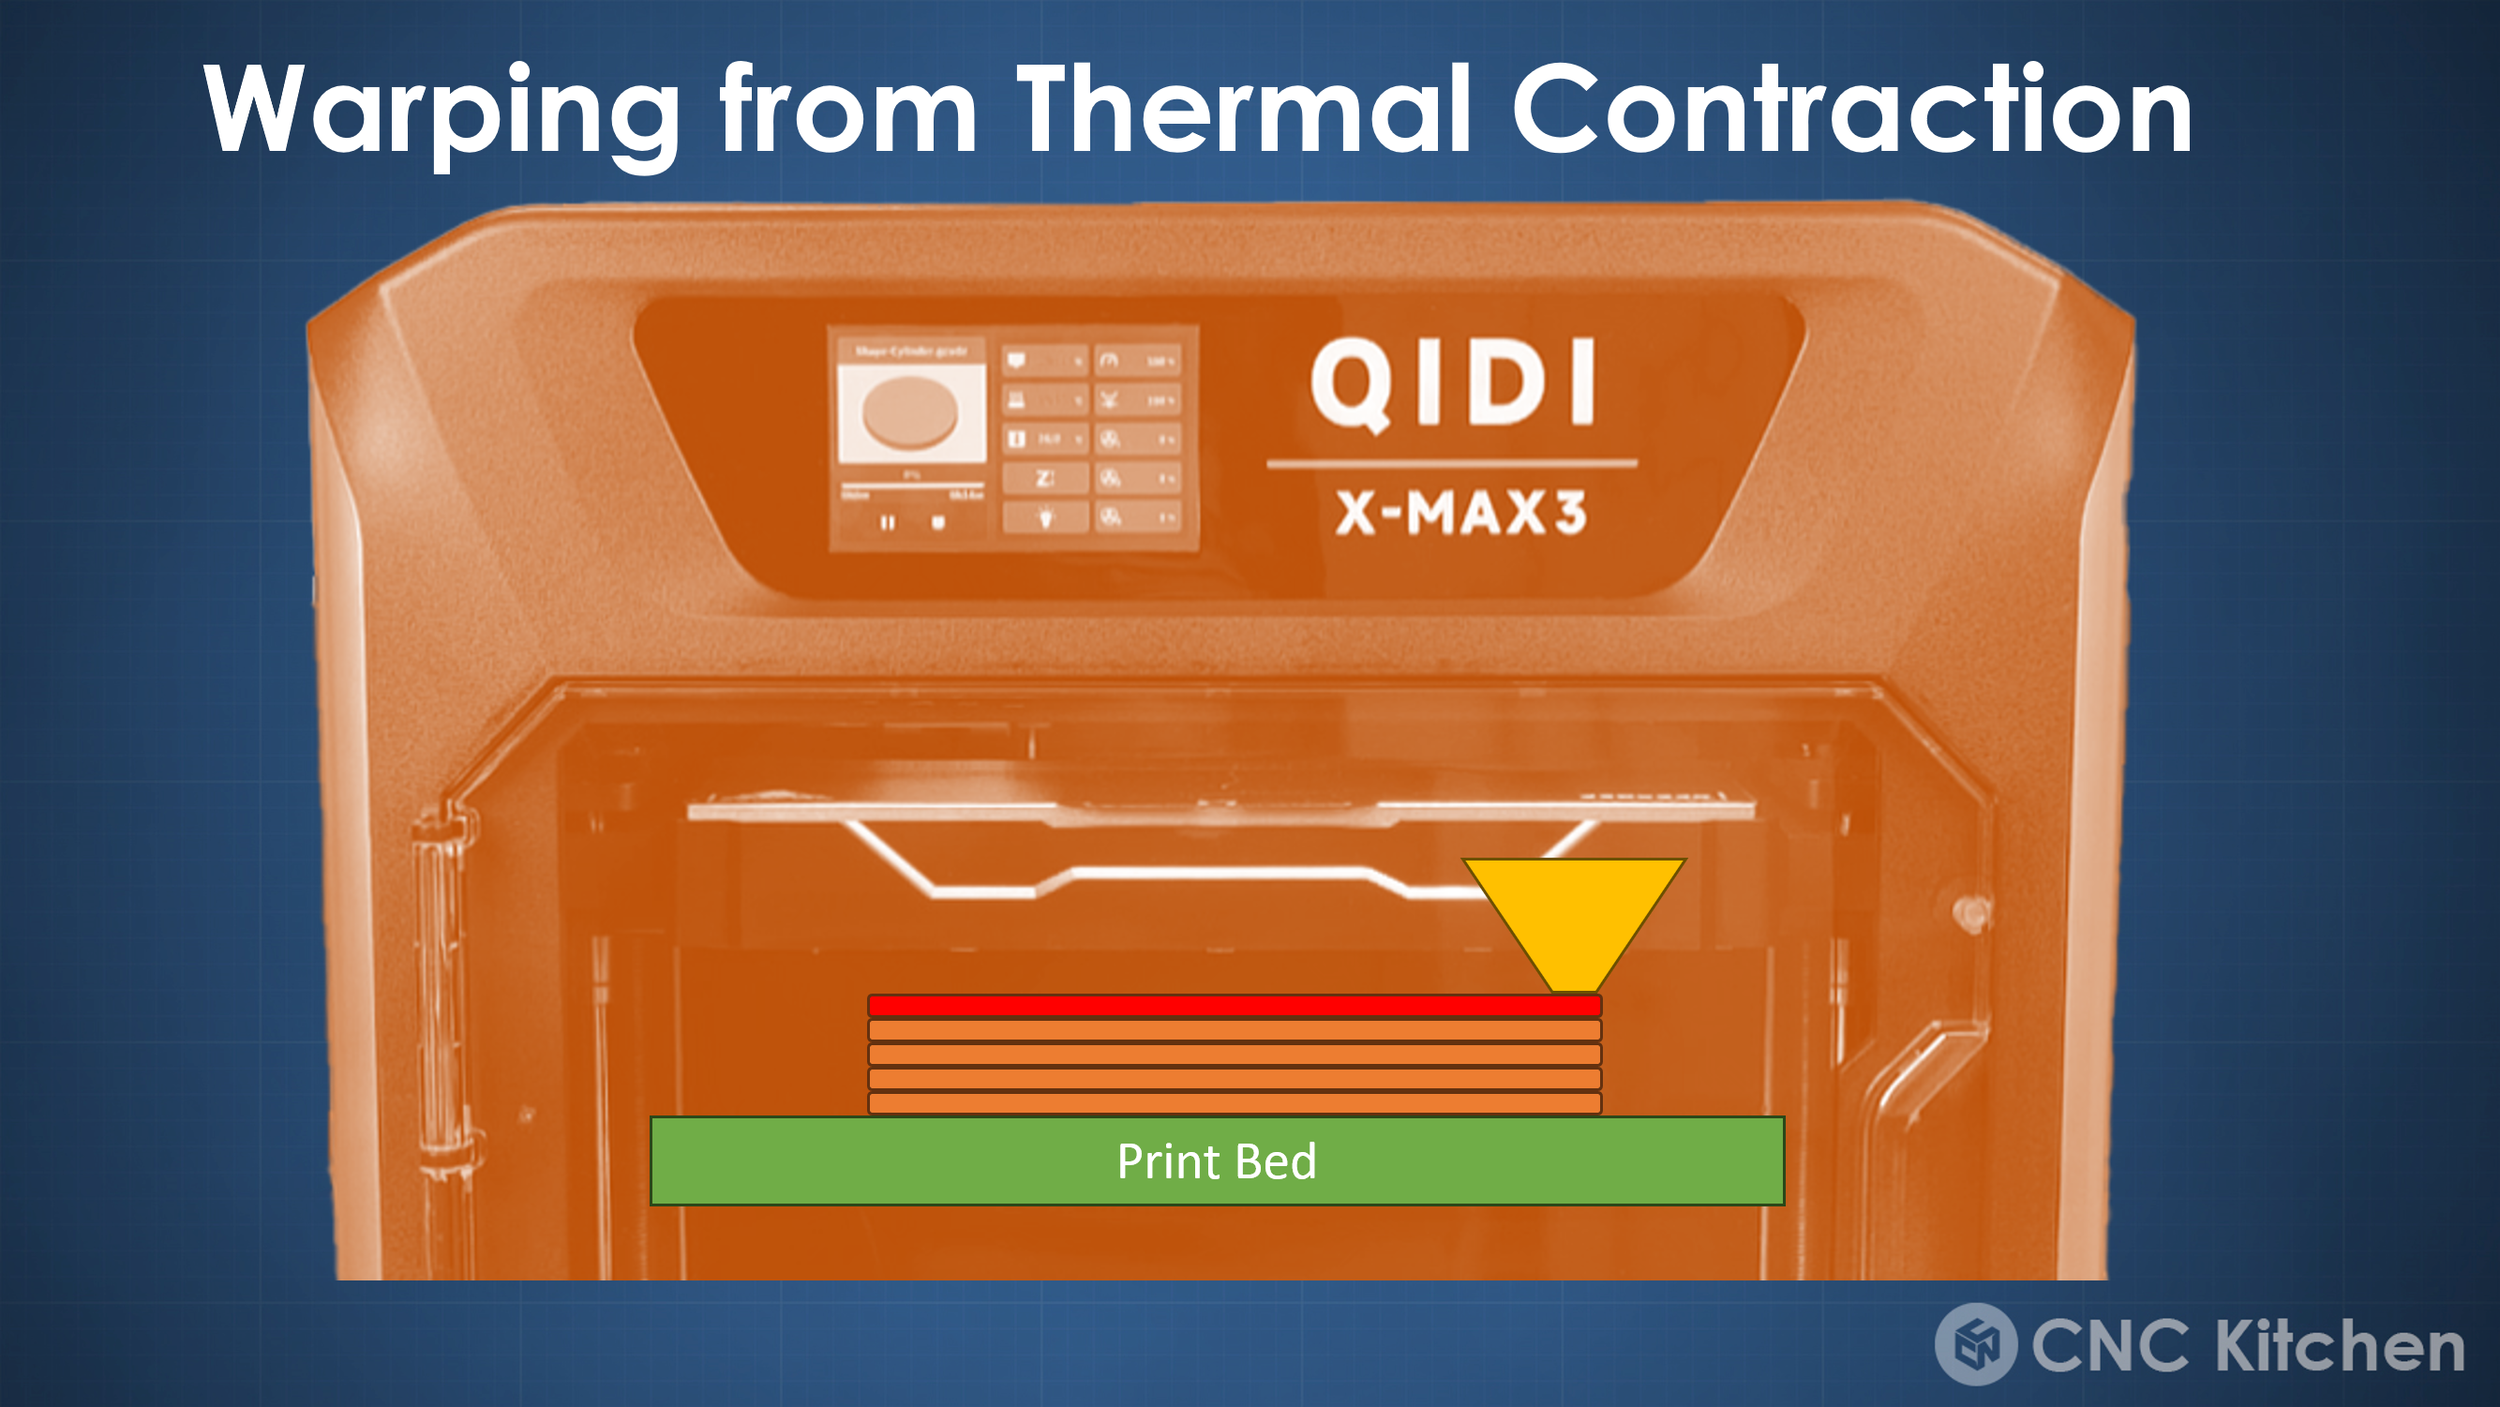
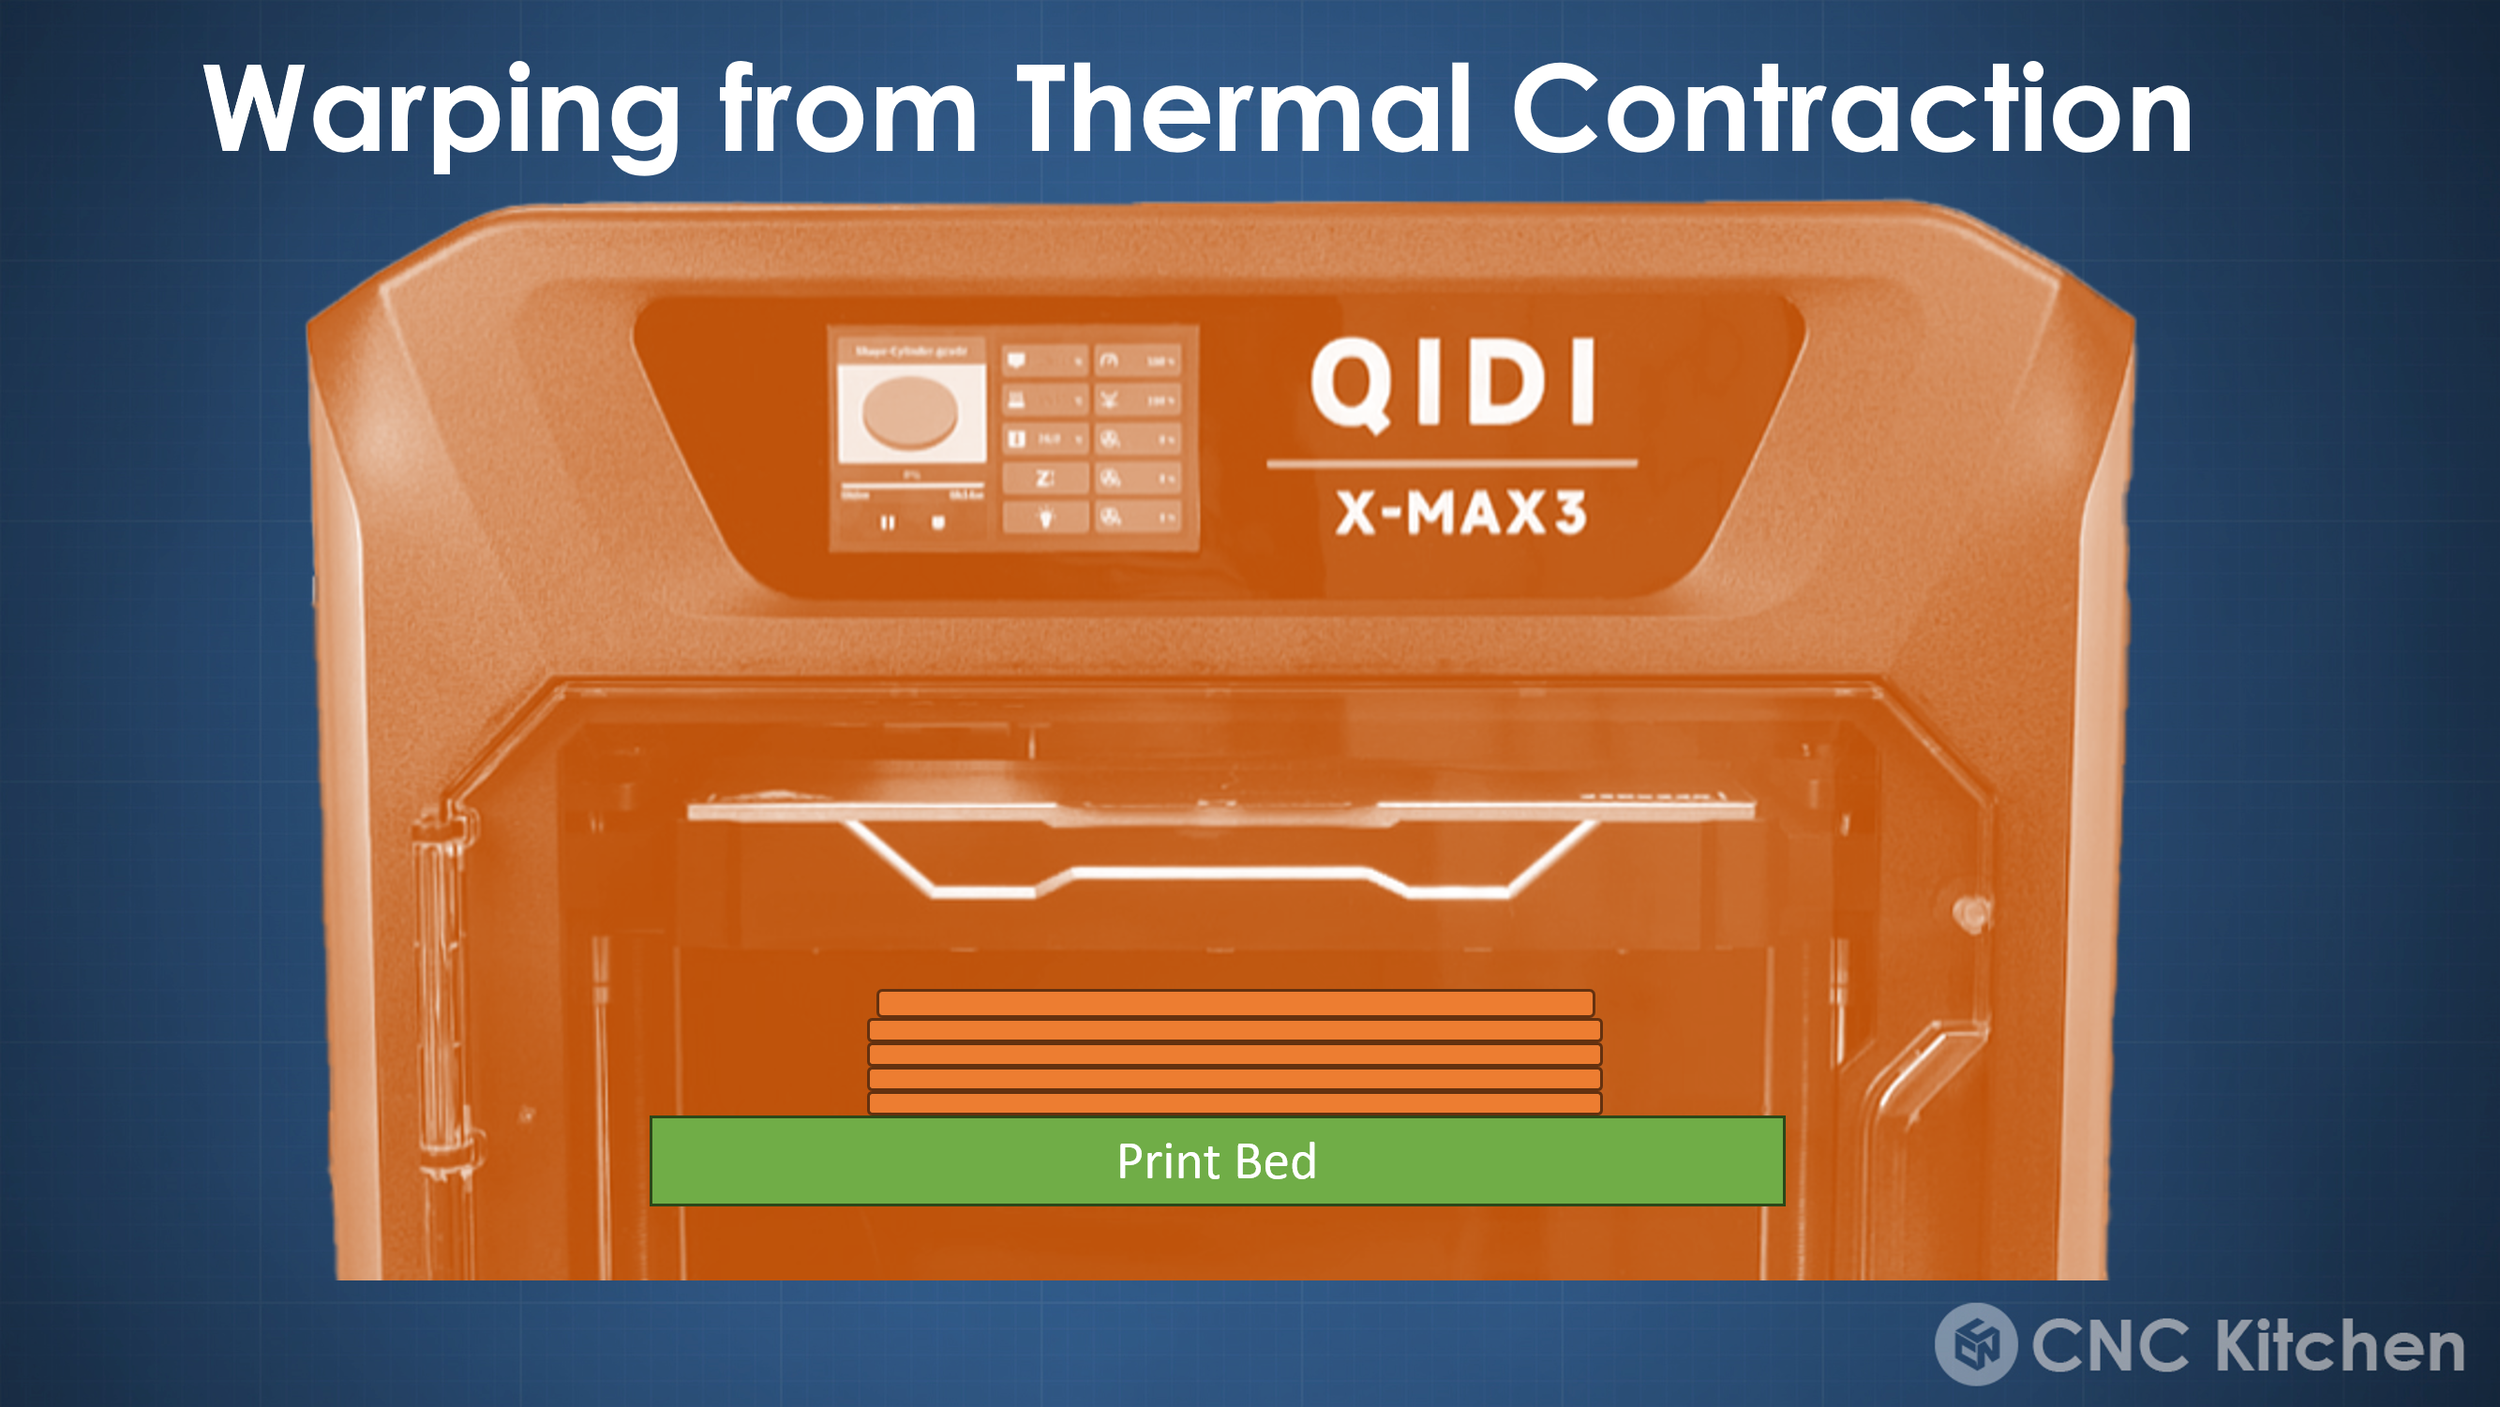
Printing at elevated temperatures benefits your prints in several ways. Let’s first talk about warping. Part of the warping simply comes from thermal contraction when the plastic printed at 250°C cools down to ambient temperature. If ambient, so in this case, chamber temperature is higher, the part will simply contract less because there is less temperature difference. The next benefit is that the printed part itself will stay softer when it’s hotter and, therefore, warp less.
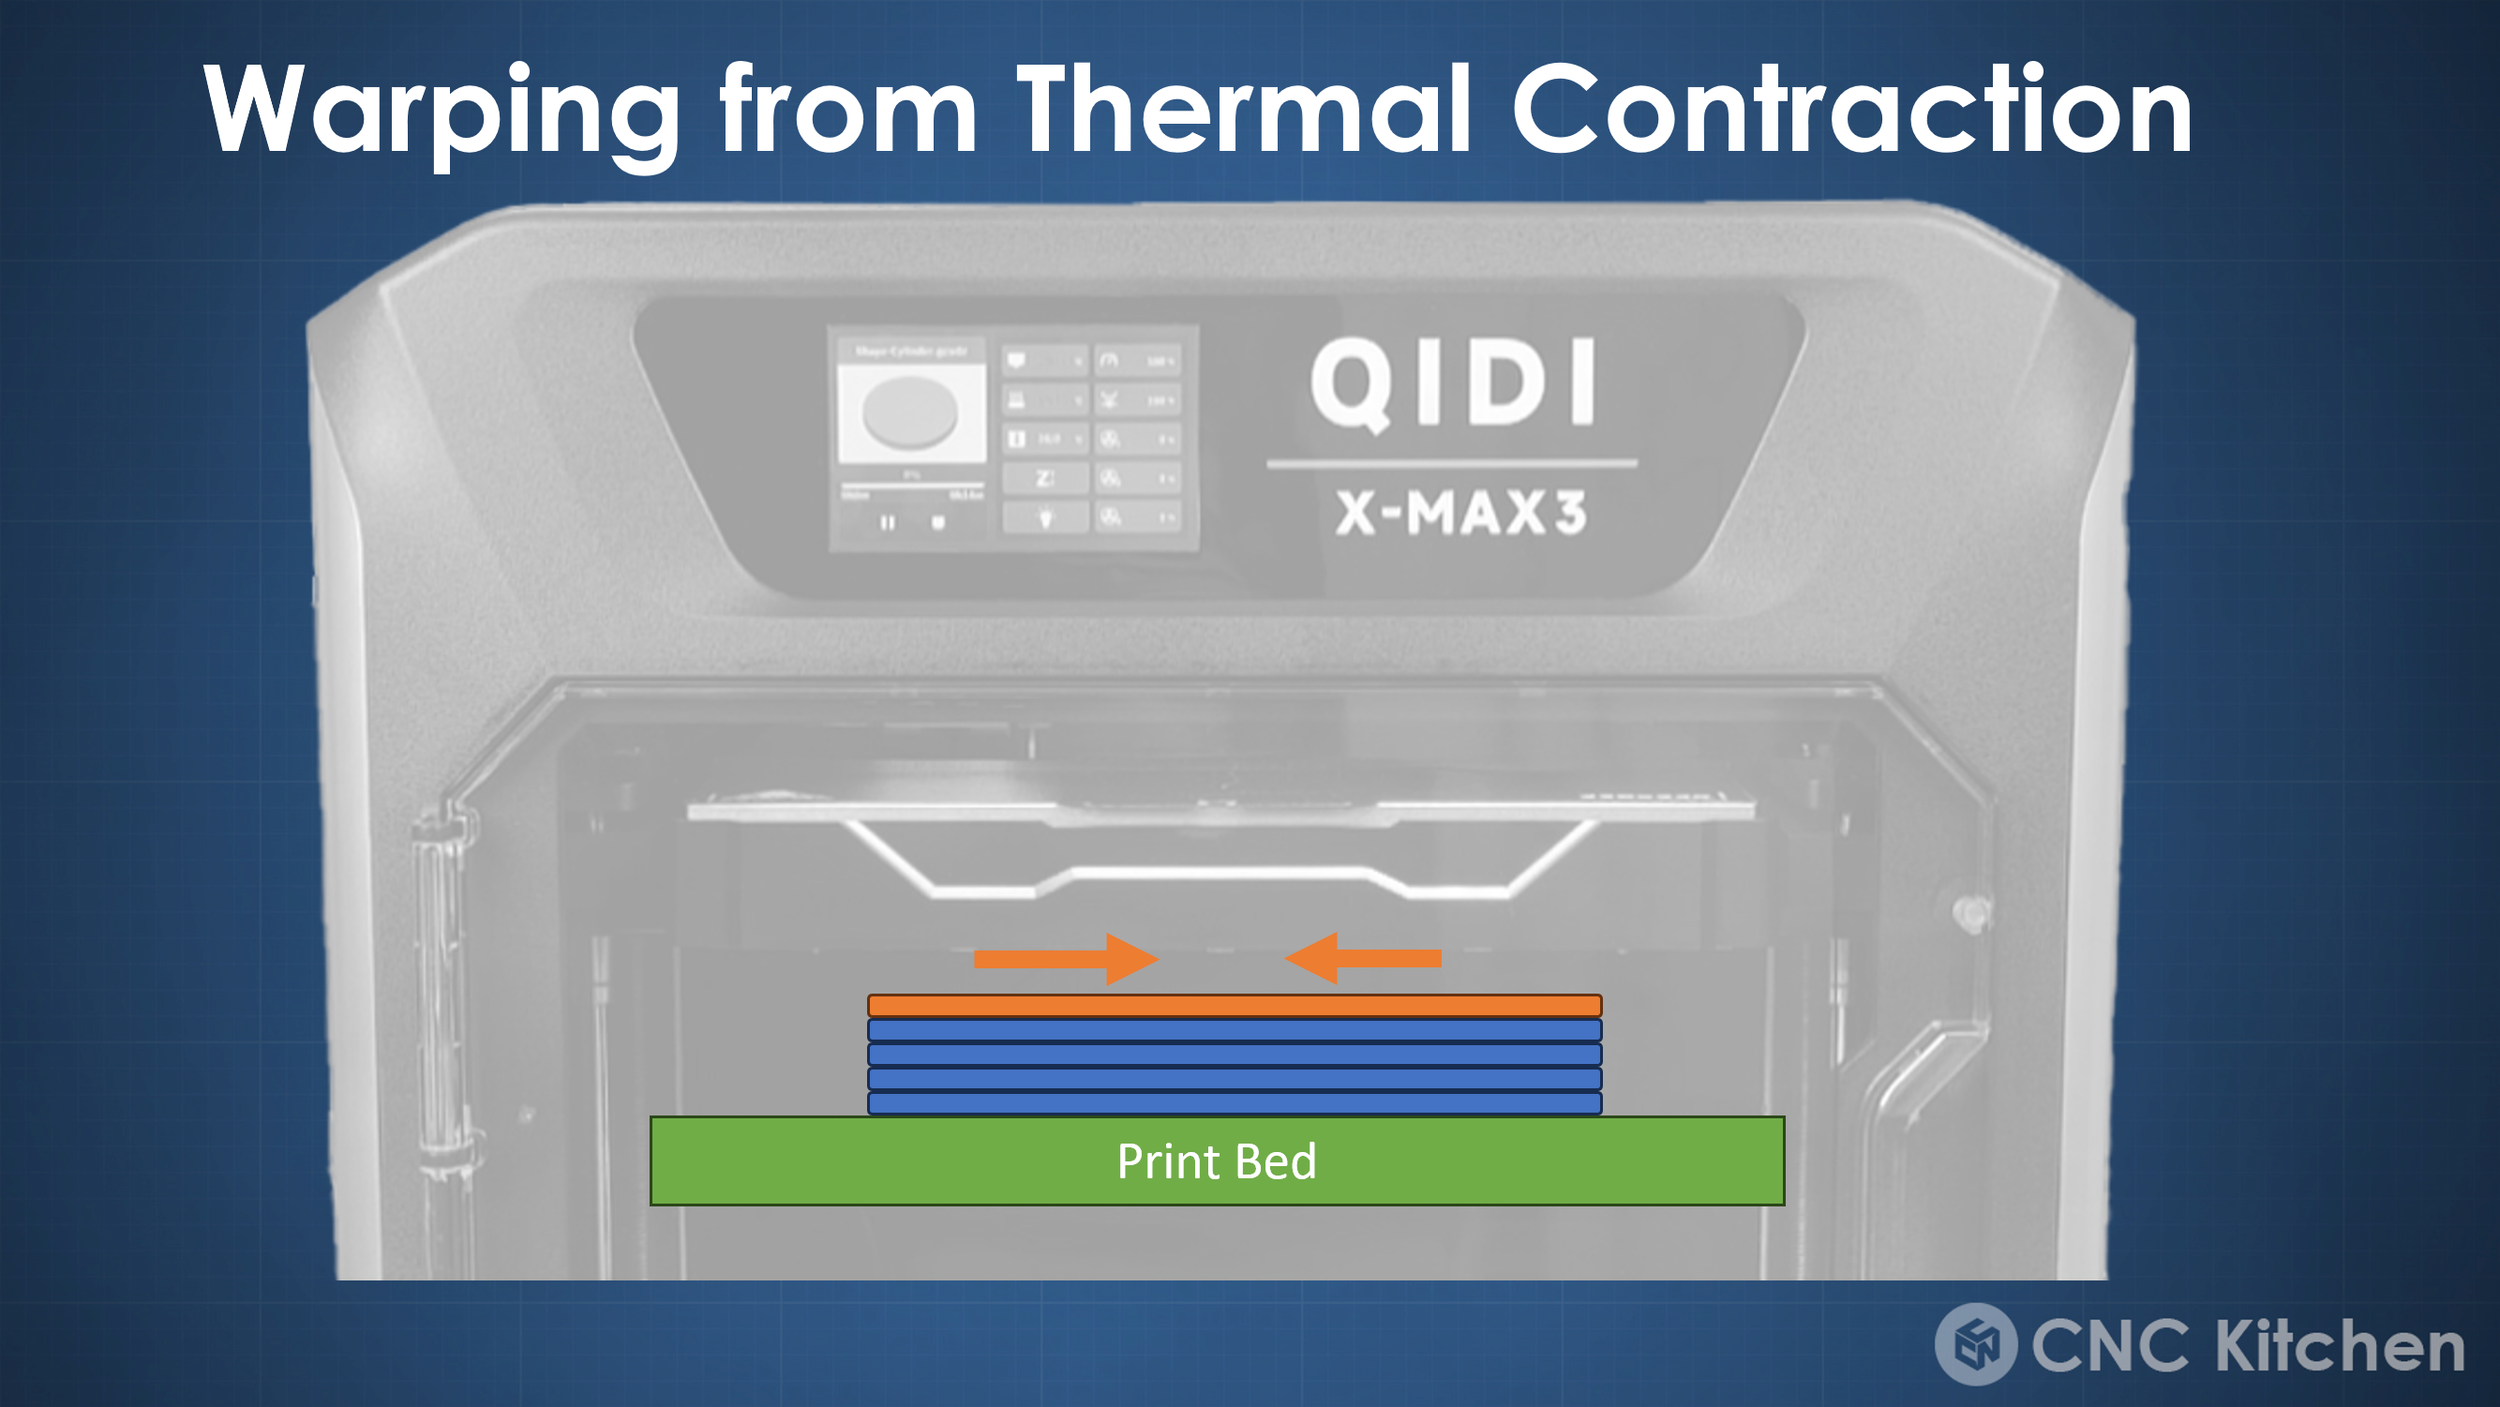

And finally, a problem that became increasingly important with the higher printing speeds we run nowadays. If you ever extruded filament quickly through your nozzle, you might have seen melt swell. This is the phenomenon that the molten string of material expands again after it leaves the nozzle if it doesn’t have enough time to re-orient into its new shape. And this is the same that happens when we print. We basically pin down a pre-stretched piece of plastic that wants to contract again, so it pulls on the previous layer, causing warping. Elevated chamber temperatures give the material time to relax in the printed state, releasing the stresses and basically inherently annealing the part.
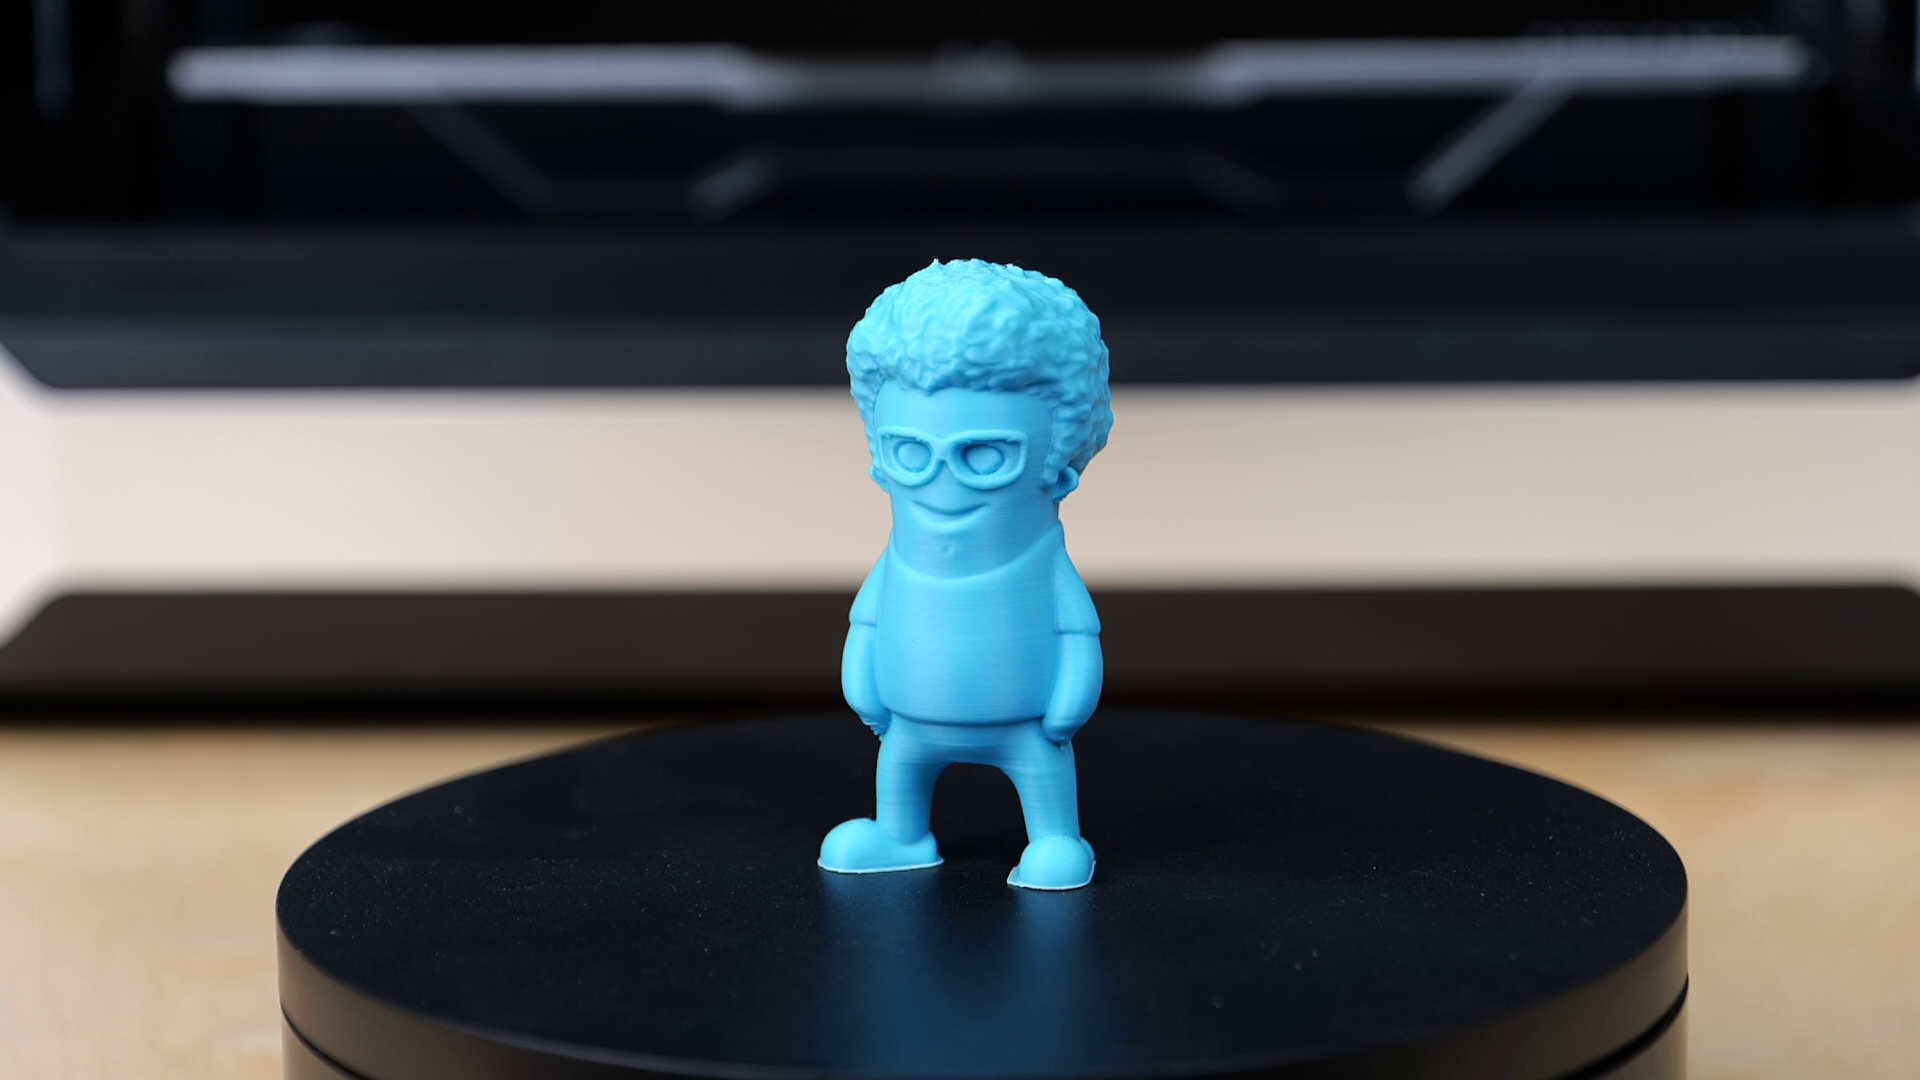
These are some reasons why a heated chamber is so beneficial to many demanding high-performance polymers. This is easily demonstrated when printing a part in ABS on an open 3D printer, where layers even delaminate. Printing the same part in an enclosed and even heated chamber like on the QIDI X-Max 3, we can’t see any of this behavior. And before all you Prusa lovers out there now scream that I only did this to make an MK4 look bad, I did the same on the X-Max 3 with an open door and lid and also got similar delamination.

Delaminated ABS print
This was a ton of talk about why enclosures and actively heated chambers help printing more demanding materials like ABS or Polycarbonate, but what we actually wanted to find out is how a higher ambient temperature affects layer adhesion. We have the samples printed, so let’s test them now on the Universal Test Machine.

Sample Mounted in my DIY Universal Test Machine
I didn’t test all of the 12 samples of each type but destroyed at least four, so we have a bit of statistics. Let’s first start with ABS and the reference samples. These are normal dogbone coupons printed flat on the bed, so we only test the strength of the polymer and not how well layers bond together. ABS is ductile but not super strong and the samples broke at 39 MPa on average, which is around 80 kg at these small parts. If layer adhesion were perfect, our standing samples would break at the same stress level, yet usually, 3D-printed parts are significantly weaker in this axis. And this is exactly what we see when testing the parts that were printed with the enclosure of the X-Max 3 fully open. They could only bear half of the stress and broke on average at 21 MPa. I fully expected that the parts in the passively heated chamber were significantly stronger, but at least with my settings and the Esun ABS, their strength only increased slightly, failing at 23 MPa on average with significant scatter. Let’s see if at least the ones printed in the chamber heated to 65 °C were stronger. And indeed they were. They broke on average at 29 MPa, which is almost 50% stronger than the last samples, reaching 75% of our reference strength. This is honestly very impressive for ABS and shows how much these more difficult-to-work-with materials benefit from the right printer setup.

Test results ABS
PRUSAMENT PCBlend is a bit different because it was engineered in a way to be well printable on open 3D printers. The samples extruded at ambient temperature were already able to reach 65% of the reference layer strength. When enclosing the print volume, the layer adhesion still improved more, reaching 72% of the reference strength in the passively heated chamber and an amazing 77% when printing at a set 65 °C!

Test results PCBlend
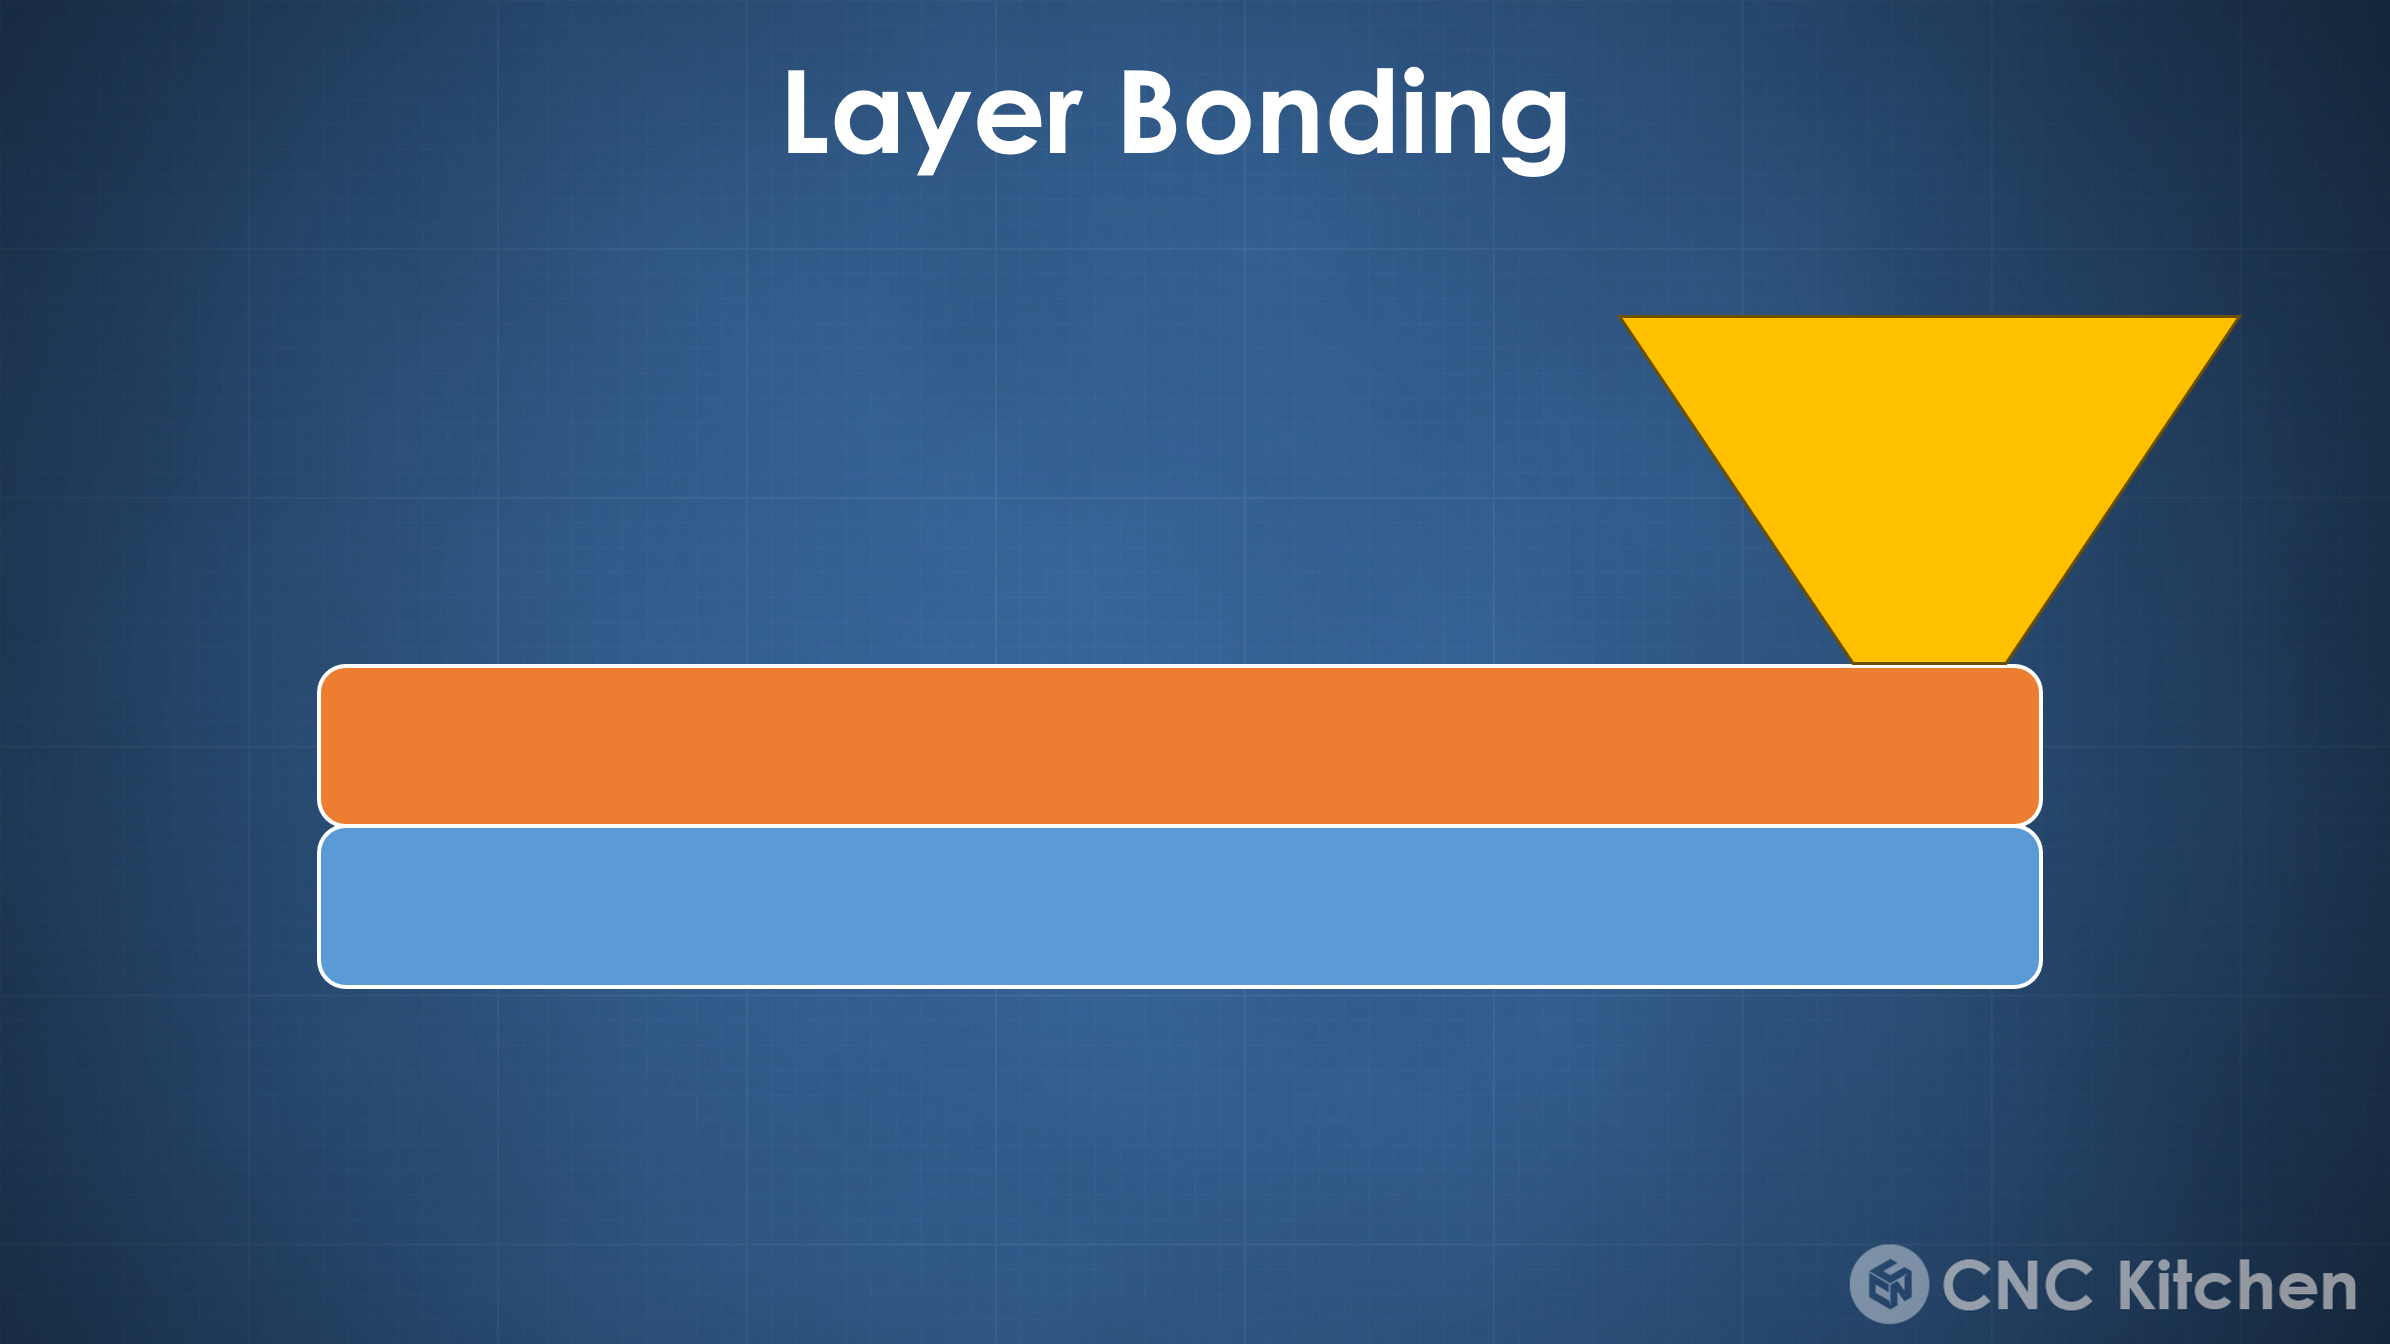
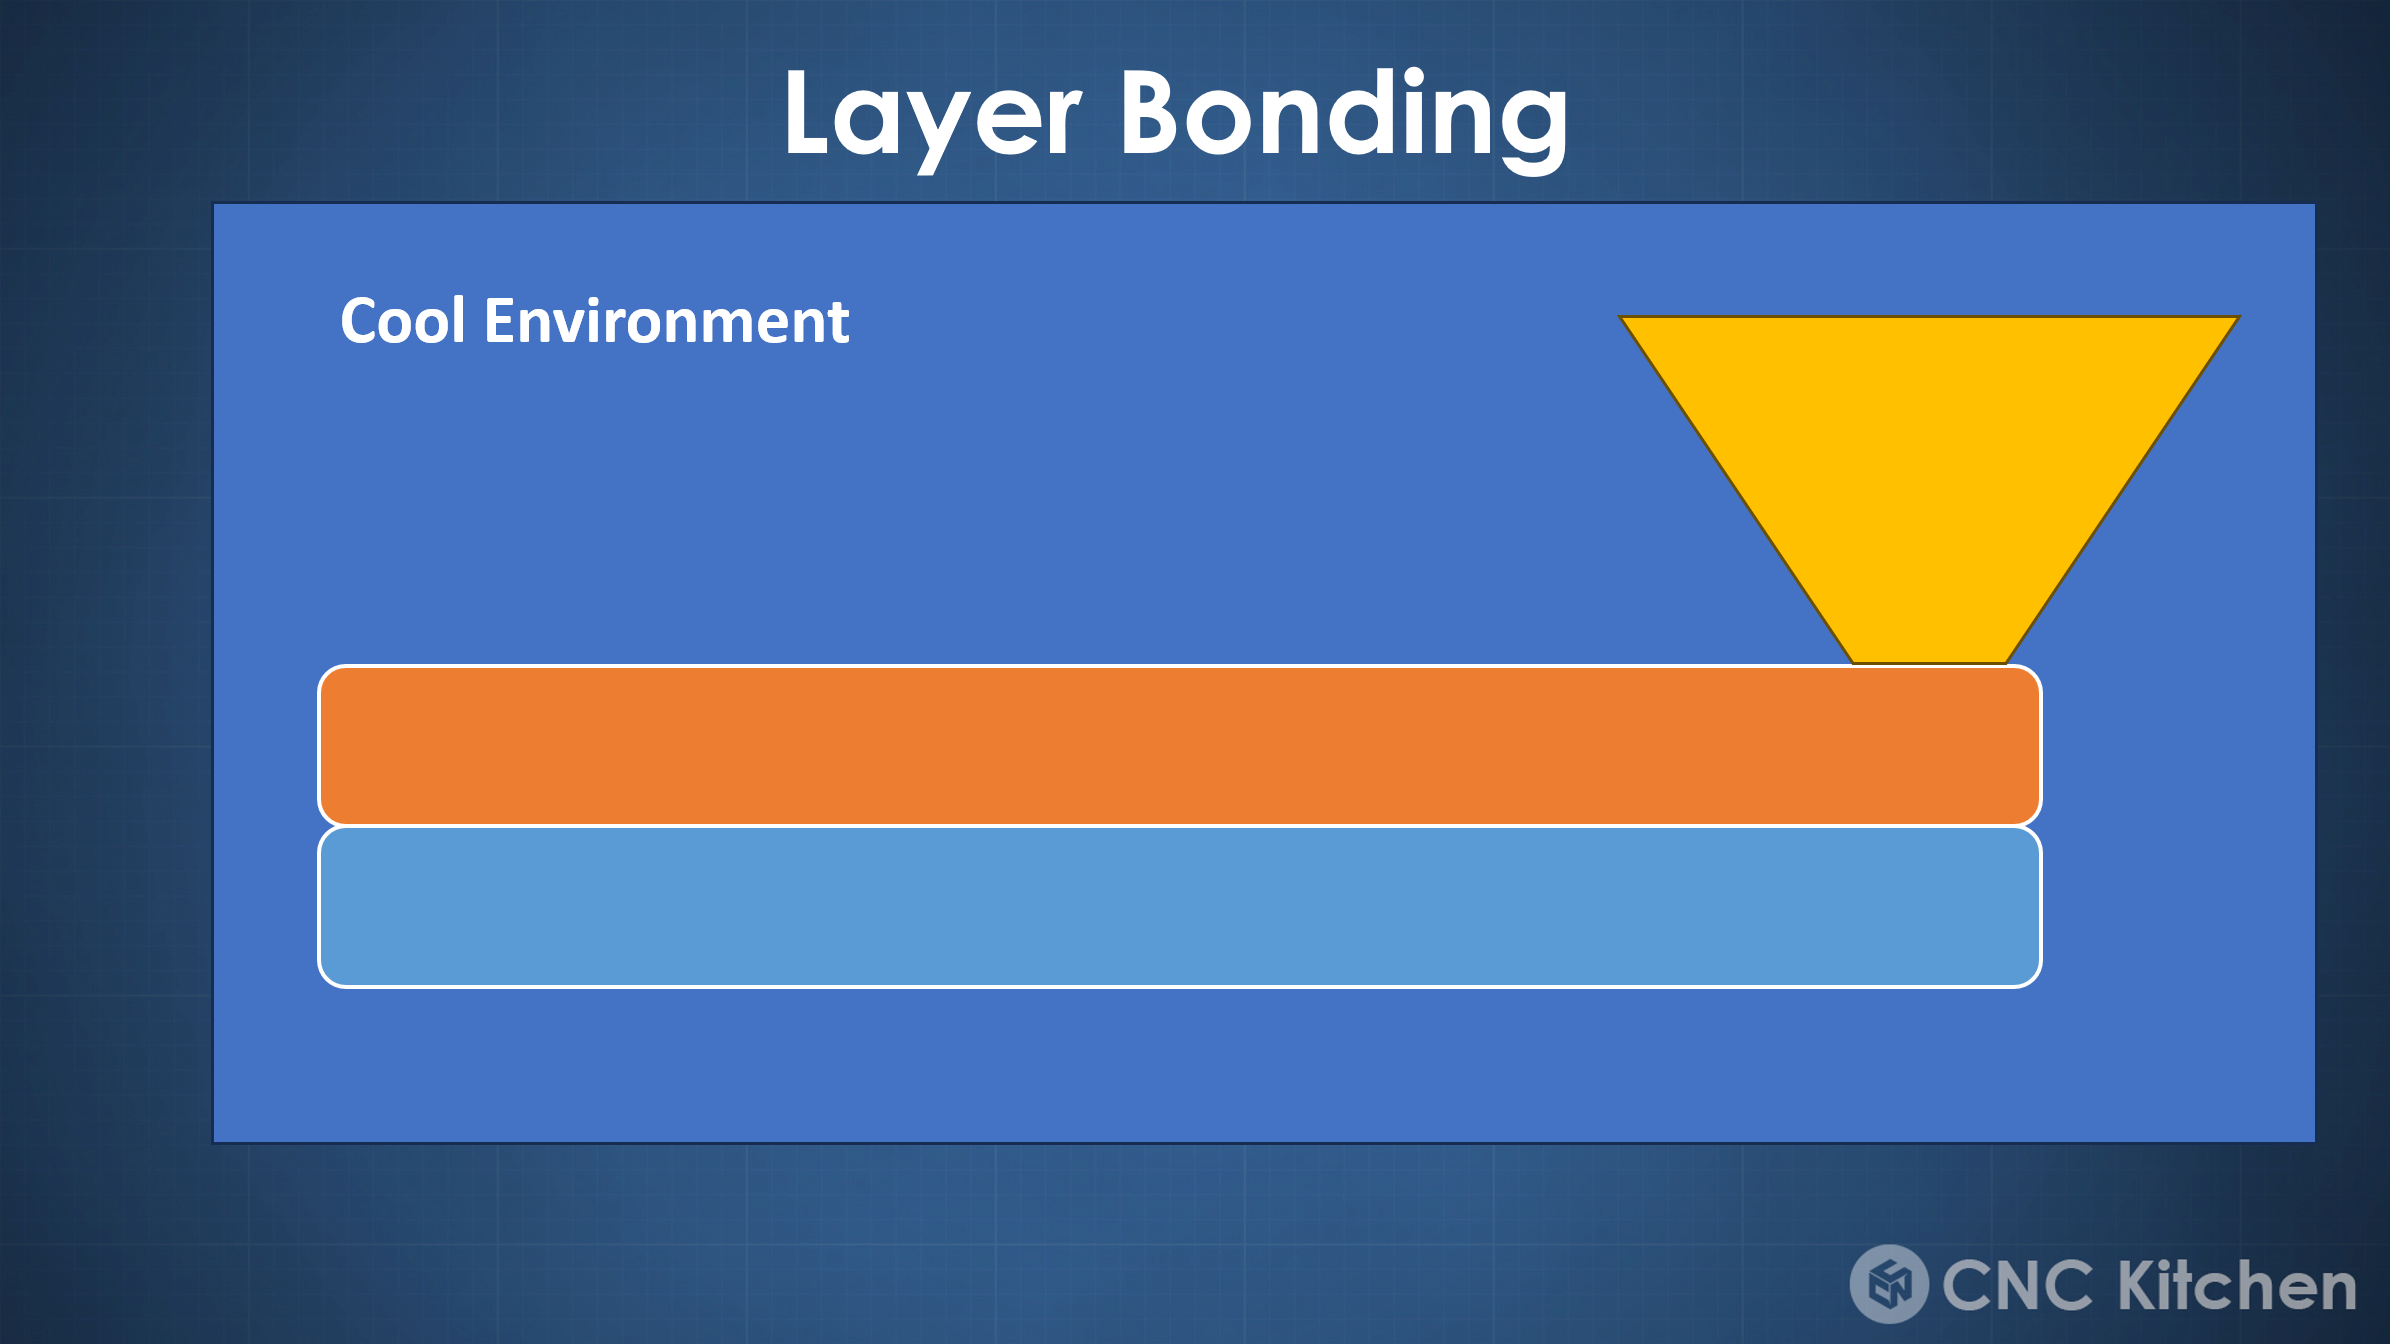
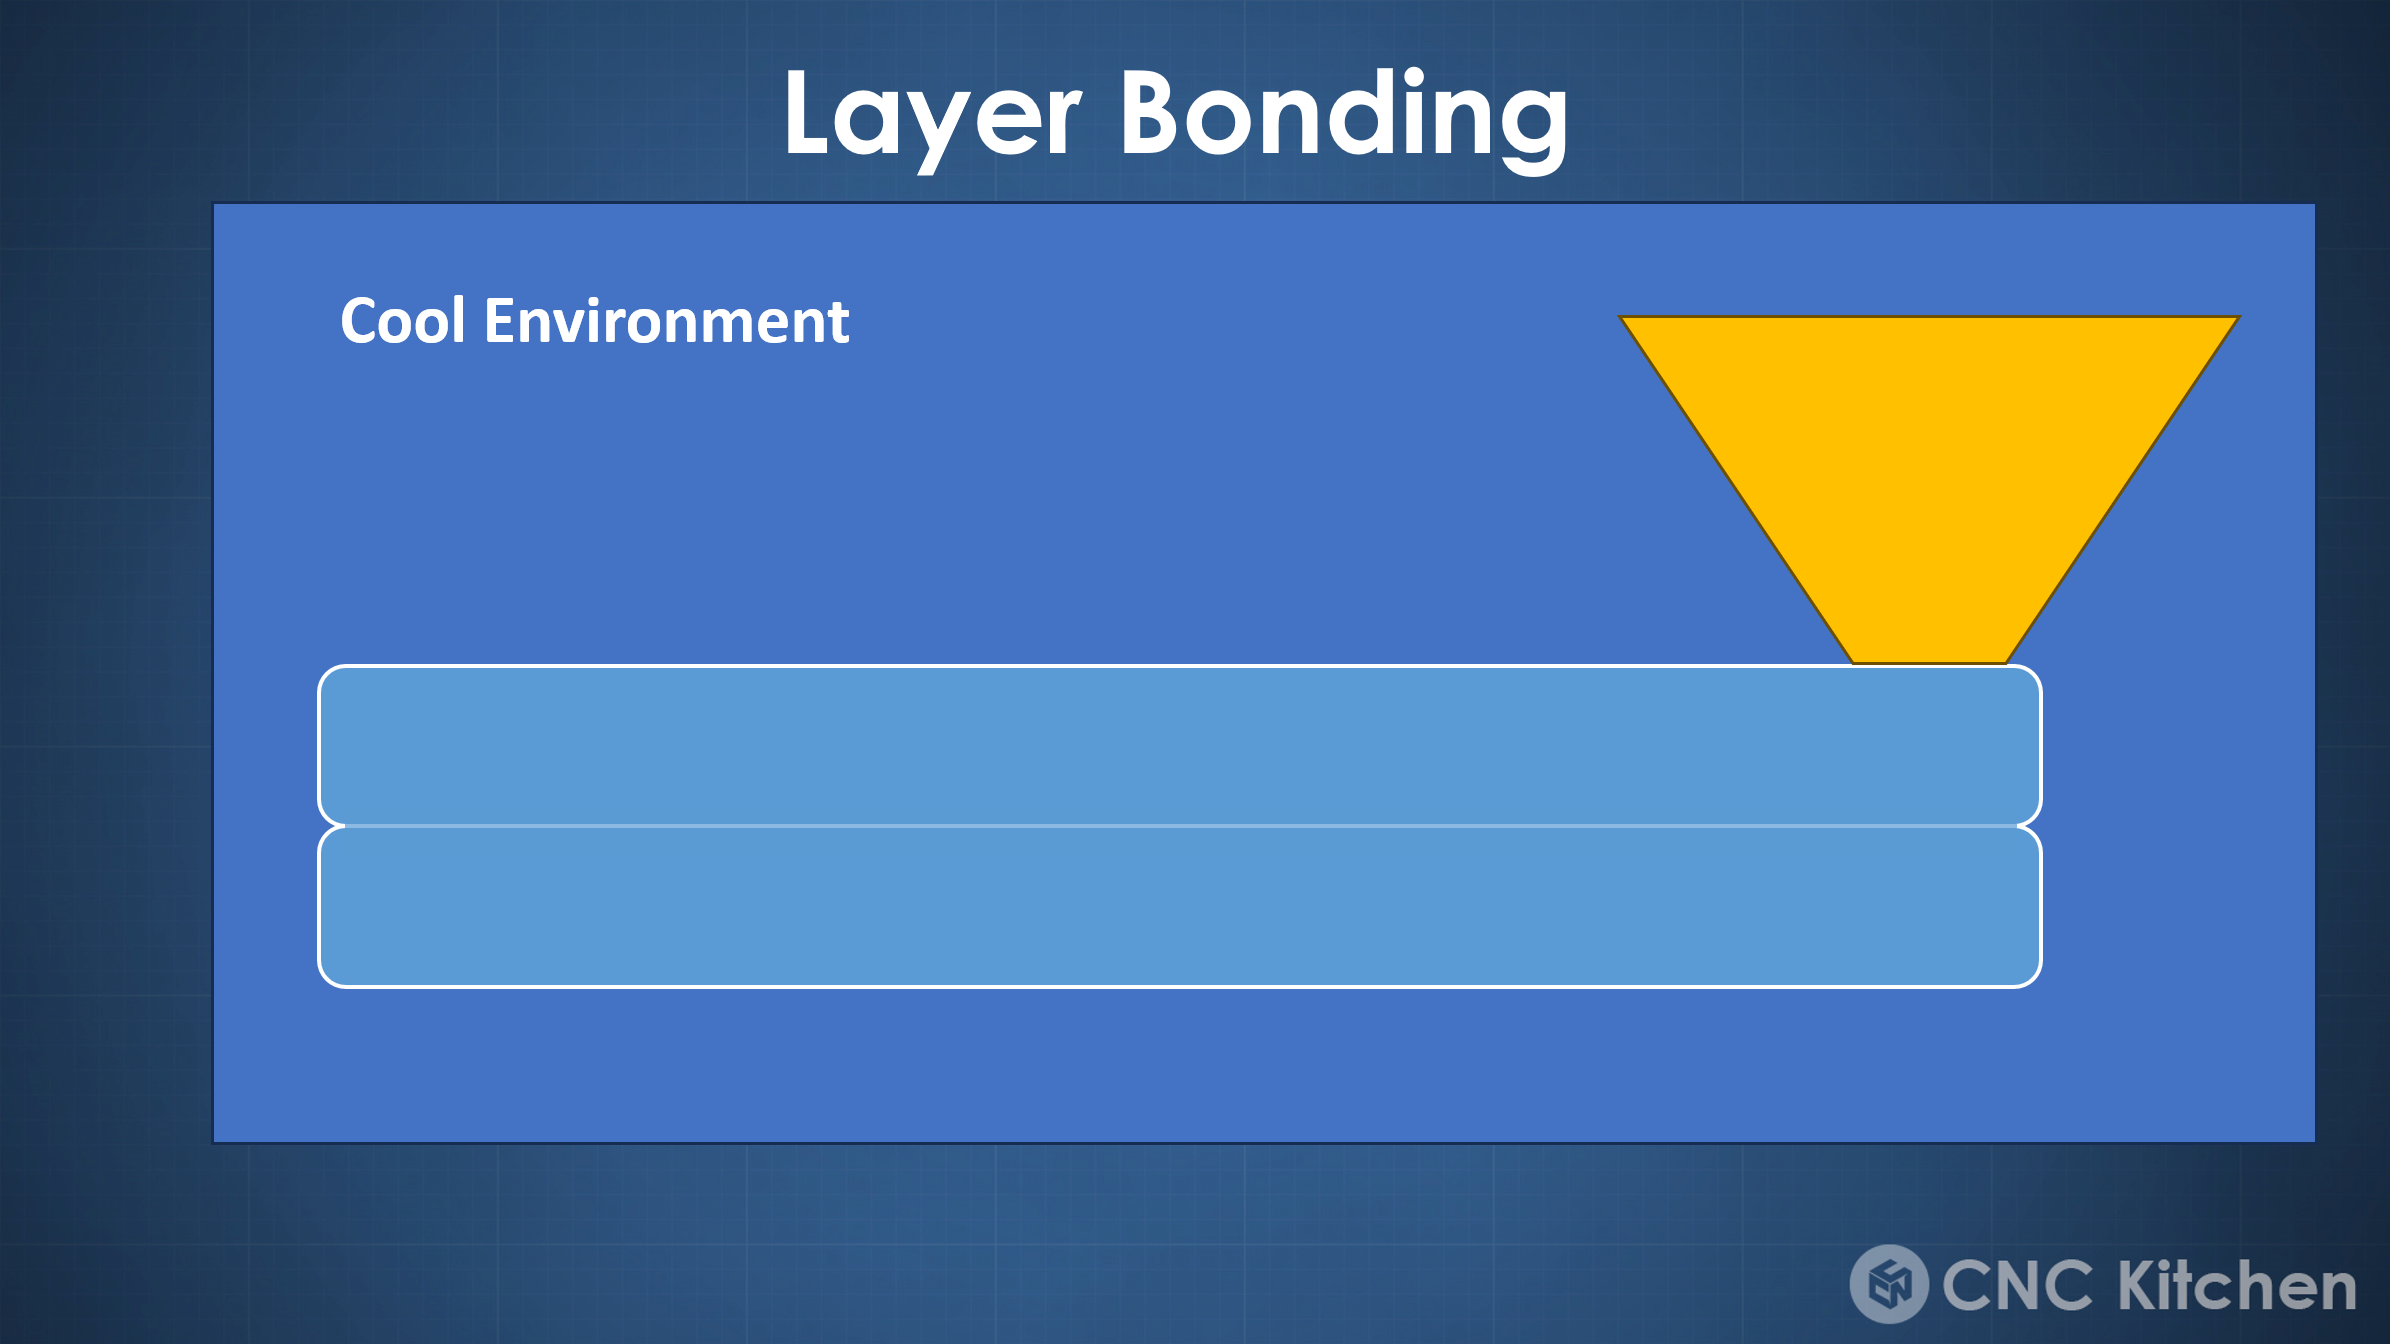
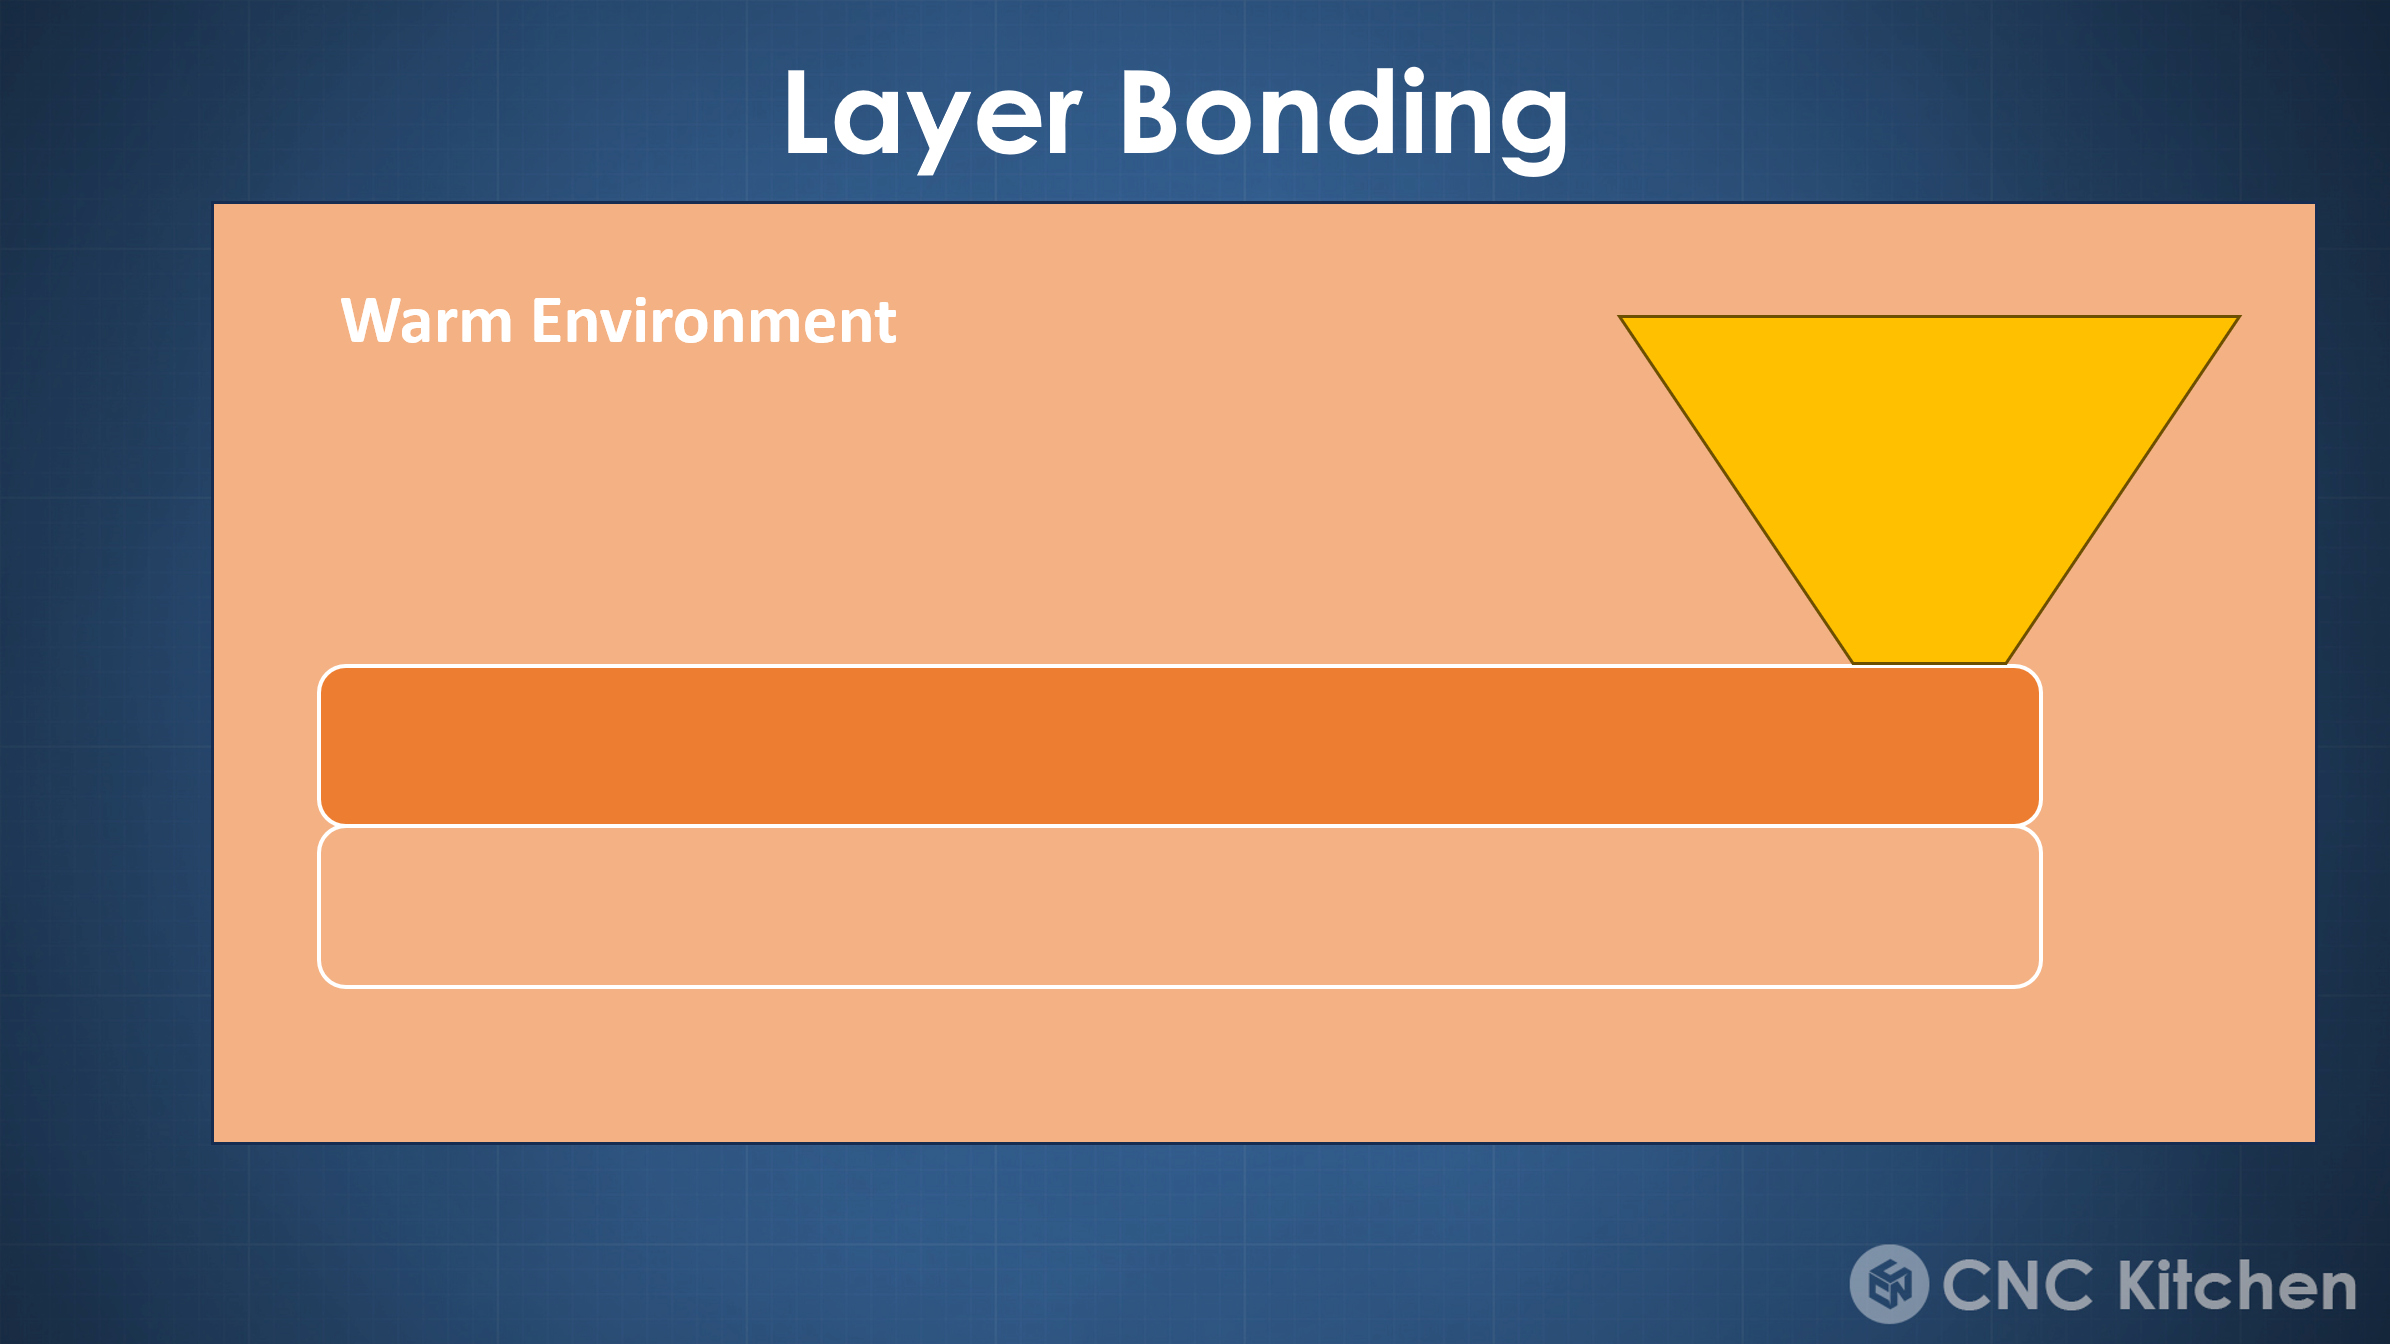
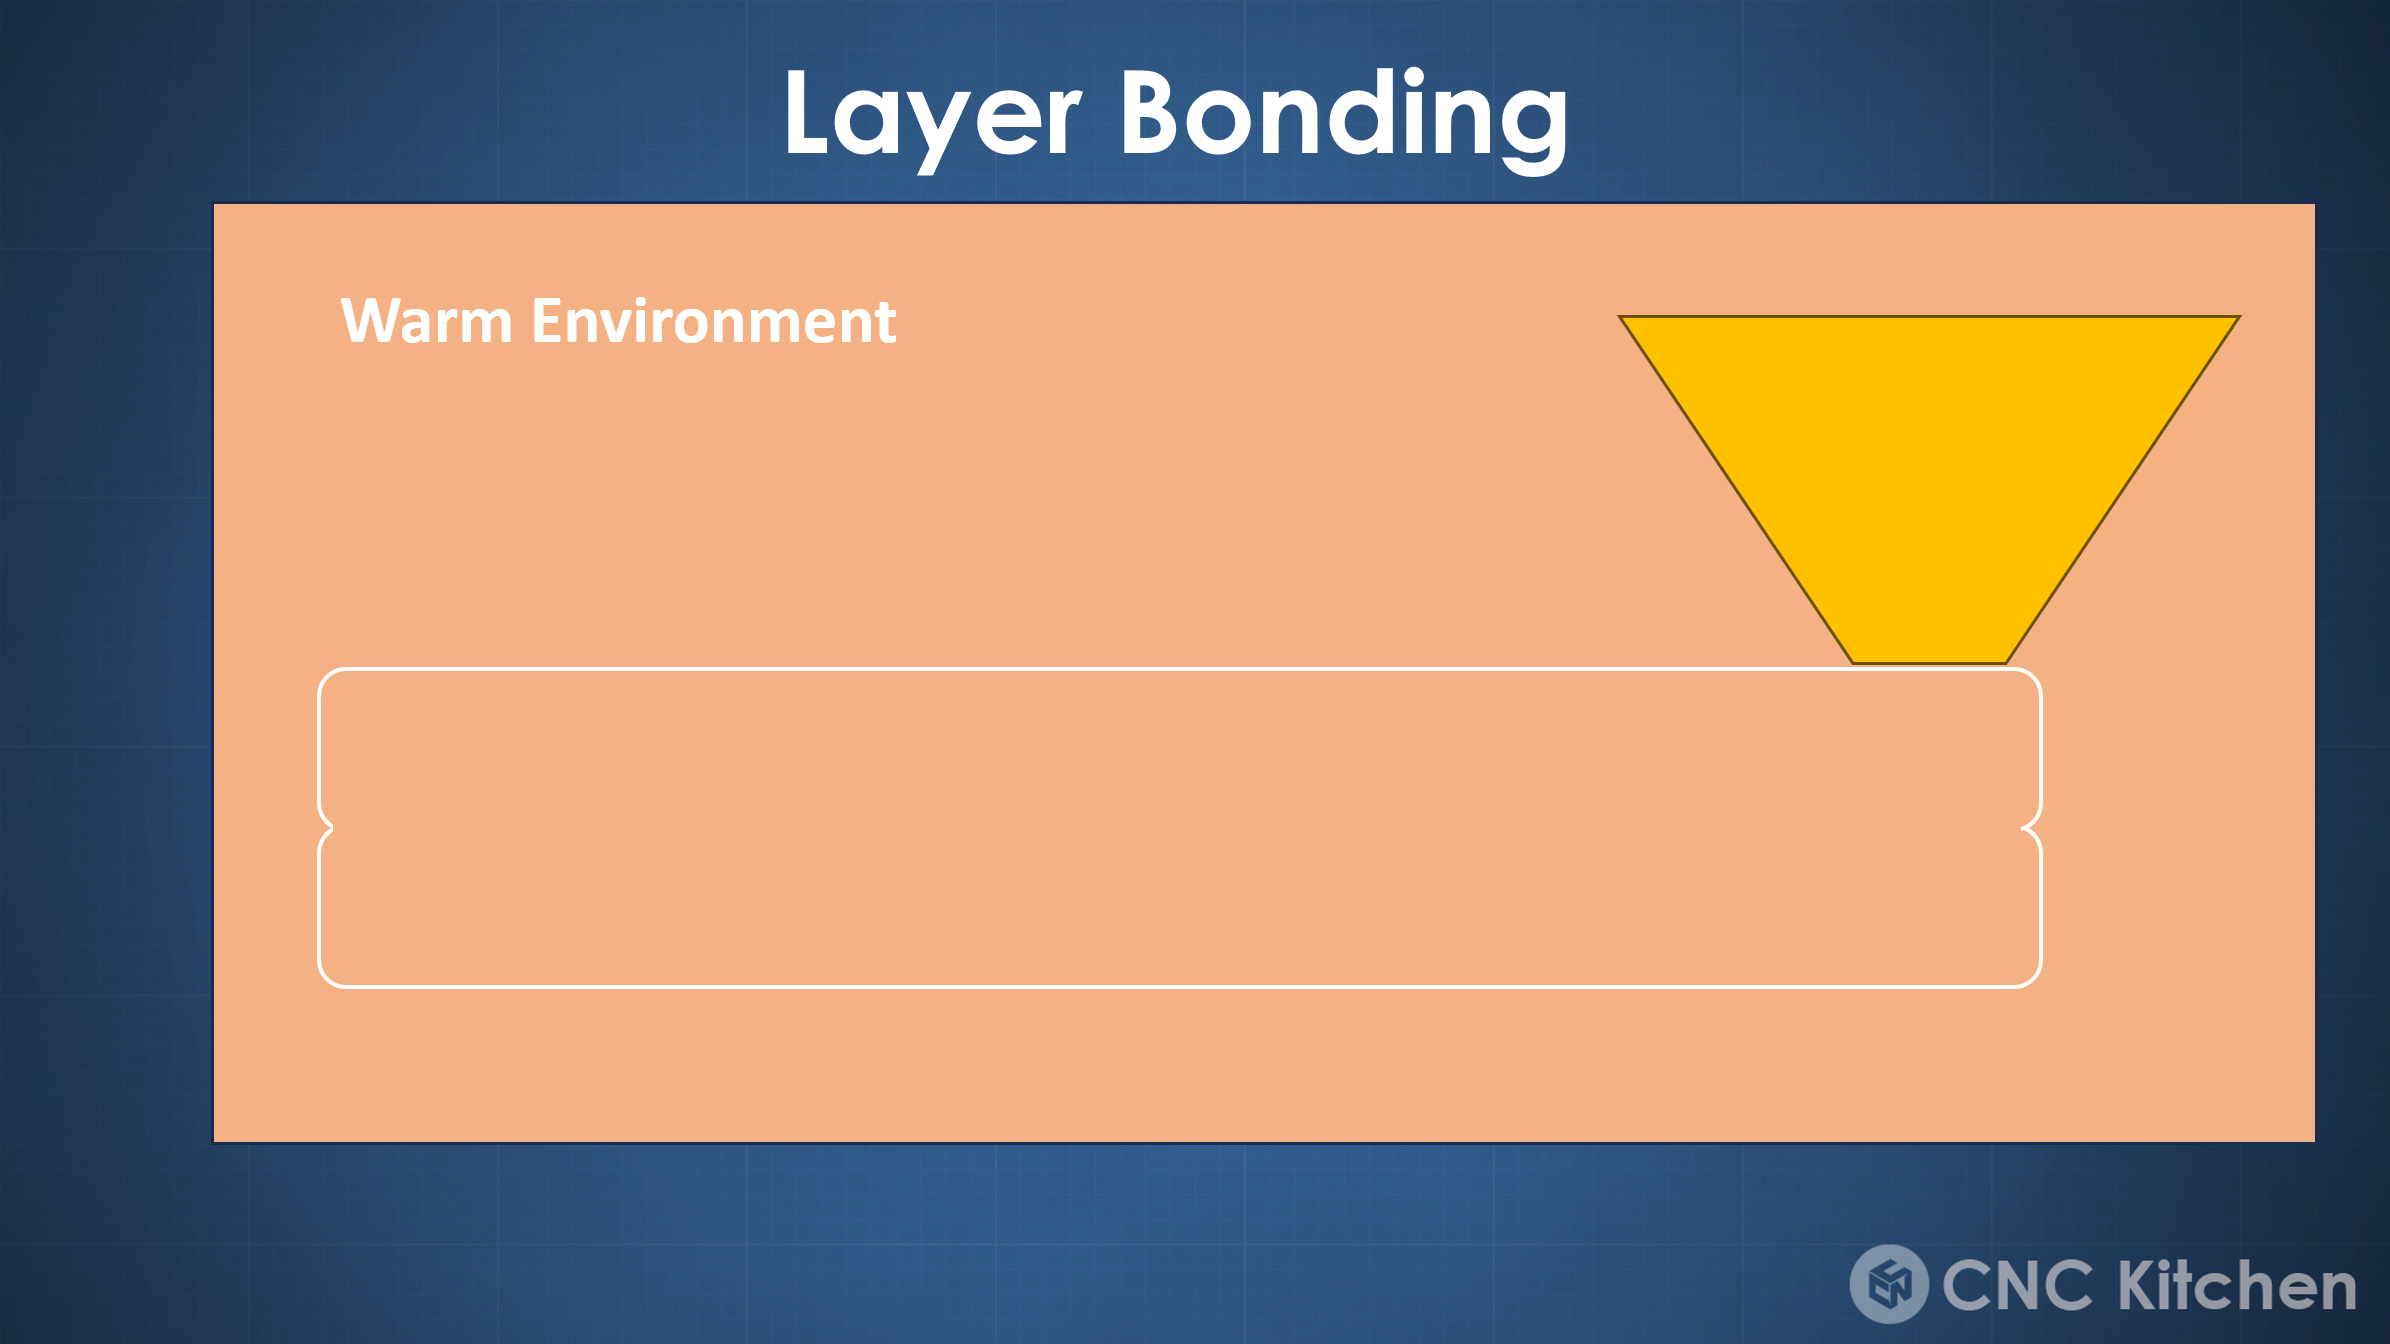
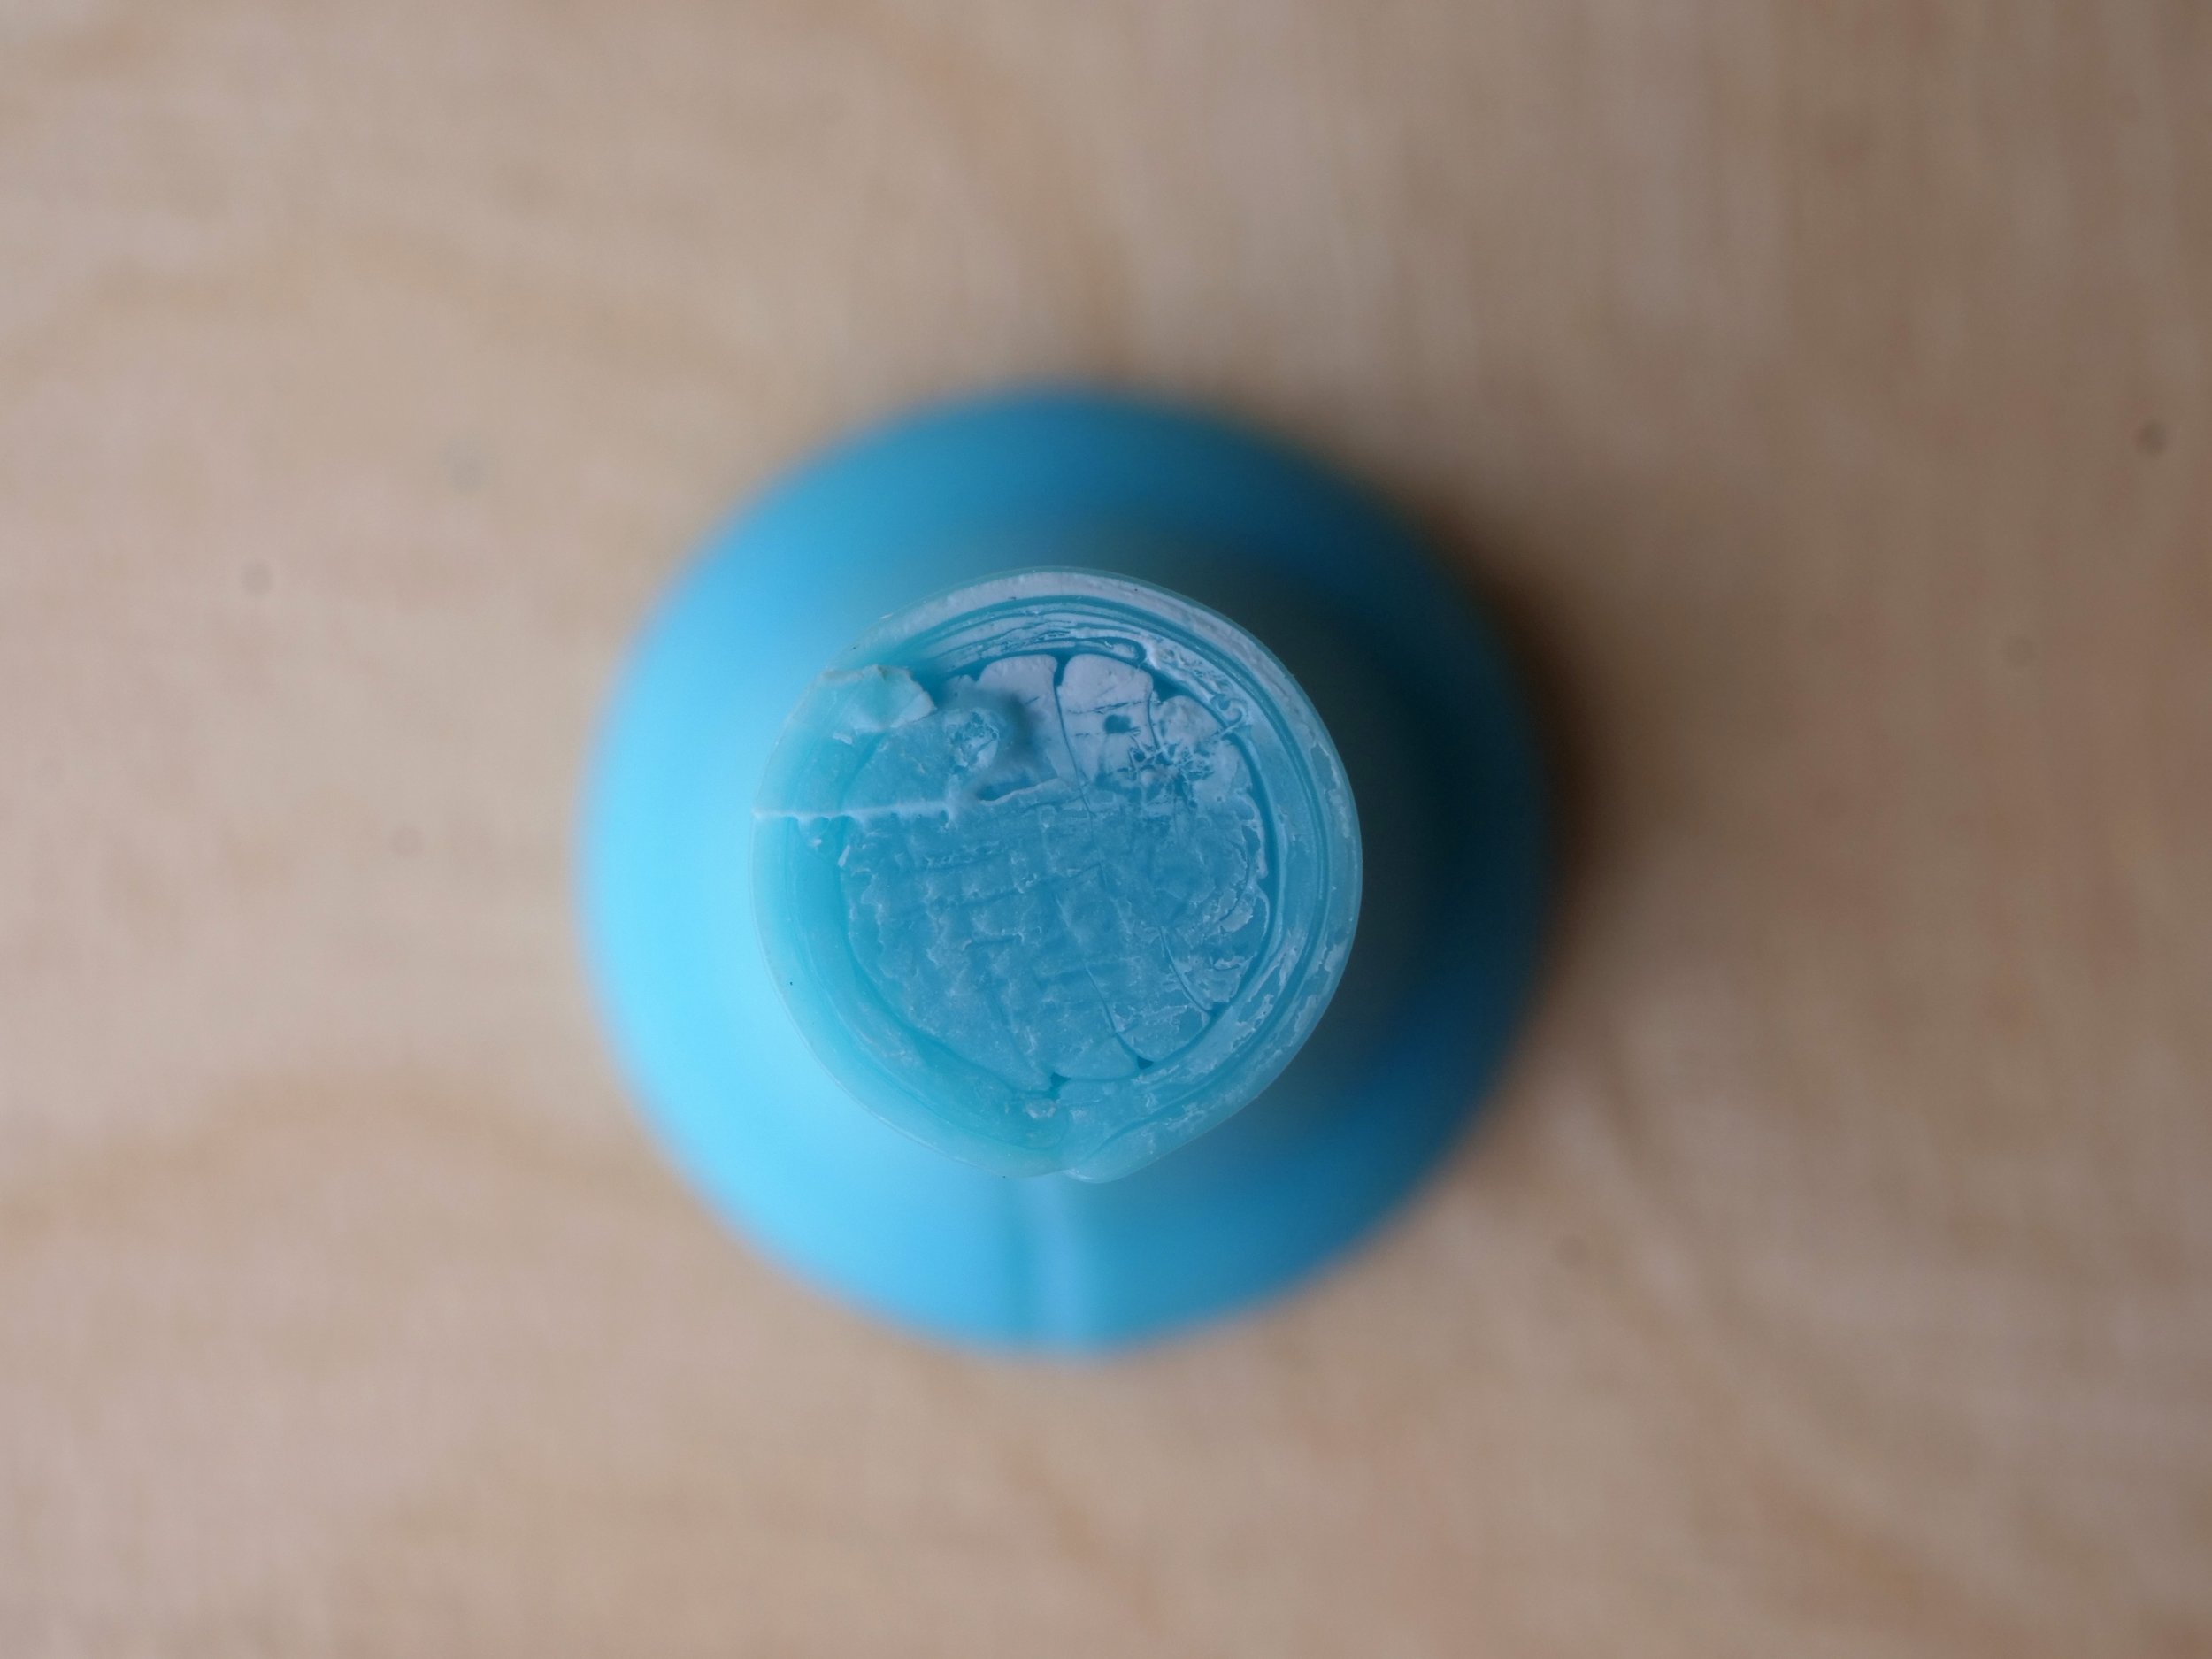
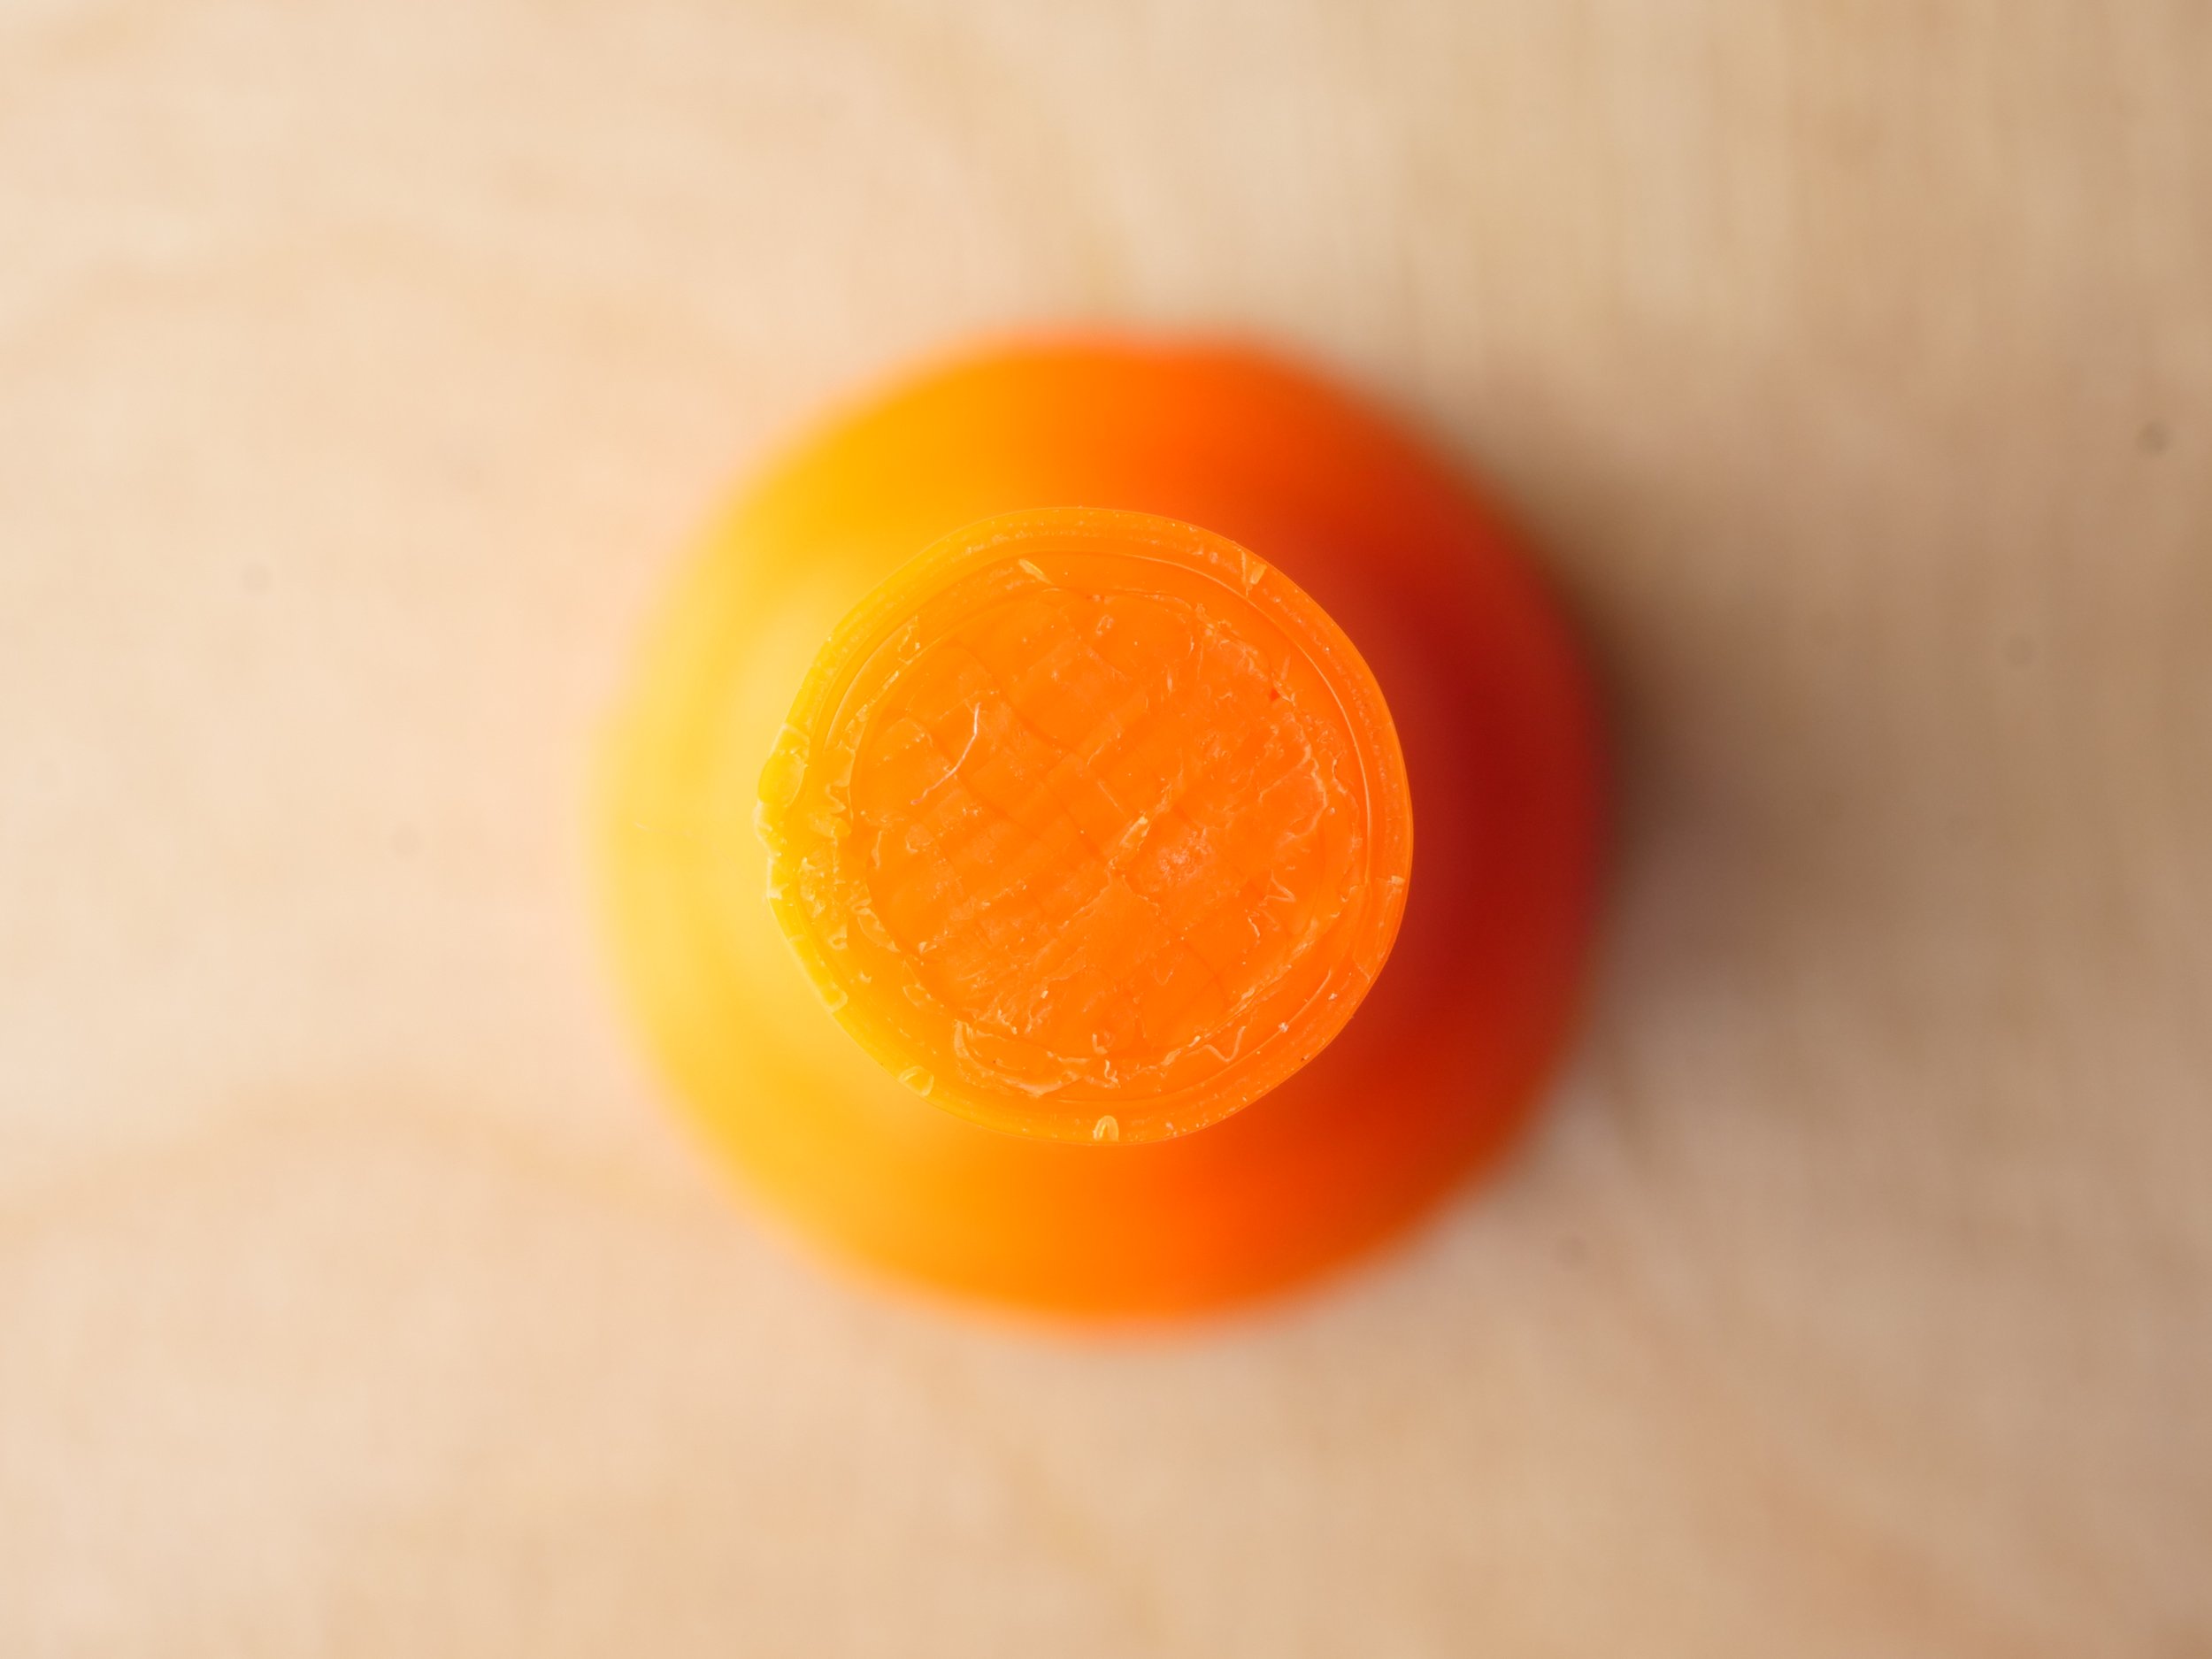
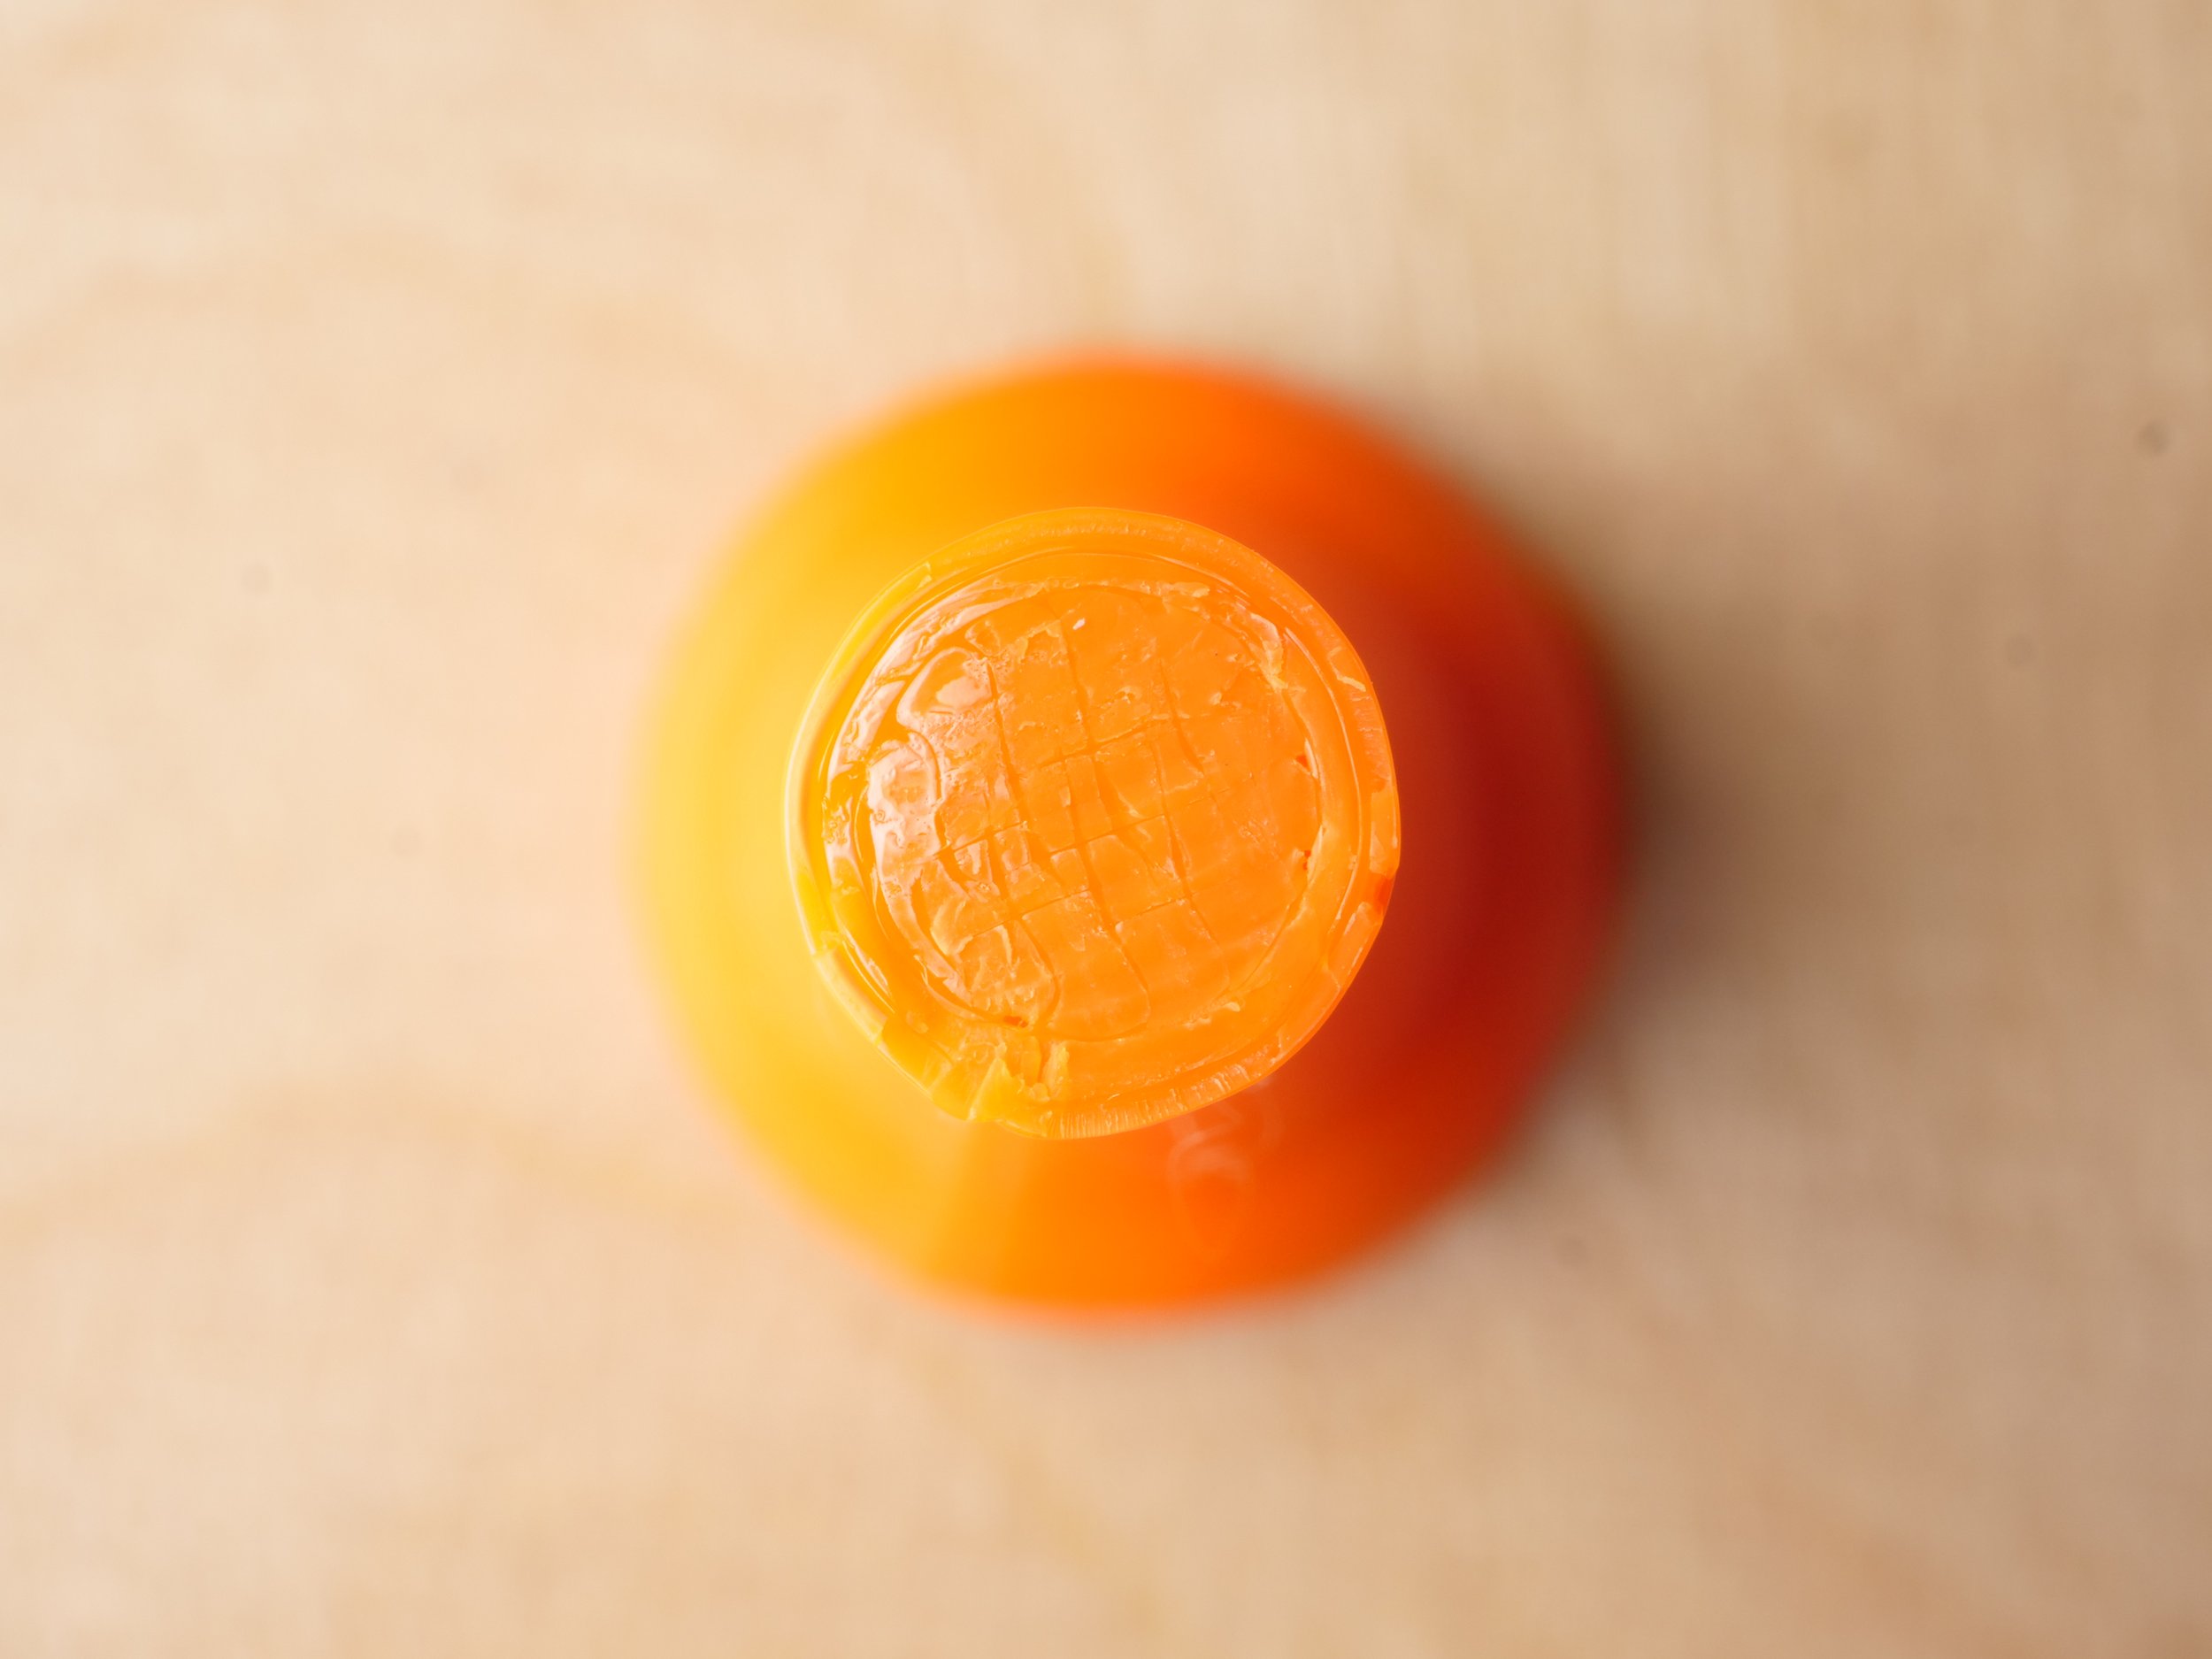
But why does printing at elevated temperatures increase layer adhesion? When 3D printing, there is usually a significant temperature difference between the layer that has already been printed and the new layer. In order to get a proper weld between layers, the previous one needs to be partly heated over its melting point. When the ambient temperature is too low, the new layer cools down too fast and doesn’t have enough time to melt the last layer. It will still stick, but not properly bond, similar to a cold solder joint. When we increase the chamber temperature, we not only have to heat up the old layer less because it’s already warm, the new layer also cools down slower, giving it more time to heat and bond to the already existing material properly.


This is also very nicely illustrated if we take a look at the fracture surfaces, where at ambient temperatures there is only a very clean and flat crack. When passively heating the chamber we can already see a two-layer crack with a bit of whitening marks and the sample that was printed in the actively heated chamber shows a crack through several layers with even chunks of material ripped out.


The strength test results clearly showed that an enclosure helps layer adhesion. Unfortunately, this technique mostly applies to technical materials with a high softening temperature. PLA, for example, needs to be printed in a cool environment with a ton of part cooling if you want the best quality. Printing it in a heated chamber might not only cause significant curling of layers but also heat creep, which is when the filament already gets soft before the hotend, jamming everything! So most enclosed printers like the QIDI X-Max 3 have a powerful exhaust fan to constantly suck in fresh air, so the chamber doesn’t get too hot when working with PLA or PETG. Yet the good thing is that most regular PLA filaments these days are so well-engineered that you can get very good layer adhesion without any fancy equipment like a heated chamber.
Working with the QIDI X-Max 3 for a couple of weeks now, yet clearly showed me how any degree of additional chamber temperatures helps make my high-performance prints stronger and even lets me print box standard ABS at a level of quality I usually only know from printing PLA. An enclosed chamber already helps with these materials, but an additional and dedicated heater with which you can reliably set and keep a temperature makes the experience even smoother and your parts stronger. If this is your use case, you should definitely check out the QIDI X-Max 3, because there are only a few other printers around that deliver the same bang for your buck at this large print volume! This machine will definitely stay in my studio!